Film & Photography
[Glass Slide.01/(197)] Packing Tea, China
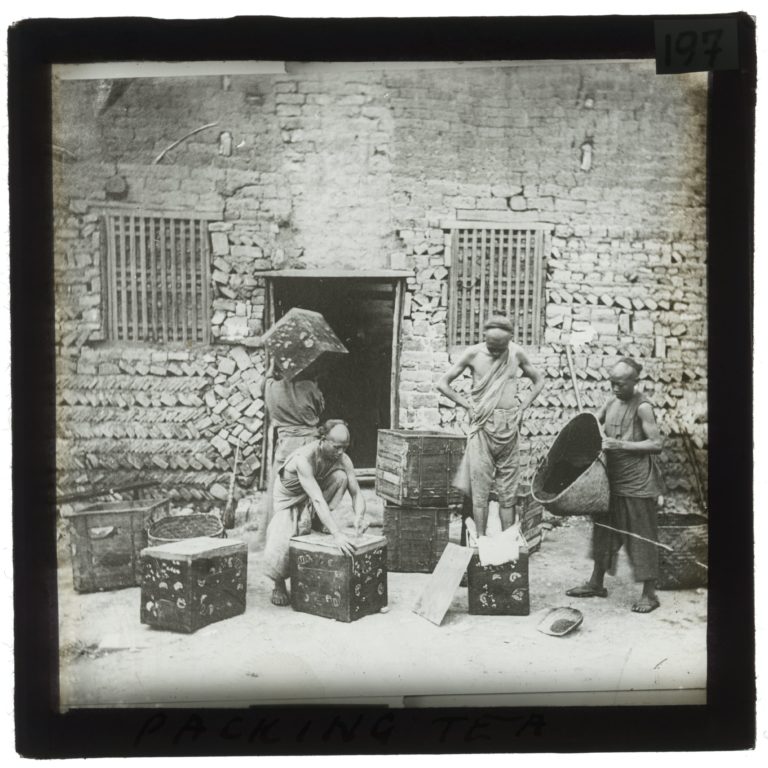
Black and white image of men packing tea. Labelled as ‘Packing Tea’.
[Glass Slide.01/(198)] Rattan Shields, China

Black and white image of men and their rattan shields. Labelled as ‘Rattan Shields’.
[Glass Slide.01/(199)] Promenade, China

Black and white aerial view of a promenade with a bridge to the side of the image and buildings in…
[Photo.12/(001)] Teppa Tank, Madura
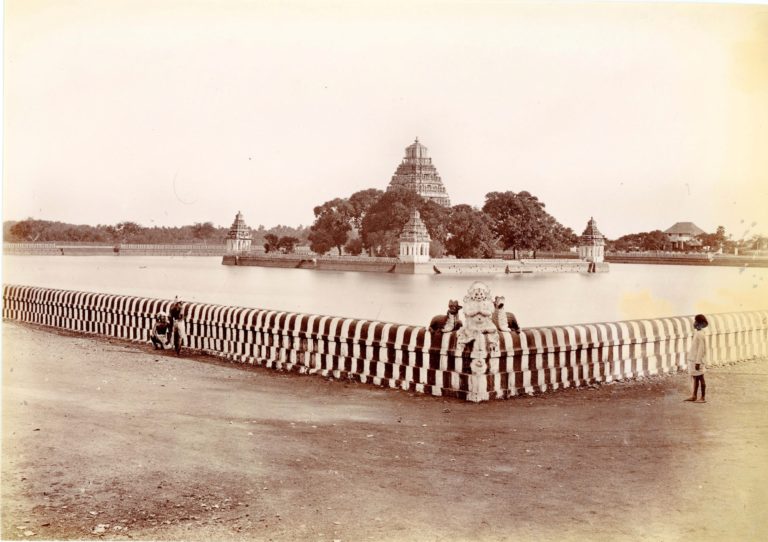
View across the Teppakulam Tank towards the shrine in the centre. By: Nicholas & Co., ca. 1880.
[Photo.12/(002)] Madura, the Southern Gopuram [of the Minakshi Sundareshvara Temple] from the east
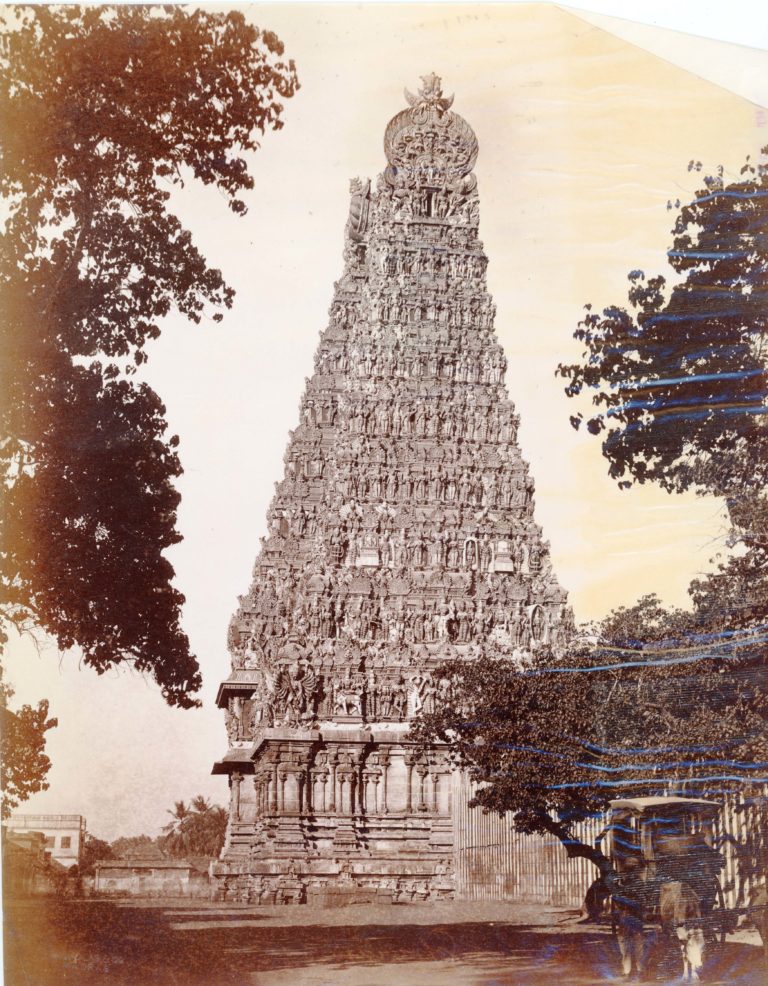
General view of the richly carved gopura of the Minakshi Sundareshvara Temple. By: Nicholas & Co., ca. 1880
[Photo.12/(003)] Madura, the temple jewels [Minakshi Sundareshvara Temple?]
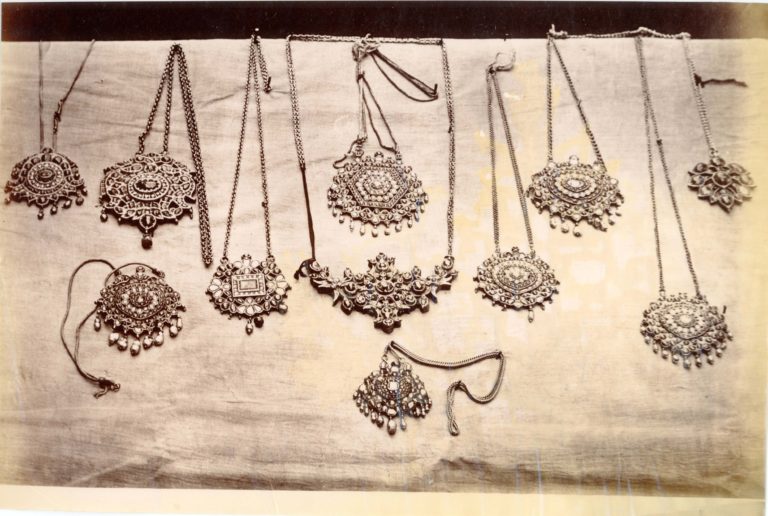
A view of the temple jewels, presumably of the Minakshi Sundareshvara Temple, arranged against a cloth backdrop. By: Nicholas &…
[Photo.12/(004)] Trichinopoly, the Rock and the Tank from the old Gateway
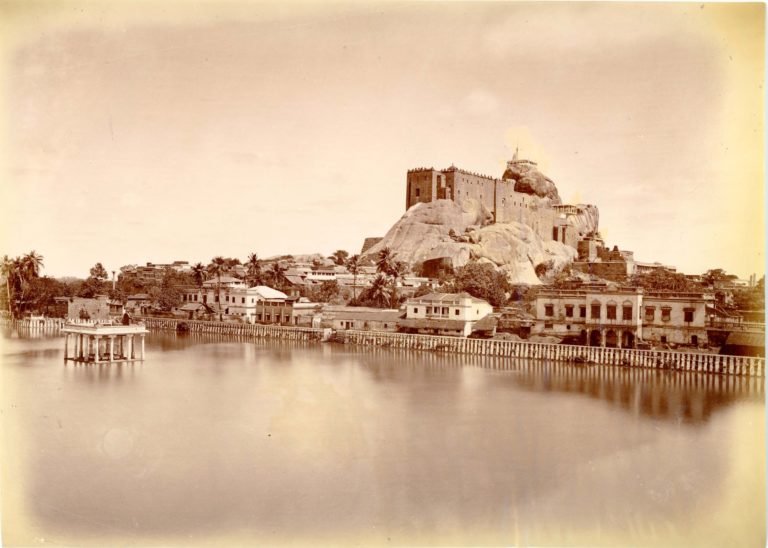
View looking across the tank towards the Rock, with its fort and temple on the summit. By: Nicholas & Co.,…
[Photo.12/(005)] Coonoor, Black Bridge on the ghat
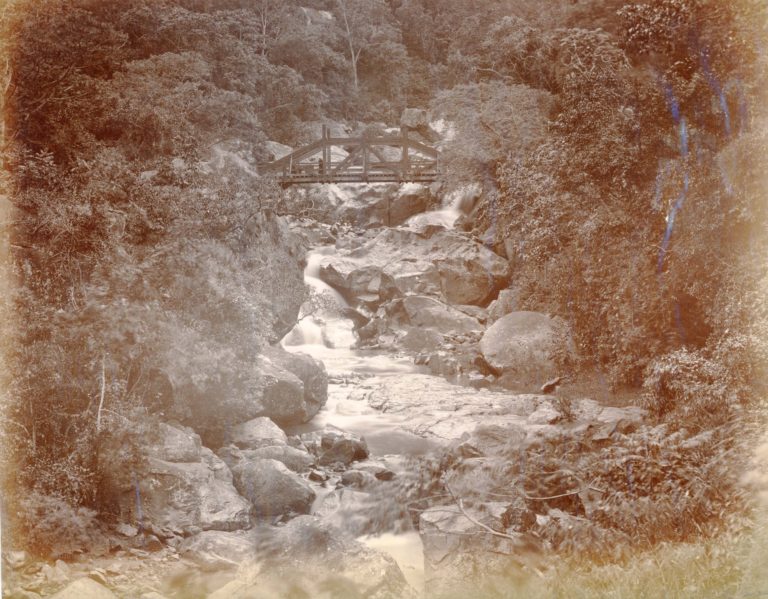
View upstream towards the small wooden bridge. By: Nicholas & Co., ca. 1880
[Photo.12/(006)] Coonoor, Glen View Hotel, distant view
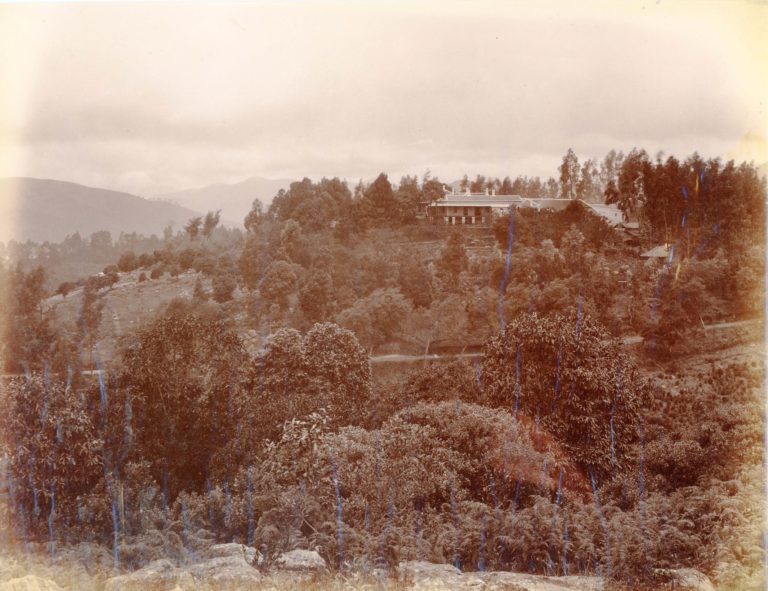
View looking across the wooded valley towards the hotel. By: Nicholas & Co., ca. 1880
[Photo.12/(007)] Coonoor, Sims Park, the Lake
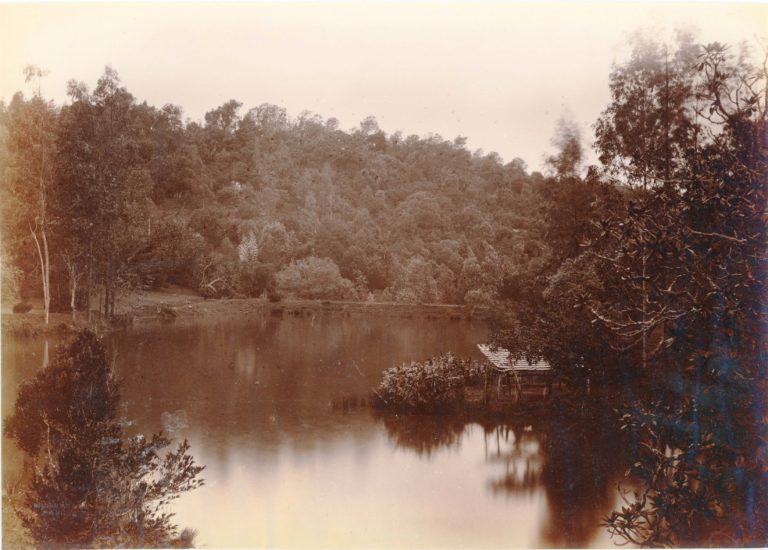
General view of the lake, with a boathouse in the foreground. By: Nicholas & Co., ca. 1880.
[Photo.12/(008)] Coonoor, Runnymede Waterfall
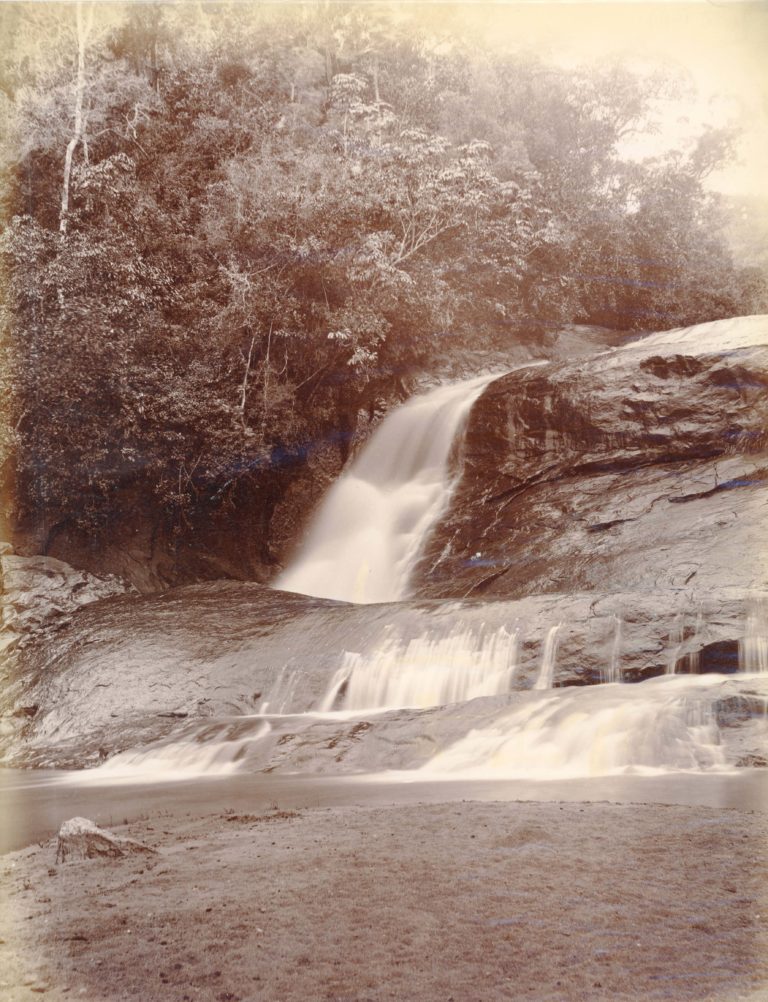
View from below the falls. By: Nicholas & Co., ca. 1880
[Photo.12/(009)] Coonoor, Hoolical Droog in the mist
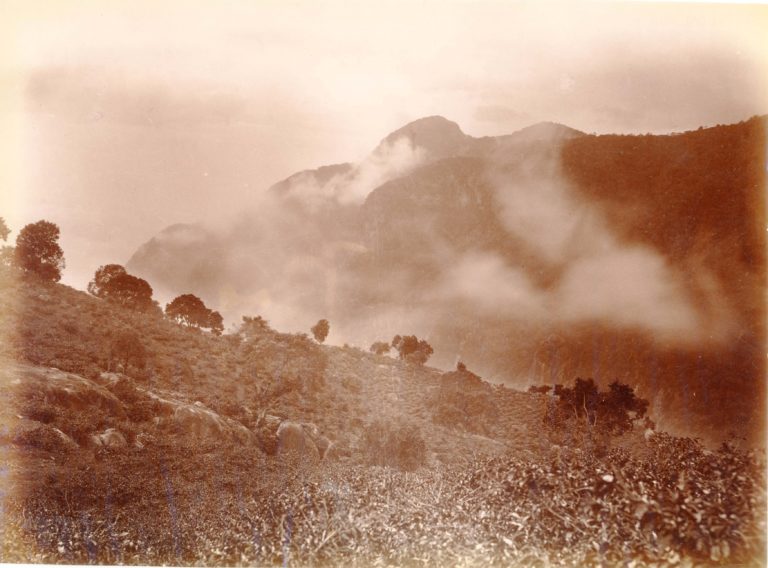
View across the valley towards neighbouring hills. By: Nicholas & Co., ca. 1880
[Photo.12/(010)] Towards Coonoor, from Lamb’s Rock
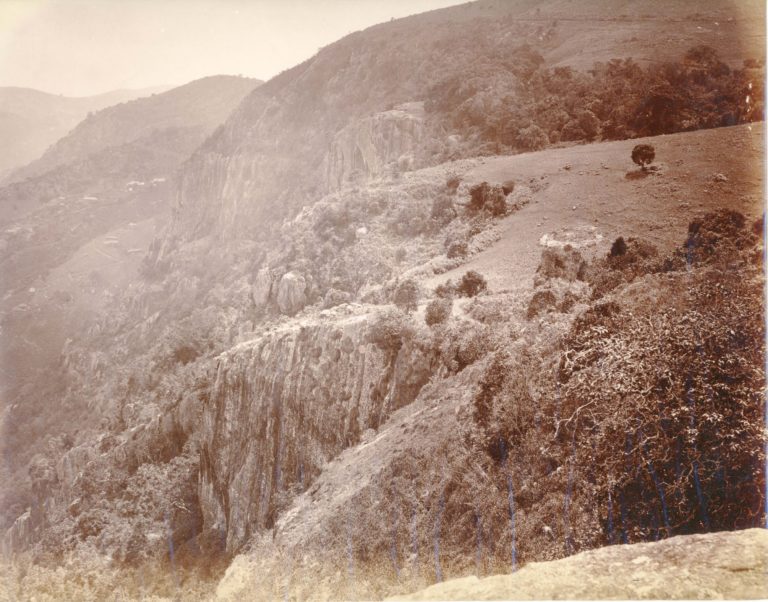
View towards Coonoor, from Lamb’s Rock. By: Nicholas & Co., ca. 1880
[Photo.12/(011)] Ootacamund, Charing Cross
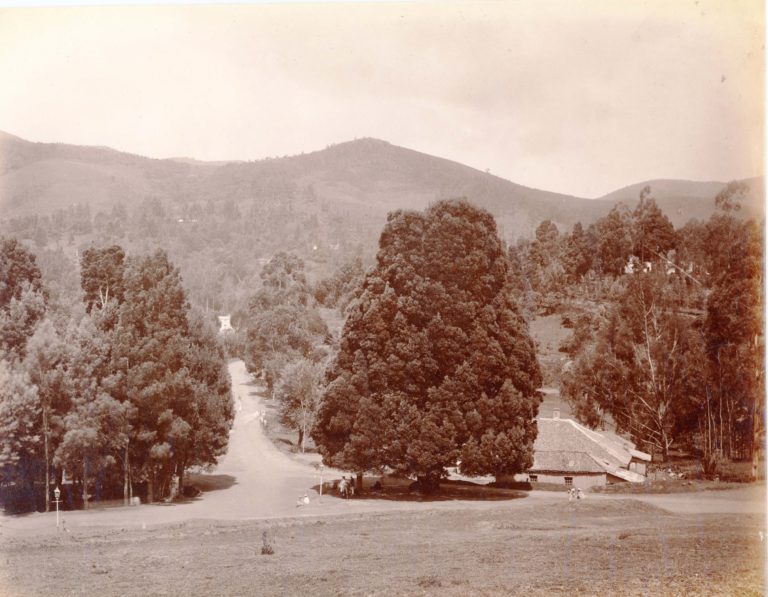
View from the hillside, looking down onto the junction of the roads below. By: Nicholas & Co., ca. 1880
[Photo.12/(012)] Ootacamund, the Lake from Willow Bund

Ootacamund, the Lake from Willow Bund. By: Nicholas & Co., ca. 1880
[Photo.12/(013)] Ootacamund, the Lake and Elk Hill from Erin Cottage
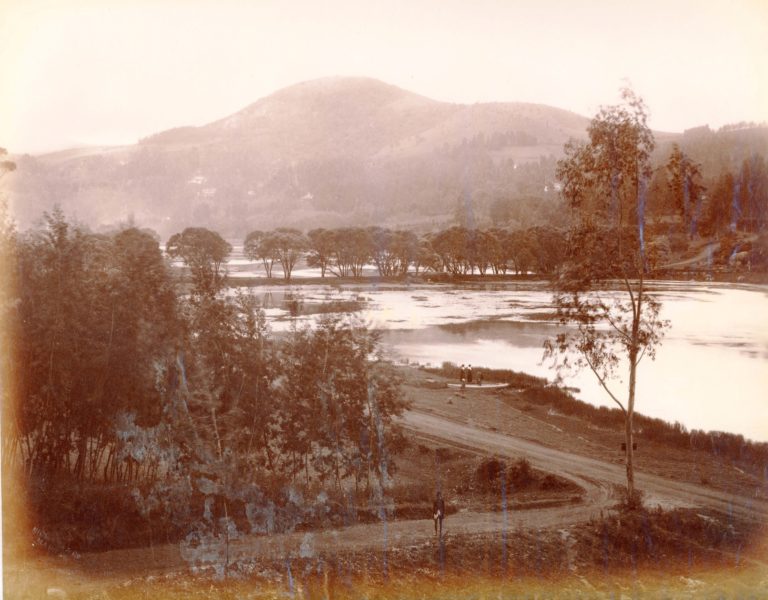
View across the lake towards Elk Hill beyond. By: Nicholas & Co., ca. 1880
[Photo.12/(014)] Ootacamund, the Lake from the west
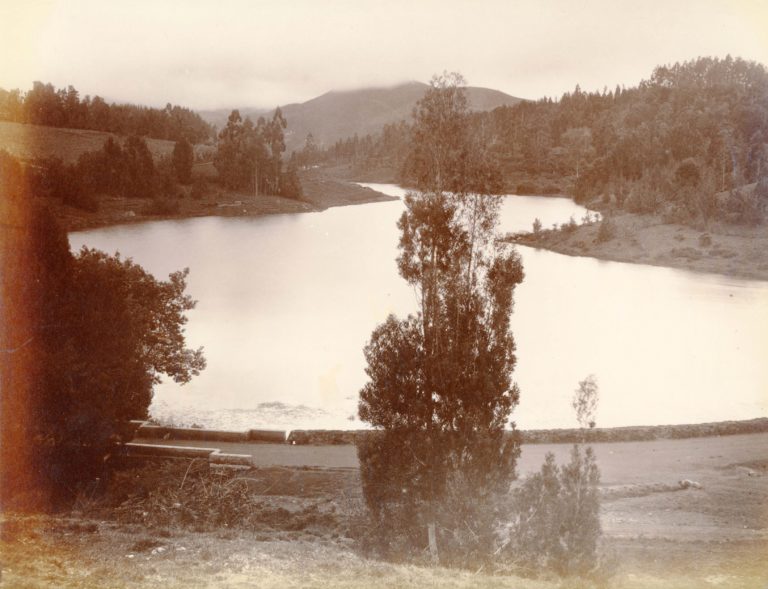
Ootacamund, the Lake from the west. By: Nicholas & Co., ca. 1880
[Photo.12/(015)] The Seven Pagodas [Mamallapuram], General view of the rathas (monolithic temples), Dharmaraja’s in foreground
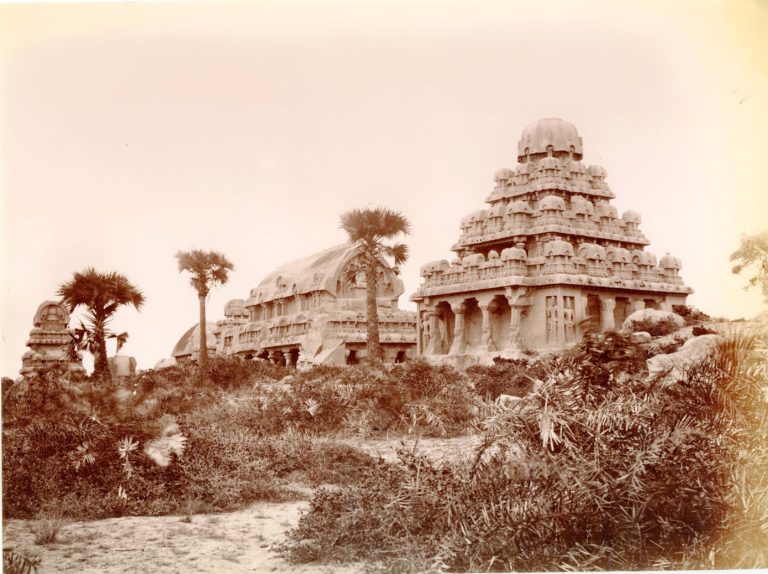
View from the south-west, with the pyramidal Dharmaraja Ratha is in the foreground, and the Bhima Ratha beyond. The Nakula…
[Photo.12/(016)] Seven Pagodas [Mamallapuram], Draupadi and Arjuna Rathas
General view from the west of the two monolithic temples, with the lion sculpture in the foreground. The Draupadi ratha…
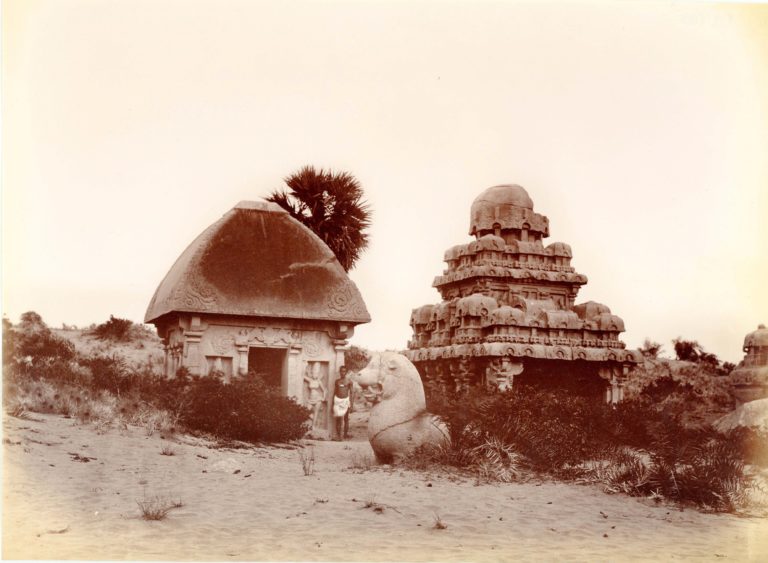
[Photo.12/(017)] The Seven Pagodas [Mamallapuram], the Split Temple [Bhima Ratha]
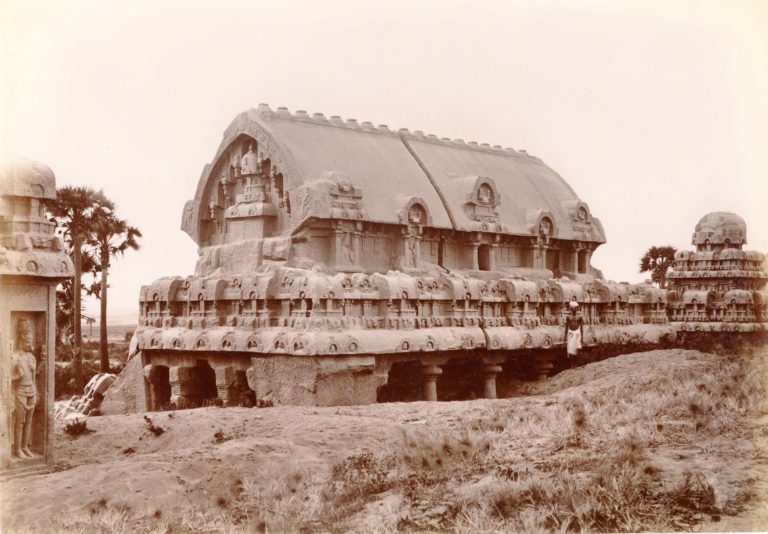
General view of the Bhima Ratha monolithic temple. By: Nicholas & Co., ca. 1880
[Photo.12/(018)] The Seven Pagodas [Mamallapuram], the Ganesa Temple, a very elegant structure
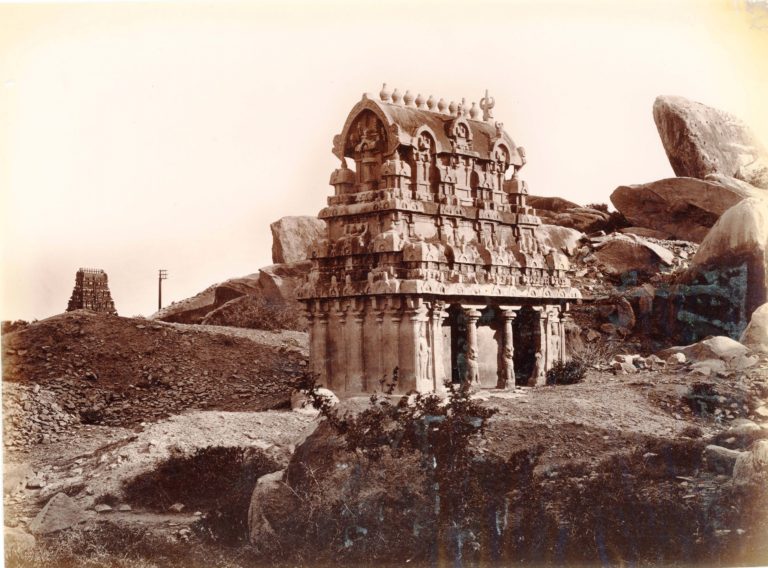
General view of the Ganesha Ratha. By: Nicholas & Co., ca. 1880.
[Photo.12/(019)] The Seven Pagodas [Mamallapuram], Yemopooram Temple [Mahishamardini Cave Temple]
The Seven Pagodas [Mamallapuram], Yemopooram Temple [Mahishamardini Cave Temple]. By: Nicholas & Co., ca. 1880.
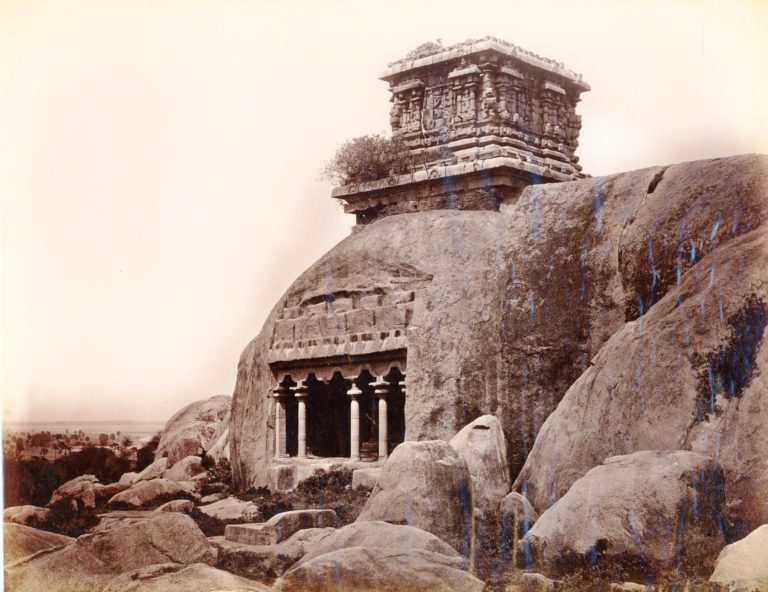
[Photo.12/(020)] The Seven Pagodas [Mamallapuram], Woolacalundha Temple

General view of the rock-cut temple. By: Nicholas & Co., ca. 1880
[Photo.12/(021)] The Seven Pagodas [Mamallapuram], the Butter Stone [Krishna’s Butterball]
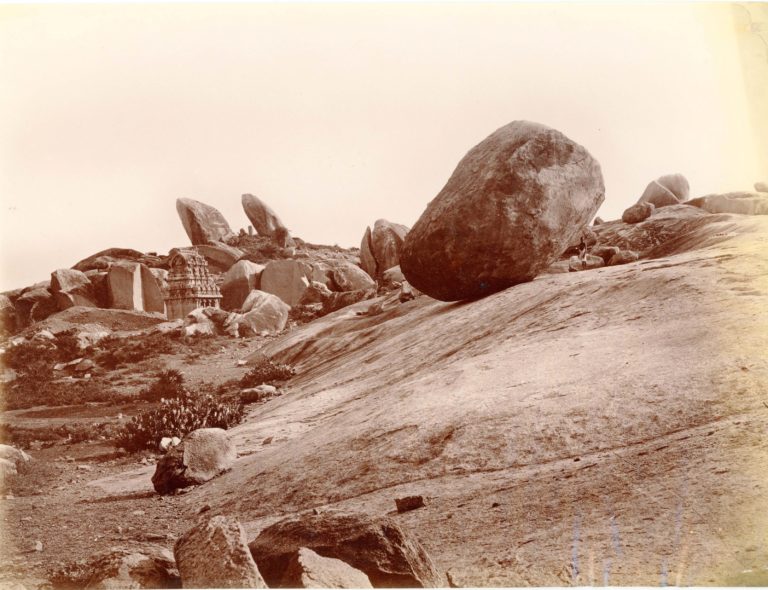
View of the massive boulder known as Krishna’s Butterball, with the Ganesha Temple visible in the background. By: Nicholas &…
[Photo.12/(022)] The Seven Pagodas [Mamallapuram], nearer view of the left portion of the carvings [Arjuna’s Penance]
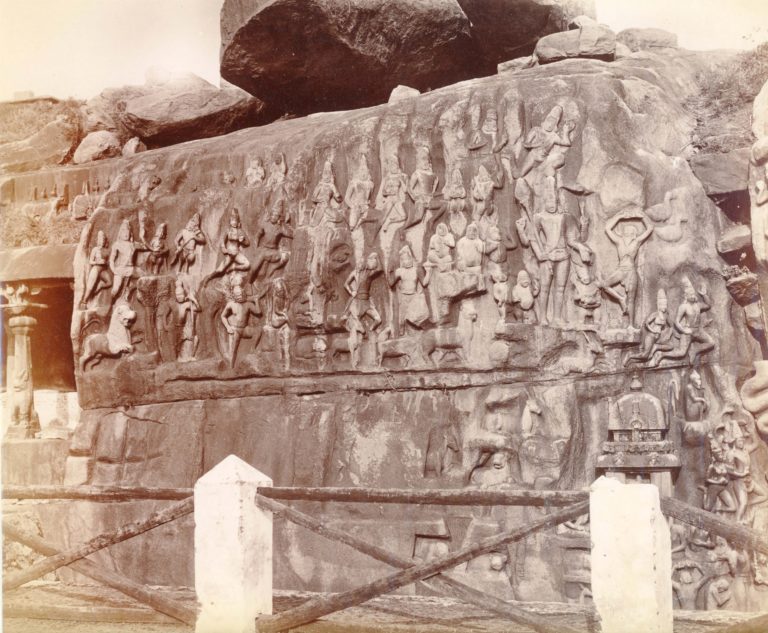
View of the sculpted rock face. This print joins up with print 23 to form an overall view of the…
[Photo.12/(023)] The Seven Pagodas [Mamallapuram], nearer view of the left portion of the carvings [Arjuna’s Penance]
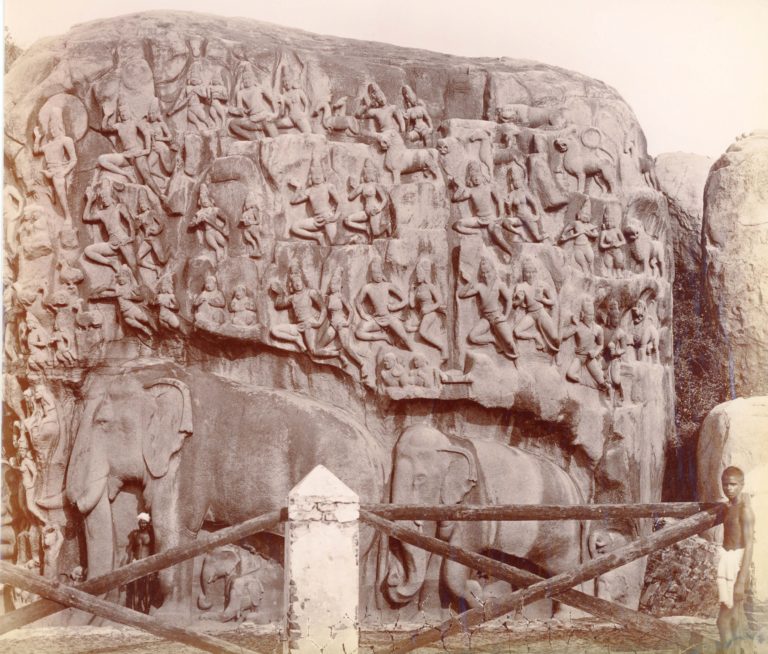
Showing the right-hand portion of the sculpted rock face, which joins up with print 22 to form an overall view….
[Photo.12/(024)] The Seven Pagodas [Mamallapuram], Vishnu Trivikrama [Varaha Cave Temple?]
Rock-cut panel sculpture of Vishnu taking the three steps. By: Nicholas & Co., ca. 1880
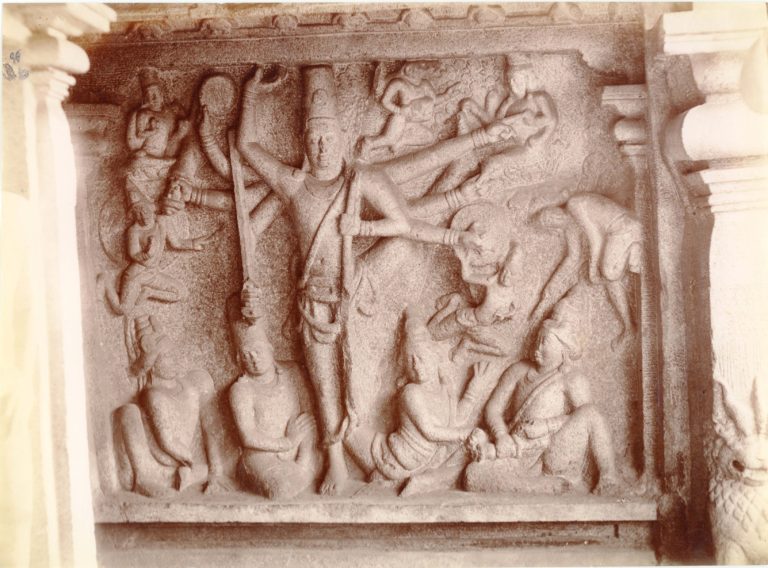
[Photo.12/(025)] The Seven Pagodas [Mamallapuram], the conflict between Durga and the evil spirit Mahishasura [Mahishamardini Cave Temple]
Rock-cut sculpture panel. By: Nicholas & Co., ca. 1880
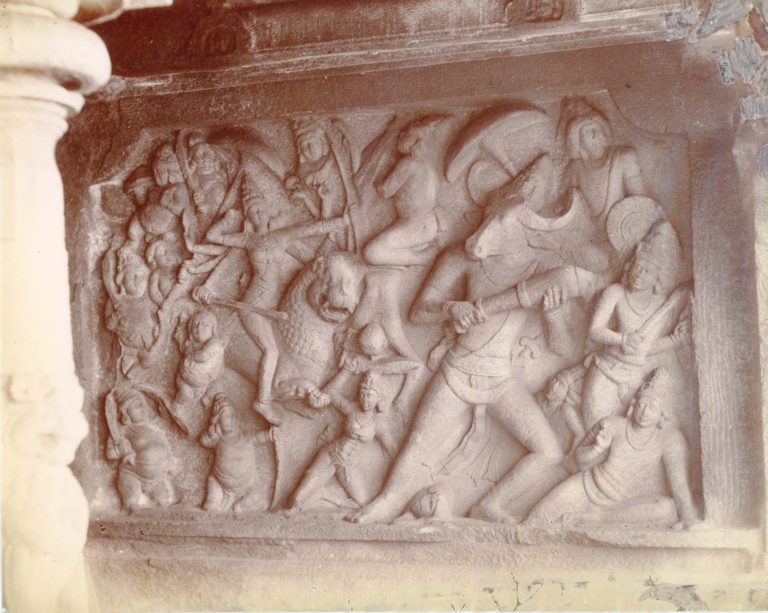
[Photo.12/(026)] The Seven Pagodas [Mamallapuram], the herds of the cowherd Nunda in Kristna’s Choultry
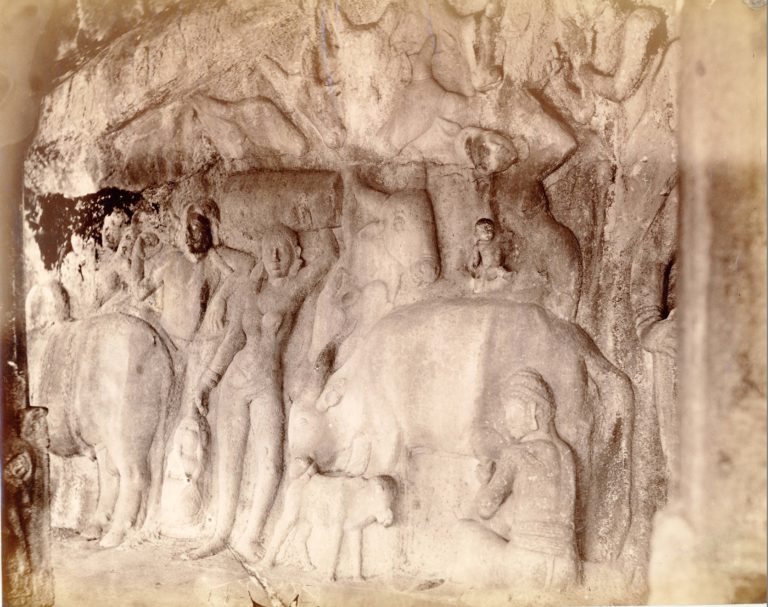
Rock-cut sculpture panel. By: Nicholas & Co., ca. 1880
[Photo.12/(027)] The Seven Pagodas [Mamallapuram], the Shore Temple
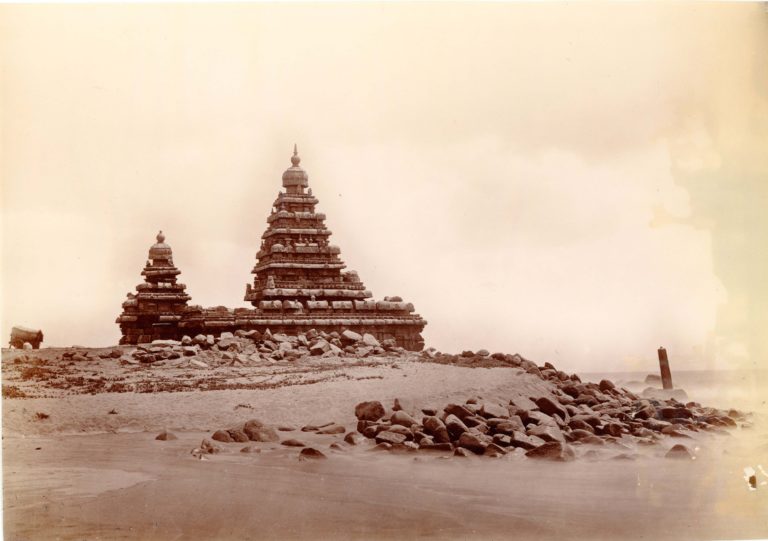
General view from the water’s edge. By: Nicholas & Co., ca. 1880
[Photo.13/(001)] Tomb of Mahomed Ghaus, Gwalior Fort
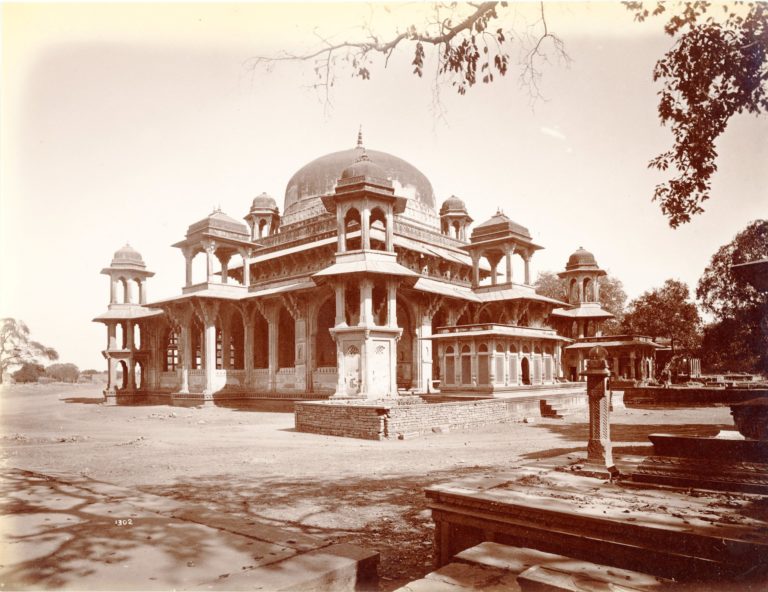
Tomb of Mahomed Ghaus, Gwalior Fort. 1880s, photograph by Lala Deen Dayal. Click on the image to expand.
[Photo.13/(002)] Interior of North Room, Man Mandir, Gwalior Fort
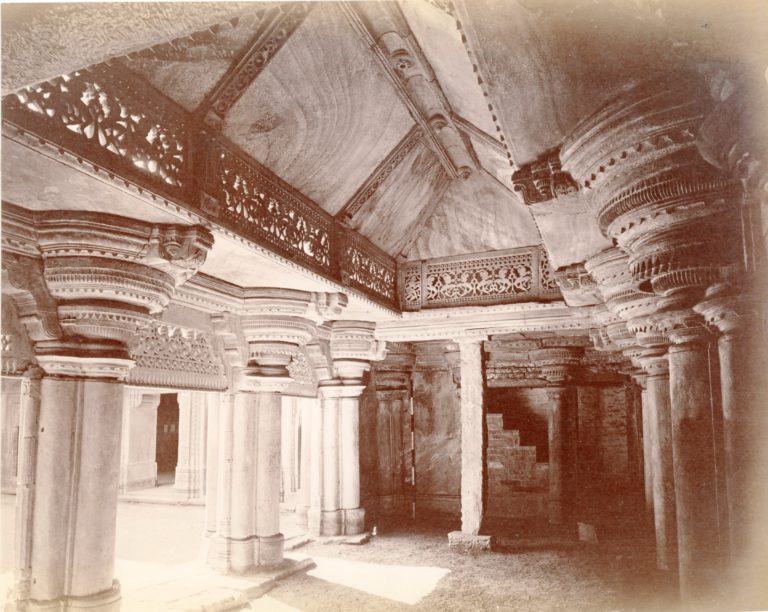
Interior of North Room, Man Mandir, Gwalior Fort. 1880s, photograph by Lala Deen Dayal. Click on the image to expand.
[Photo.13/(003)] Sas Bahu Temple, Gwalior Fort
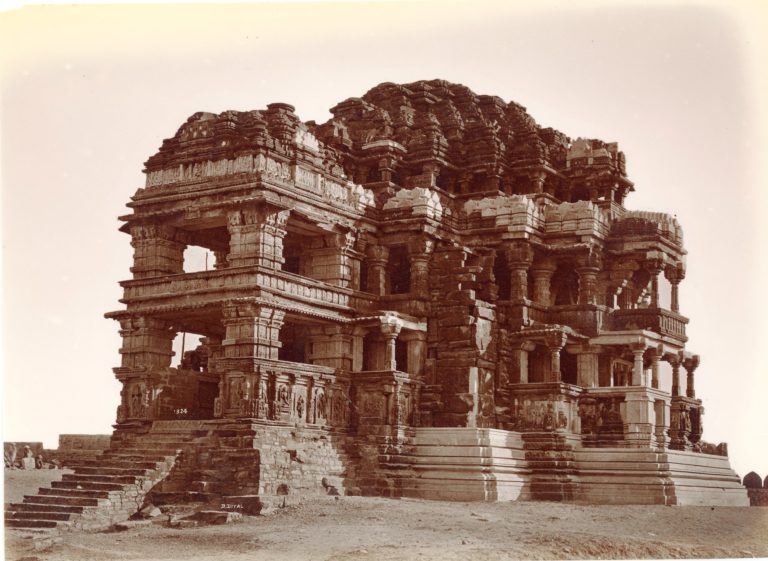
Sas Bahu Temple, Gwalior Fort. 1880s, photograph by Lala Deen Dayal. Click on the image to expand.
[Photo.13/(004)] Teli-ka-Mandir, Gwalior Fort
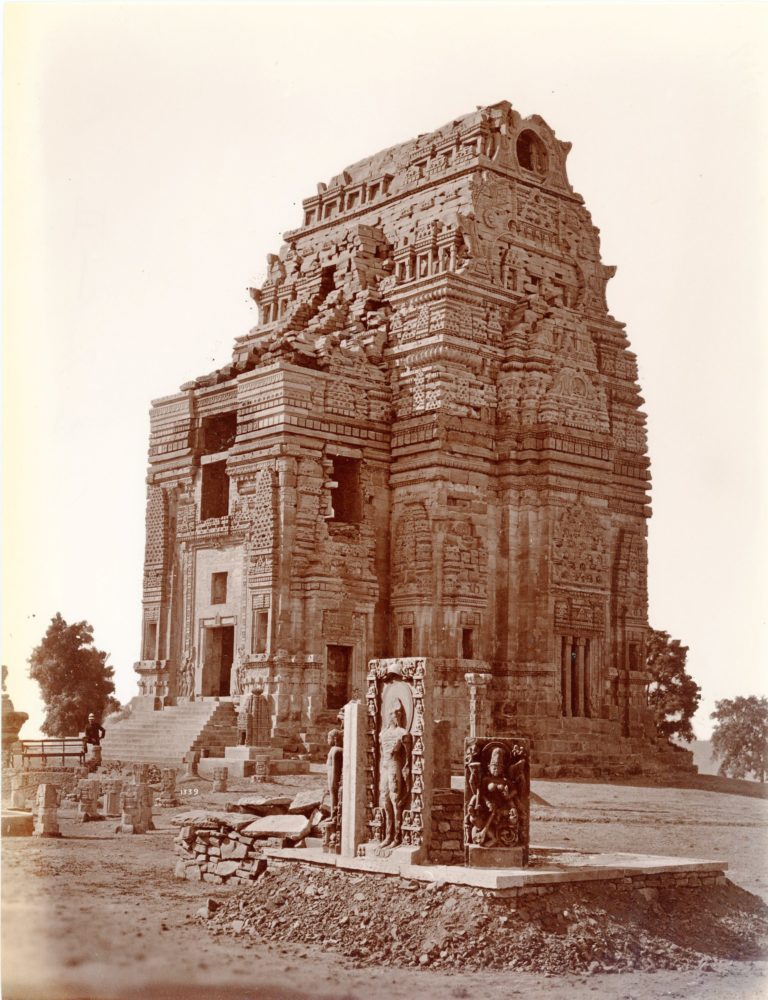
General view of the temple in the process of restoration, with sculptures displayed on plinths in the foreground. Reproduced as…
[Photo.13/(005)] Centre archway of Arhai-din-ka-Jhonpra, Ajmer
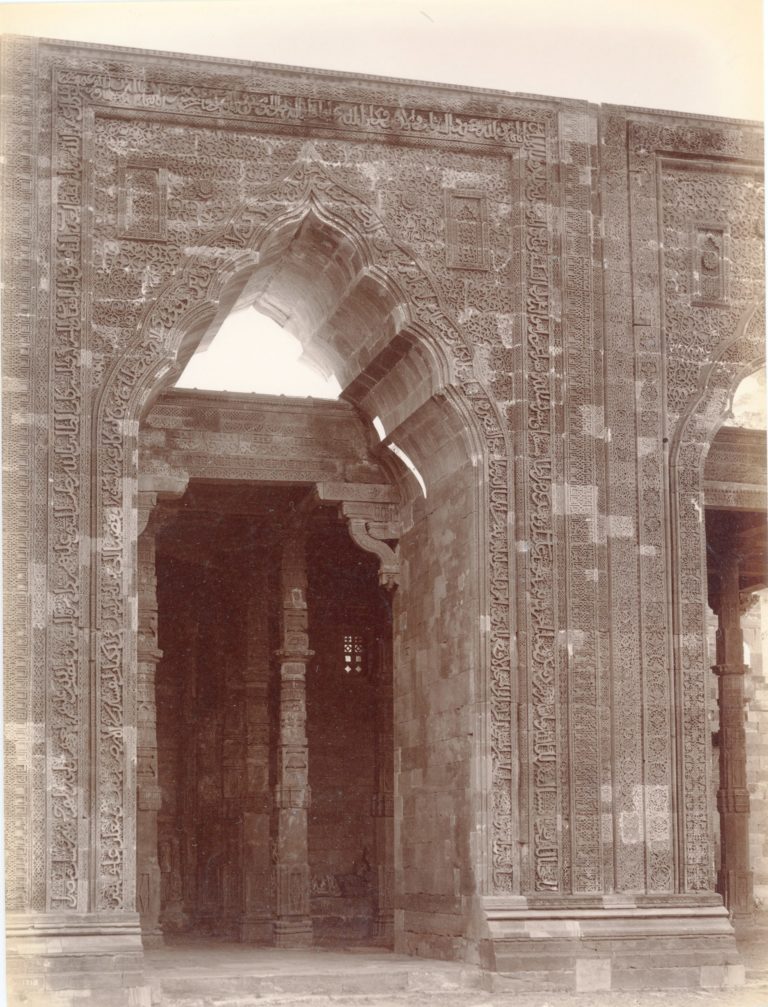
Centre archway of Arhai-din-ka-Jhonpra, Ajmer. 1880s, photograph by Lala Deen Dayal. Click on the image to expand.
[Photo.13/(006)] View of Durgah, Ajmer
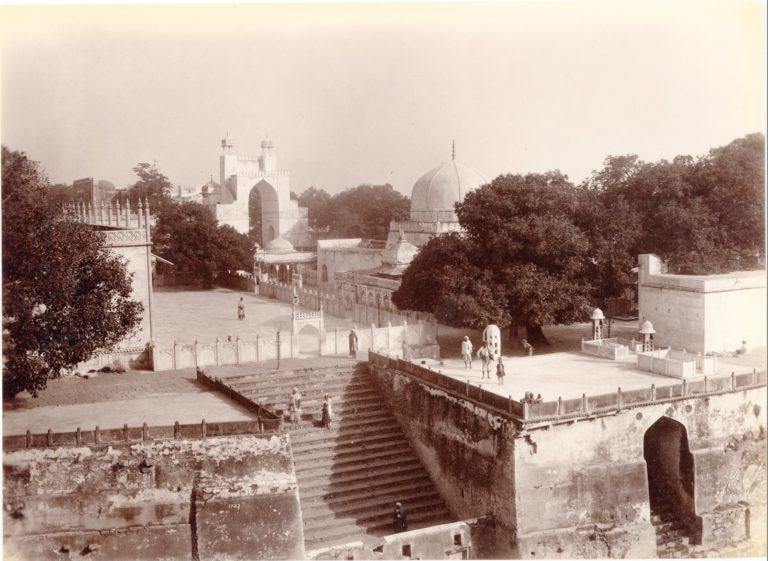
View of Durgah, Ajmer [Khwaja Muin-ud-din Chishti’s Dargah]. 1880s, photograph by Lala Deen Dayal. Click on the image to expand.
[Photo.13/(007)] Anna Sagor Lake, Ajmer
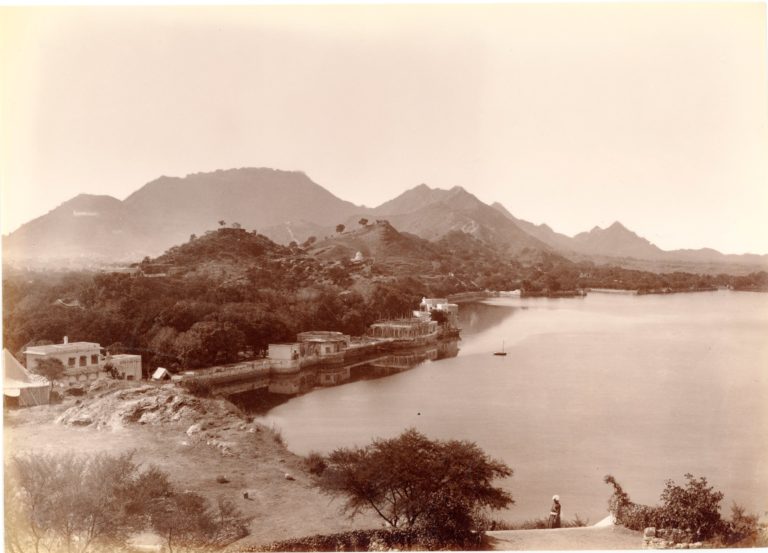
Anna Sagor Lake, Ajmer. 1880s, photograph by Lala Deen Dayal. Click on the image to expand.
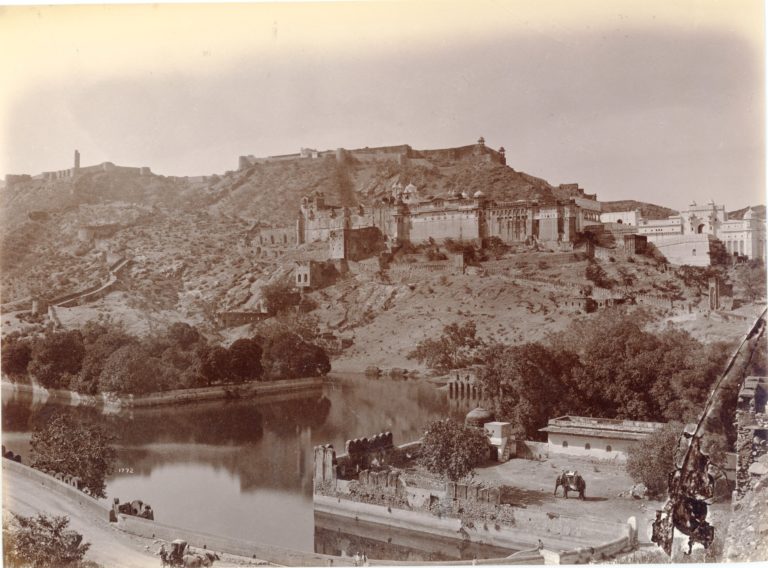
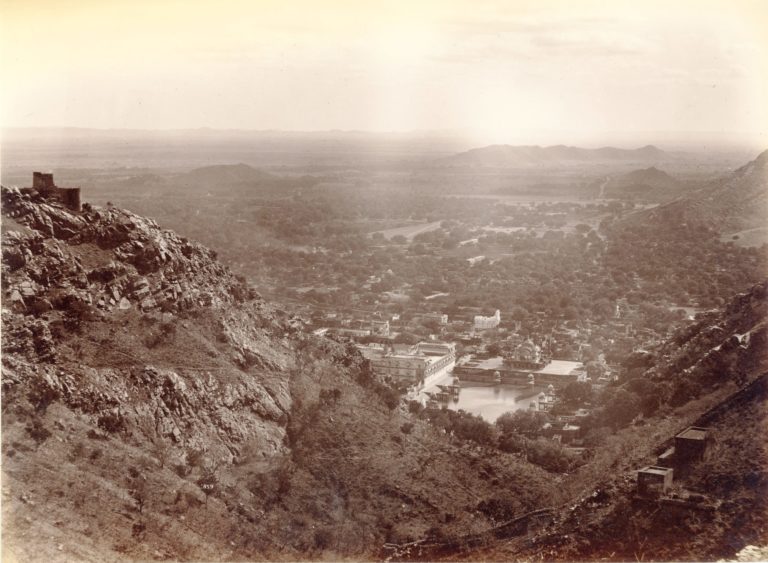
[Photo.13/(008)] City view from the Palace, Amber
City view from the Palace, Amber. 1880s, photograph by Lala Deen Dayal. Click on the image to expand.
[Photo.13/(009)] Street view, Jaipur
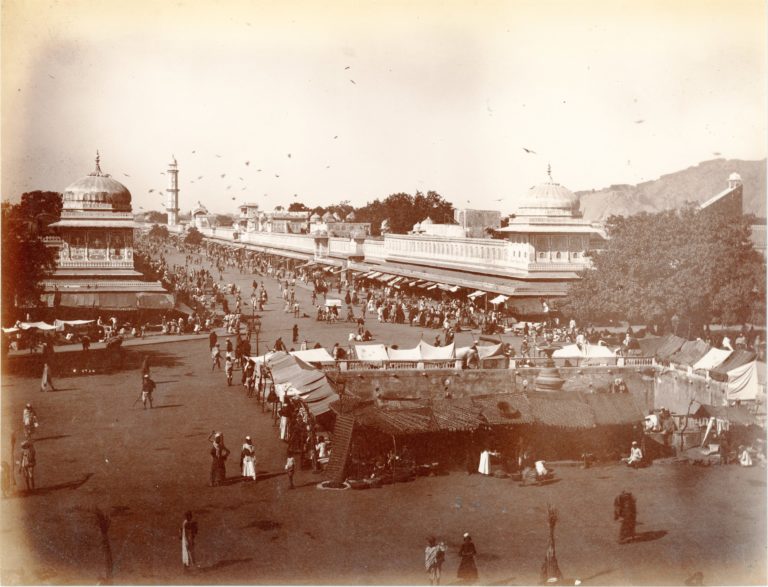
Street view, Jaipur. 1880s, photograph by Lala Deen Dayal. Click on the image to expand.
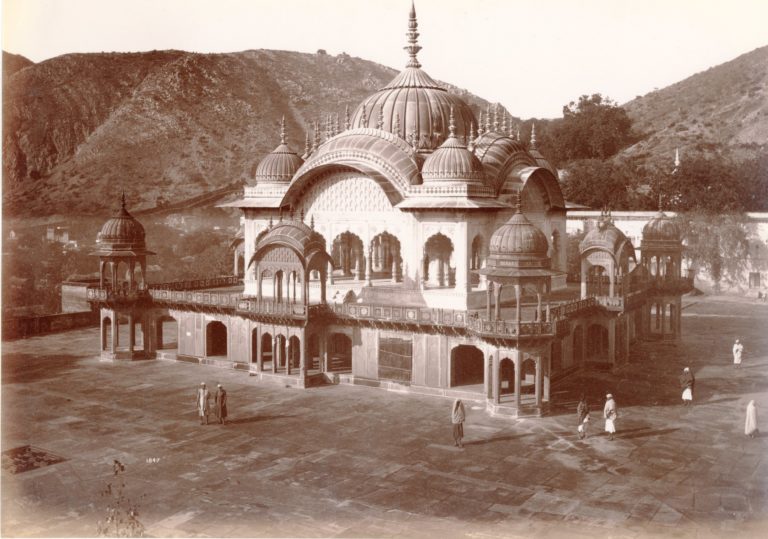
[Photo.13/(010)] The Palace, Amber
The Palace, Amber. 1880s, photograph by Lala Deen Dayal. Click on the image to expand.
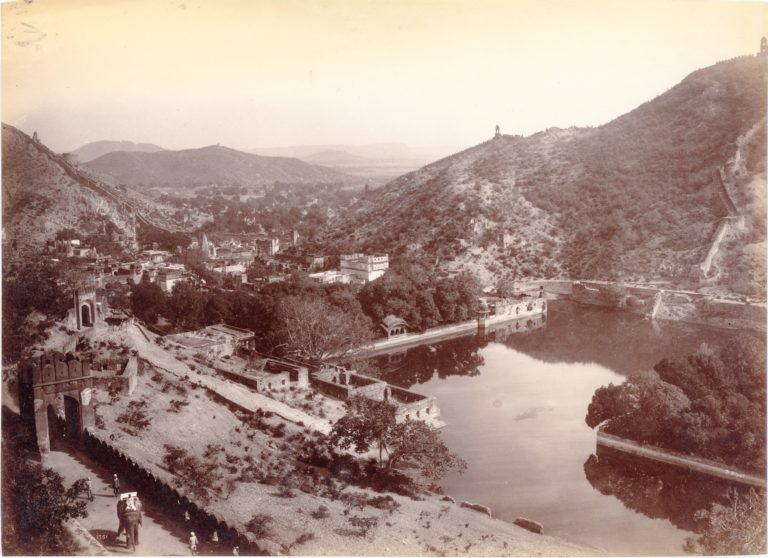
[Photo.13/(011)] North corner of the Amber Lake
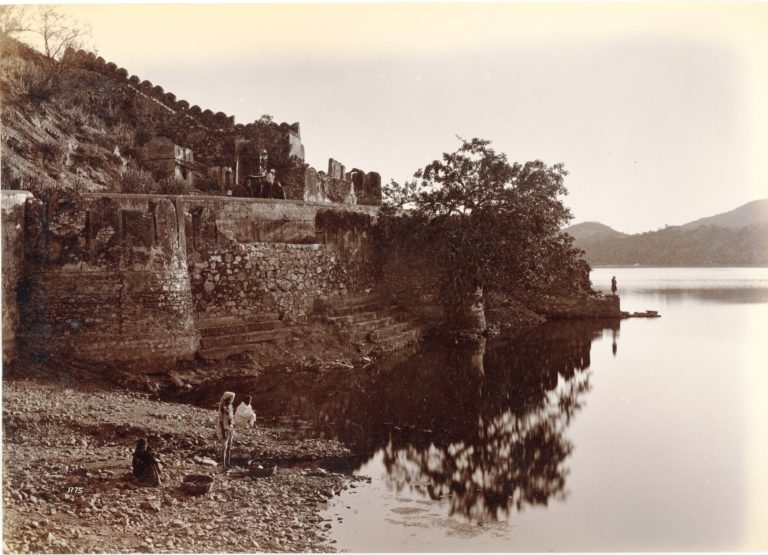
North corner of the Amber Lake. 1880s, photograph by Lala Deen Dayal. Click on the image to expand.
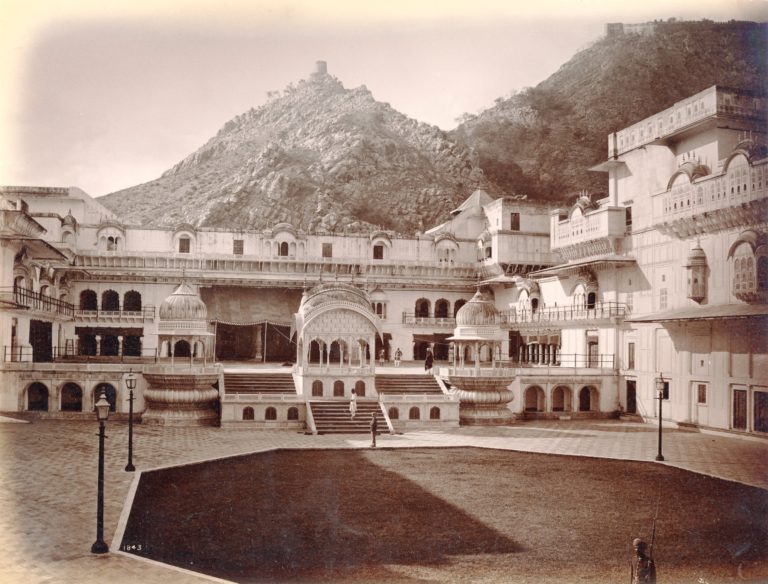
[Photo.13/(012)] Jaipur Palace

Jaipur Palace. 1880s, photograph by Lala Deen Dayal. Click on the image to expand.
[Photo.13/(013)] Inside the City Palace, Alwar
Inside the City Palace, Alwar. 1880s, photograph by Lala Deen Dayal. Click on the image to expand.
[Photo.13/(014)] Marble Cenotaph of the Maharaja, Alwar
Marble Cenotaph of the Maharaja, Alwar. 1880s, photograph by Lala Deen Dayal. Click on the image to expand.
[Photo.13/(015)] City view, Alwar
City view, Alwar. 1880s, photograph by Lala Deen Dayal. Click on the image to expand.
[Photo.13/(017)] The Water Palace [Gopal Bhavan], Dig
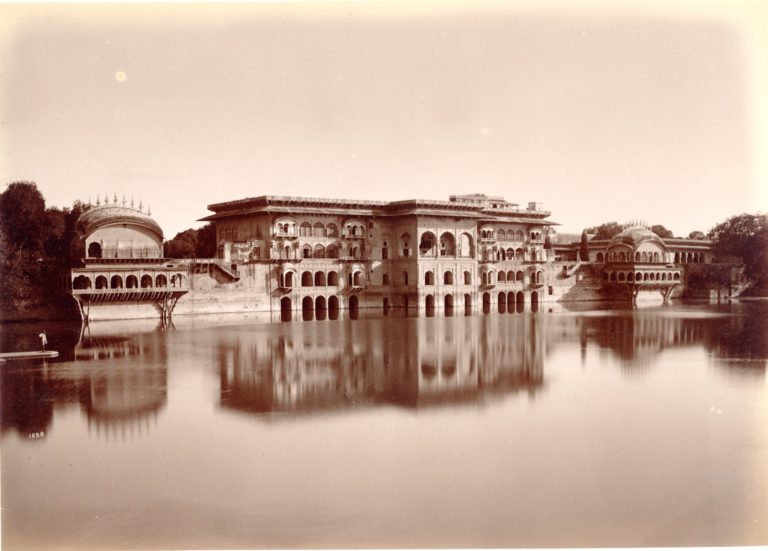
View looking across the Gopal Sagar tank towards the west facade of the Gopal Bhavan, flanked by the Savan Bhavan…
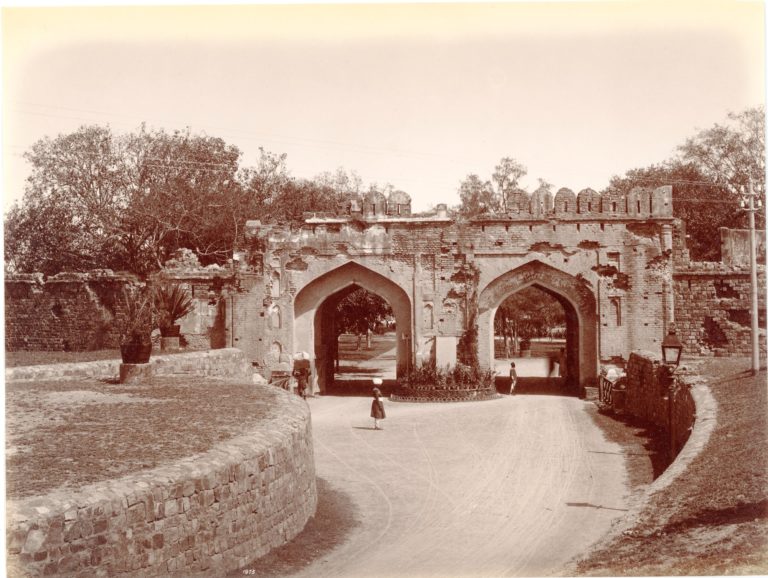
[Photo.13/(018)] Lahore Gate of the Fort, Delhi
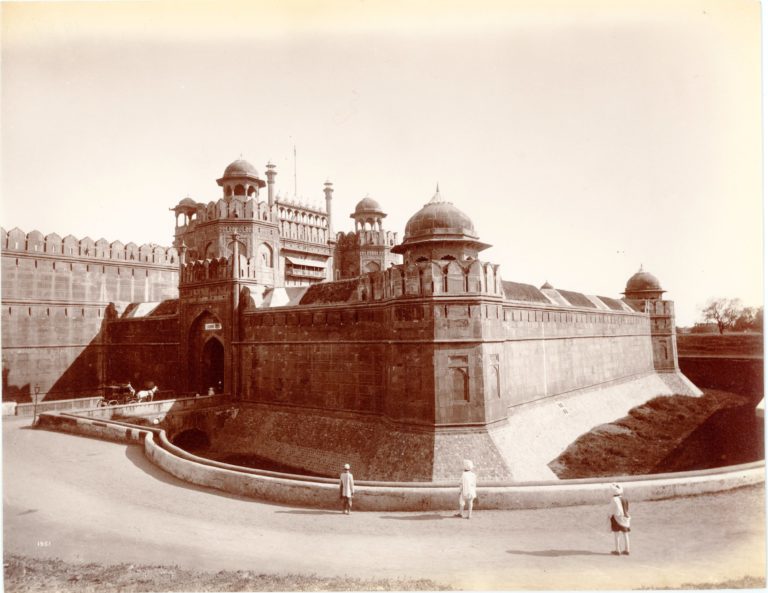
Lahore Gate of the Fort, Delhi. 1880s, photograph by Lala Deen Dayal.Click on the image to expand.
[Photo.13/(019)] Interior view of the Sumon Barj, Delhi
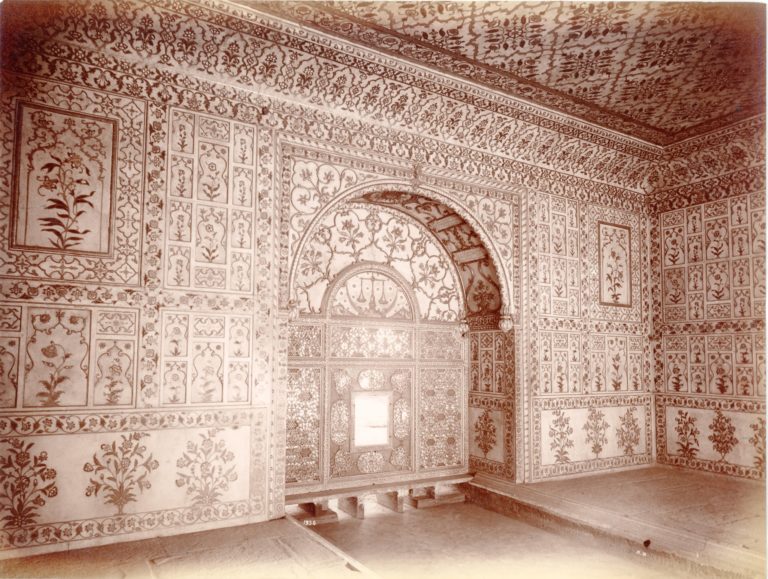
Interior view of the Diwan-i-Khas, showing pietra dura work and pierced screen. 1880s, photograph by Lala Deen Dayal. Click on…
[Photo.13/(020)] The Kashmiri Gate, Delhi
The Kashmiri Gate, Delhi. 1880s, photograph by Lala Deen Dayal. Click on the image to expand.
[Photo.13/(021)] The Qutb Minar, Delhi
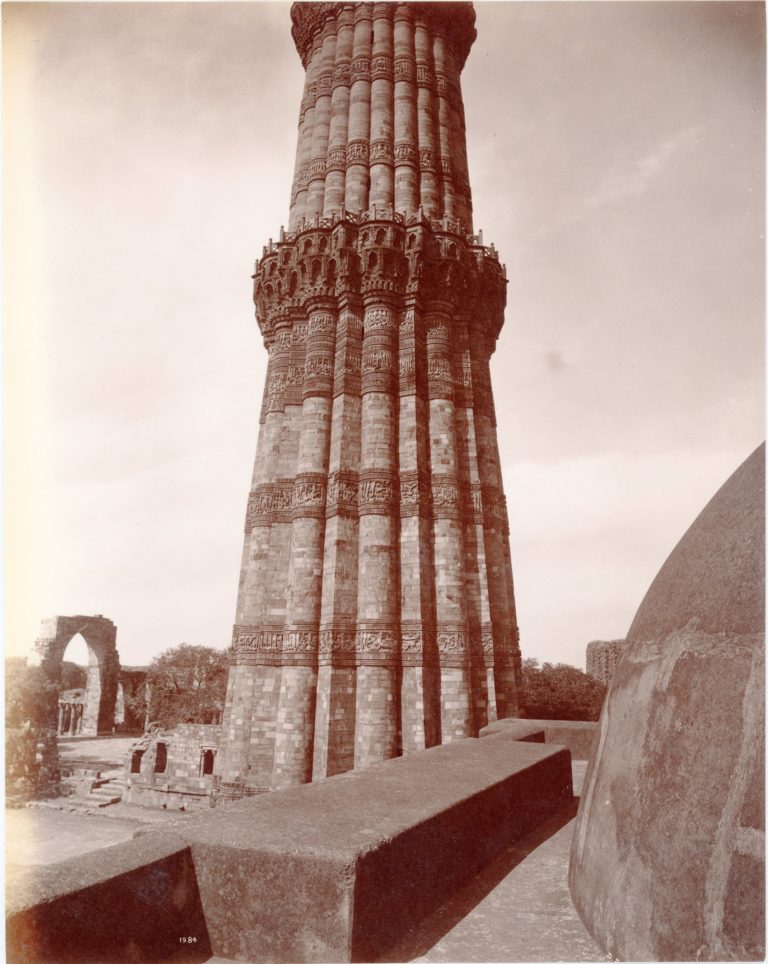
View from the base up to the second gallery of the Qutb Minar, photographed from the roof of the Alai…
[Photo.14/(001)] View looking towards the River Hugli from the Ochterlony Monument, Calcutta
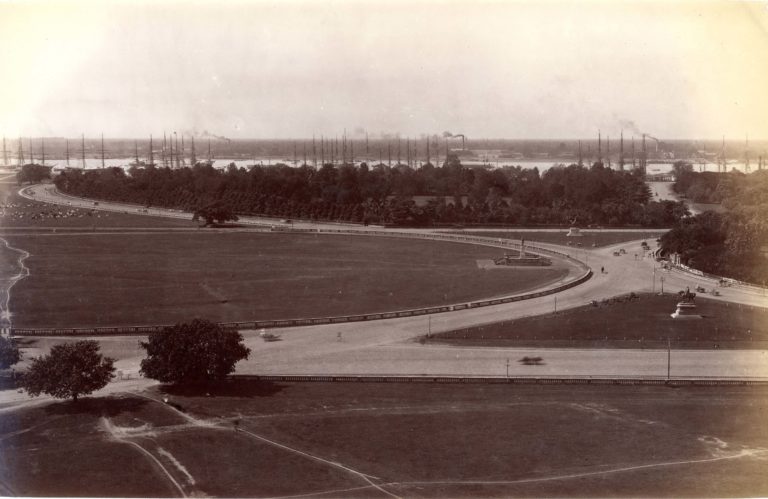
View looking westwards across the Maidan from the top of the Ochterlony Monument.
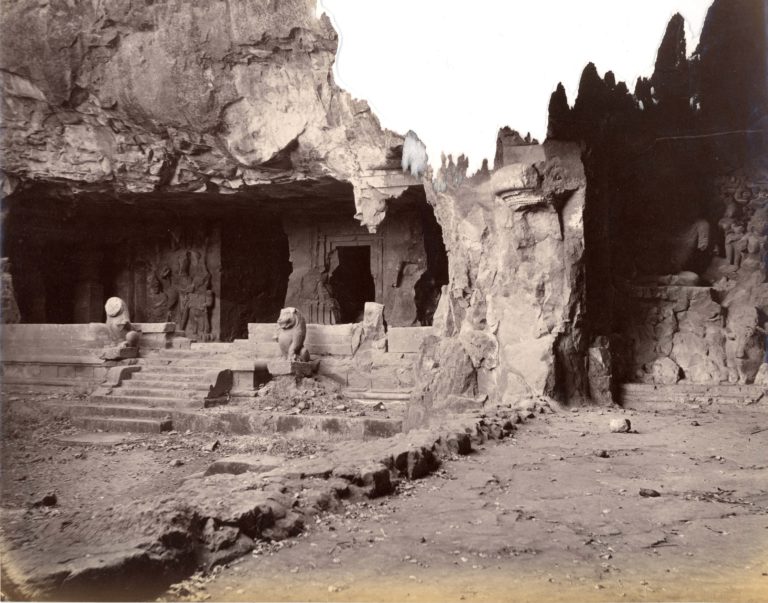
[Photo.14/(003)] Lankeshvara Shrine, Kailasanatha Rock-cut Temple, Ellora

Listed in the Bourne and Shepherd catalogue as ‘The Ar-Lanka Cave Temple of Kylas’.
[Photo.14/(004)] Dherwada Cave Temple, Ellora
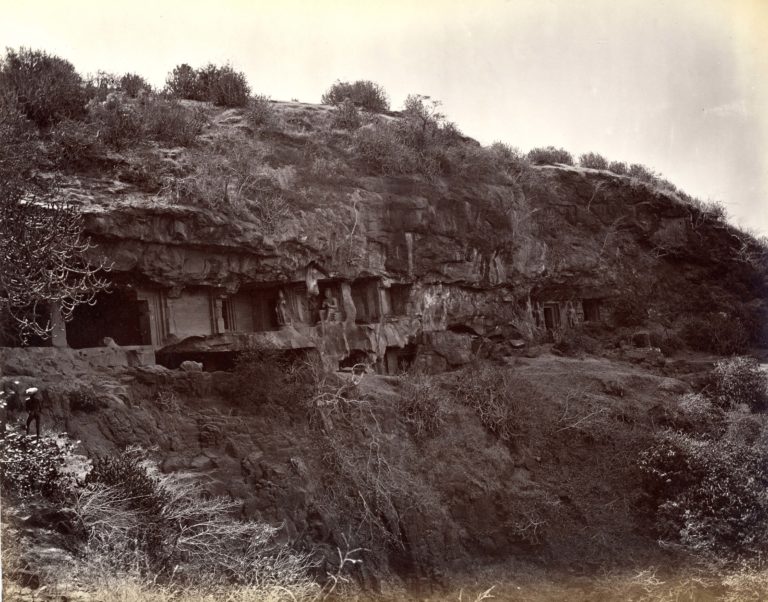
View of entrance to the Buddhist Dherwada Cave (Ellora Cave IX). Listed in the Bourne and Shepherd catalogue as ‘General…
[Photo.14/(005)] Side porch of rock-cut temple with sculptured figures
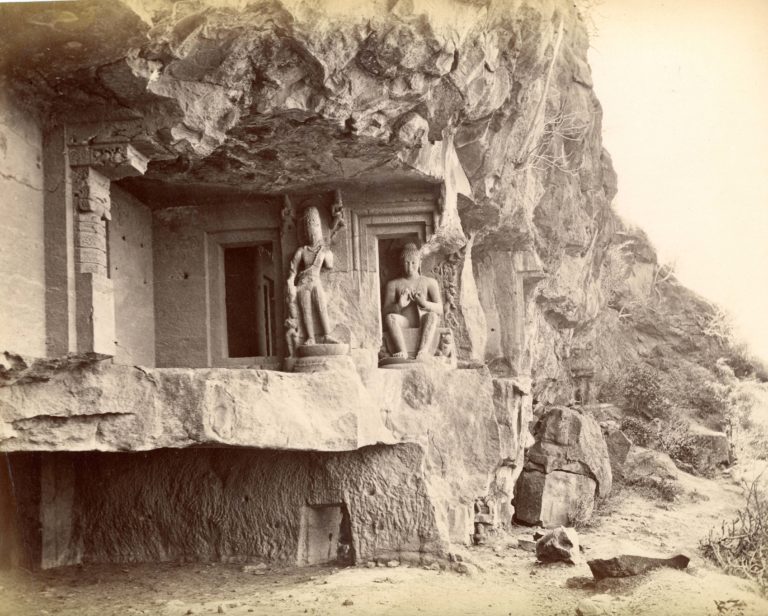
Side porch of rock-cut temple with sculptured figures, with seated Buddha on right and a dvarapala on left between two…
[Photo.14/(006)] Elephanta Cave Temple
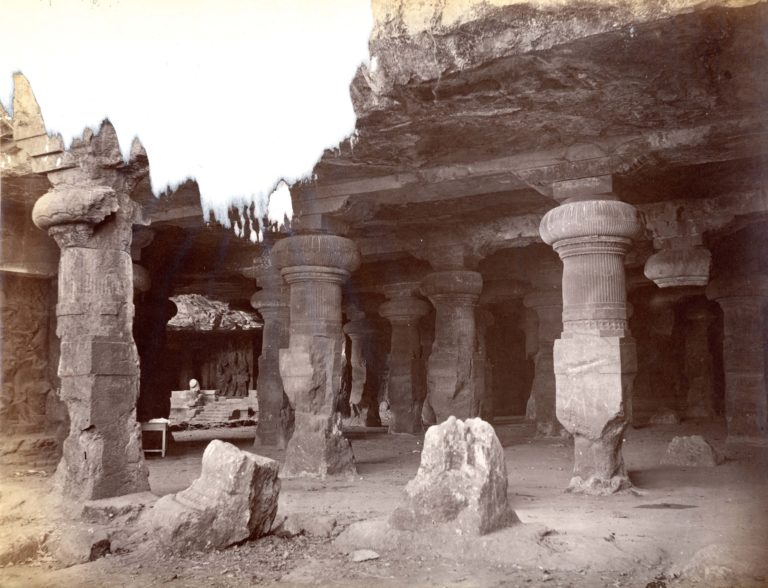
View of the Shiva Temple. Listed in the Bourne and Shepherd catalogue as ‘General view of the Great cave of…
[Photo.14/(007)] Entrance to cave temple, Elephanta
Listed in the Bourne & Shepherd catalogue as ‘Left wing, or Lion Cave’.
[Photo.14/(008)] Interior of Elephanta Cave Temple

Listed in the Bourne and Shepherd catalogue as ‘View from Lion Cave, looking towards entrance’.
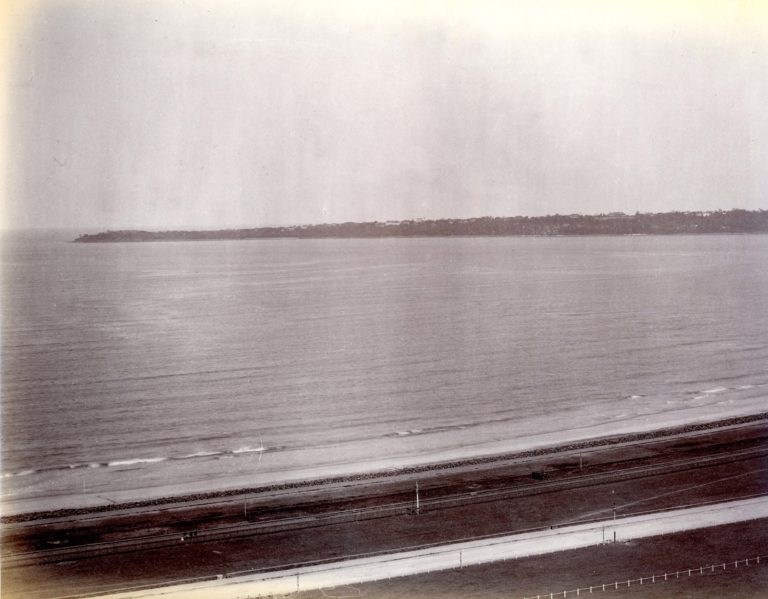
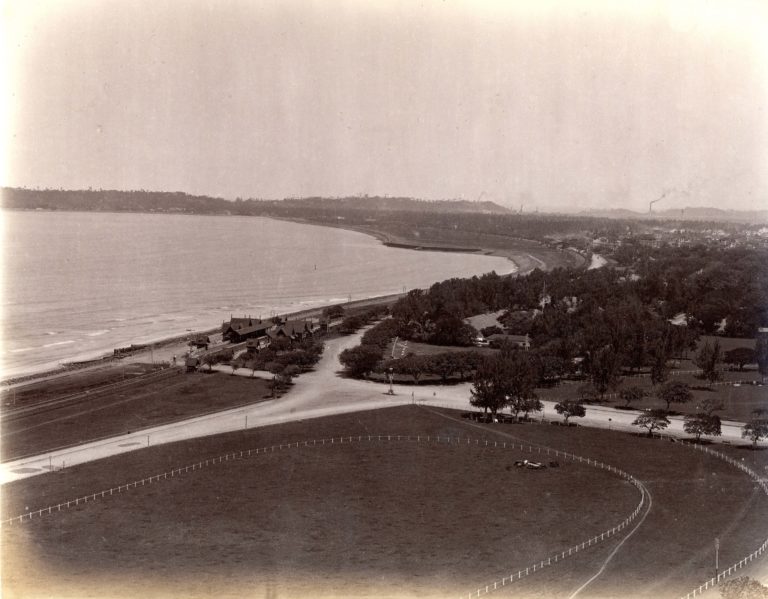
[Photo.14/(009)] The Bund Gardens, Poona
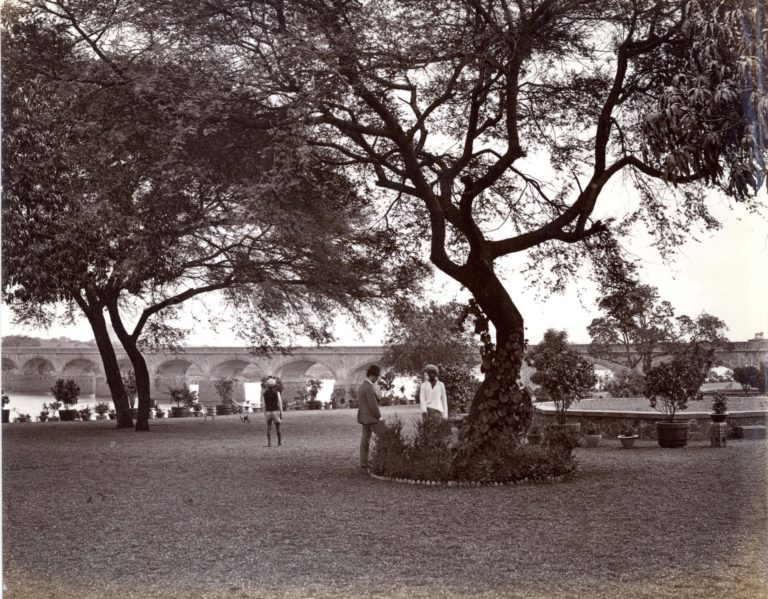
The Bund Gardens, Poona, looking towards the Fitzgerald Bridge
[Photo.14/(010)] View on the Bund at Poona
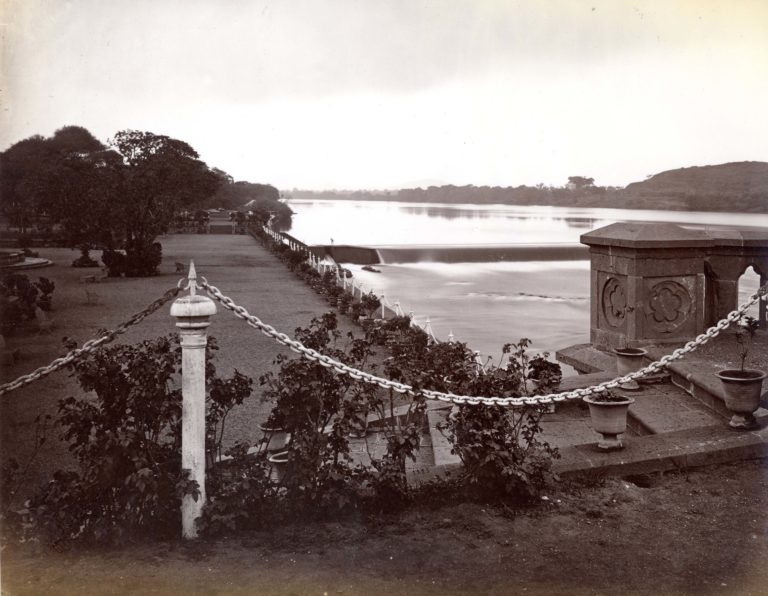
View from the Bund Gardens looking towards the stone bund across the river.
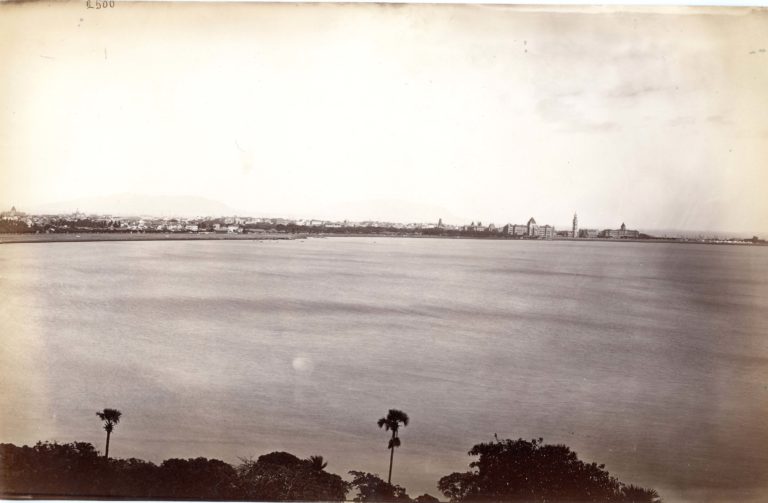
[Photo.14/(011)] Back Bay, Bombay
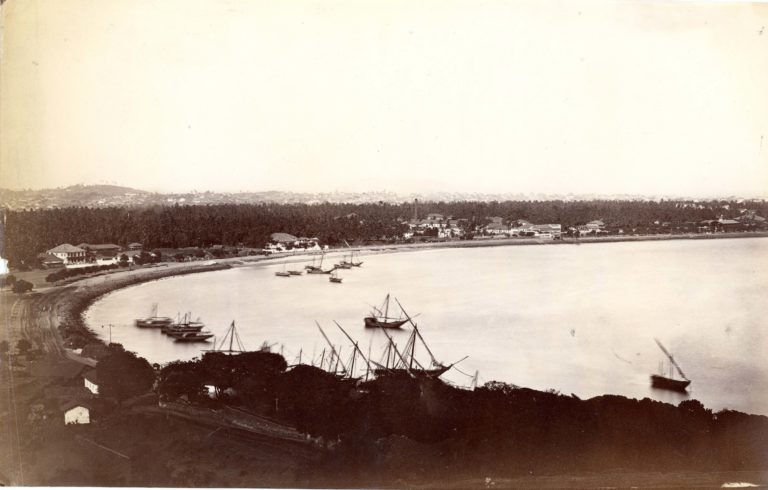
This view, looking across Back Bay from Malabar Hill towards the town, links up with print 12 to form a…
[Photo.14/(012)] Bombay from Malabar Hill
View looking south-east across Back Bay towards the town, with the University buildings and Secretariat visible in the distance. The…
[Photo.14/(013)] Malabar Hill from the Rajabai Tower, Bombay
View from the Rajabai Tower, looking across Back Bay towards Malabar Hill. This print joins up with print 14 to…
[Photo.14/(014)] Malabar Hill from the Rajabai Tower, Bombay
Continuation of print 13, forming a panoramic view of Malabar Hill.
[Photo.14/(015)] Mahalakshmi Temple, Breach Candy, Bombay

General view of the temple and surrounding houses on the seashore at Breach Candy.
[Photo.14/(016)] Darjeeling
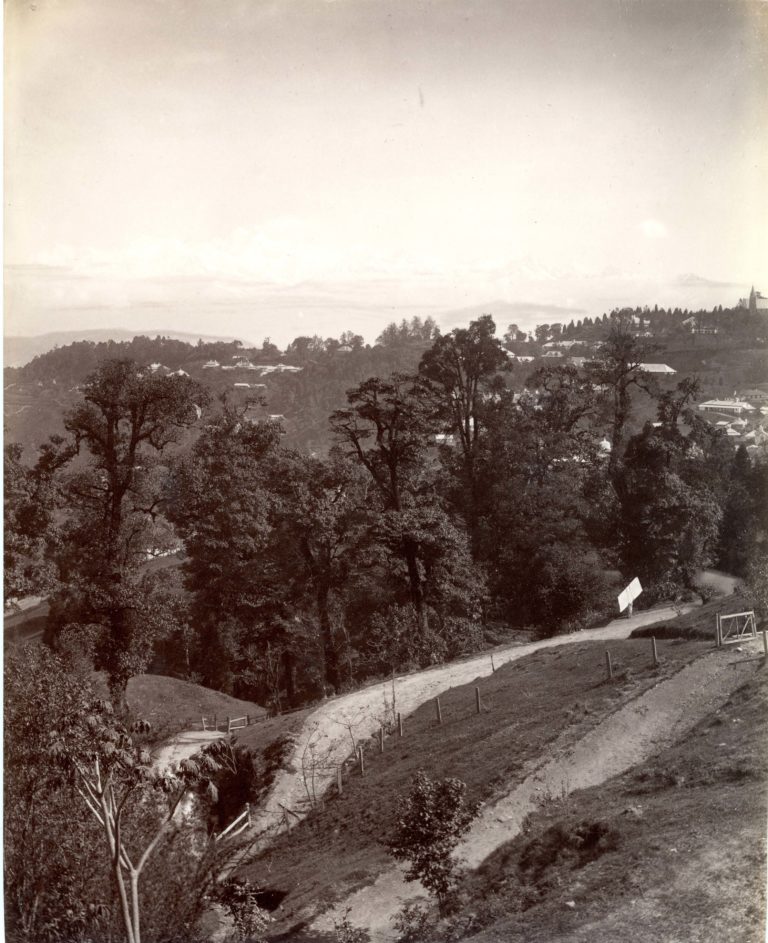
Joins up with print 17. Photograph uncredited, but possibly by Johnston & Hoffmann.
[Photo.14/(017)] Darjeeling

Joins up with print 16. Photograph uncredited, but possibly by Johnston & Hoffmann.
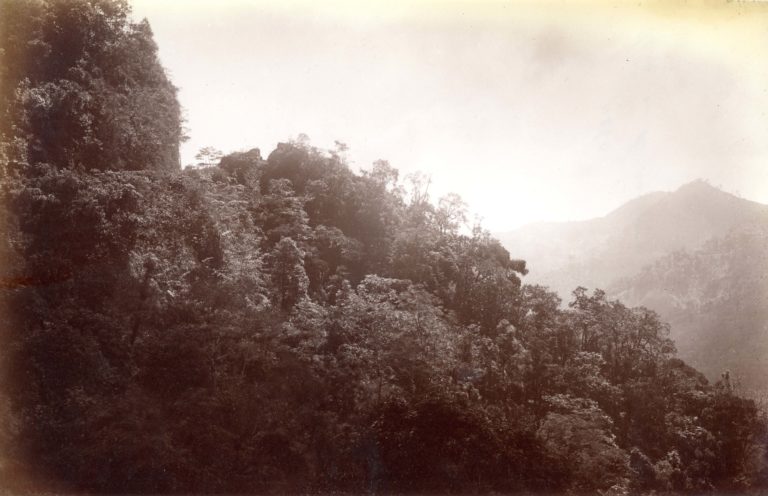
[Photo.14/(018)] Sunset on Kinchenjunga, from Darjeeling
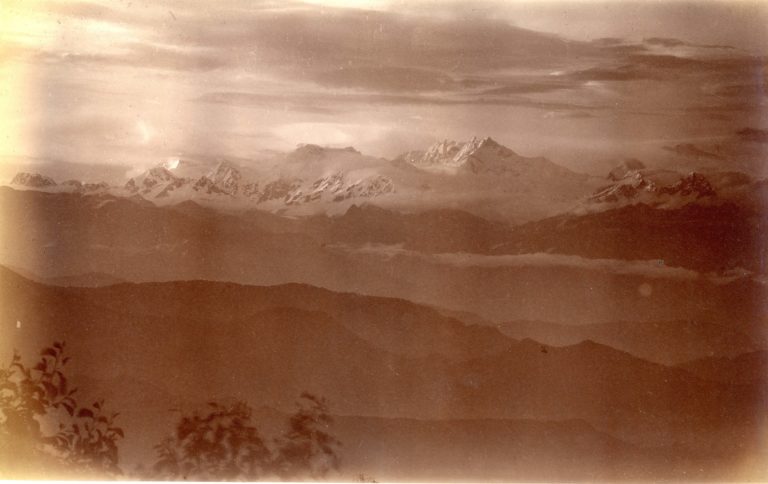
View looking towards the Himalayas from Darjeeling. Photograph uncredited, but possibly by Johnston & Hoffmann.
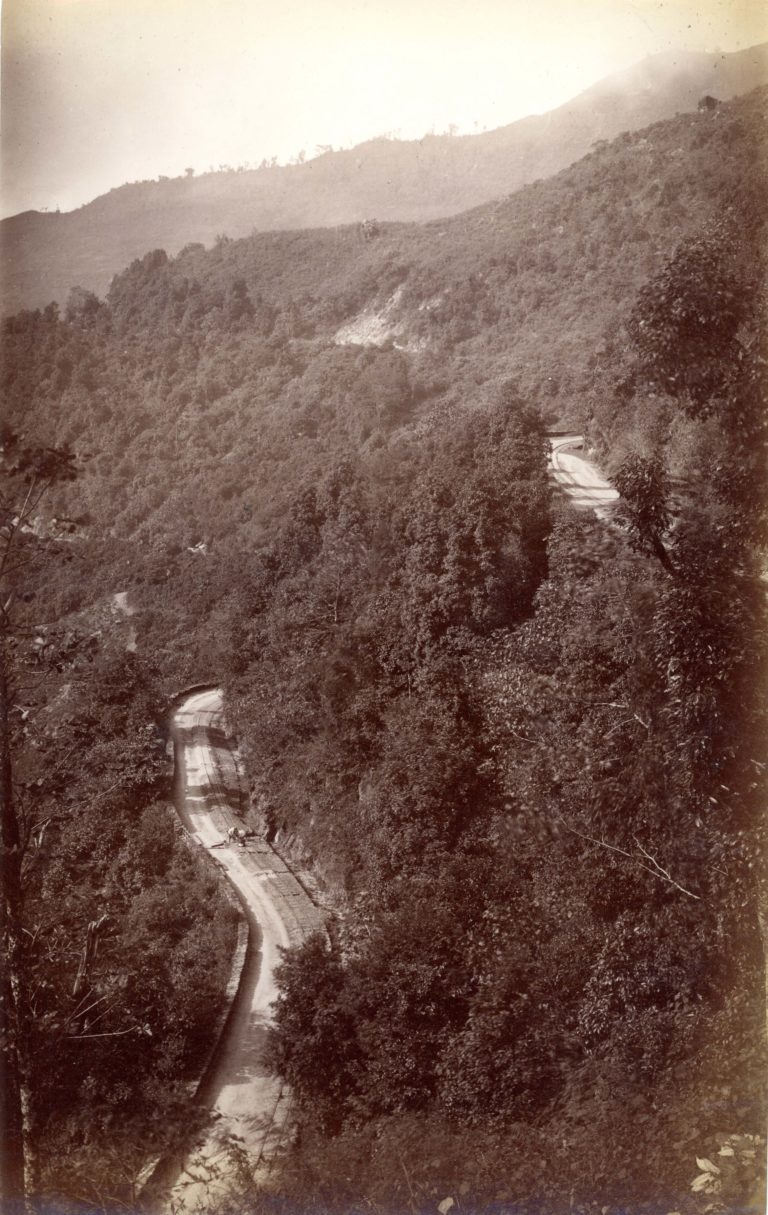
[Photo.14/(019)] Tista Valley
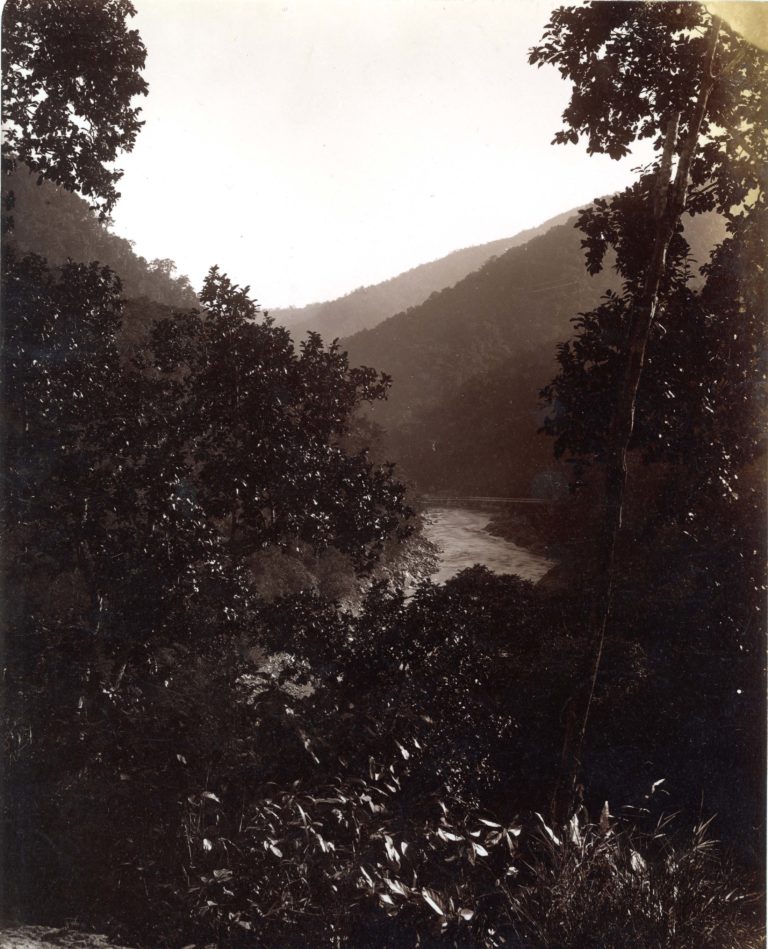
View of river and wooded hills. Photograph uncredited, but possibly by Johnston & Hoffmann.
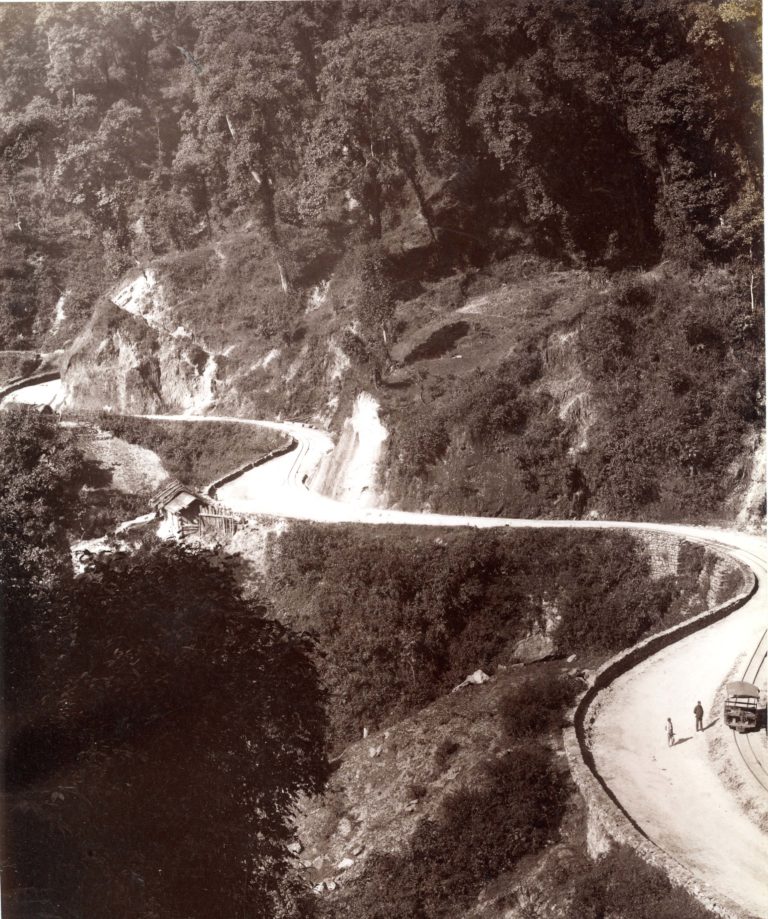
[Photo.14/(022)] The railway view from Goomti Corner
Photograph uncredited, but possibly by Johnston & Hoffmann.
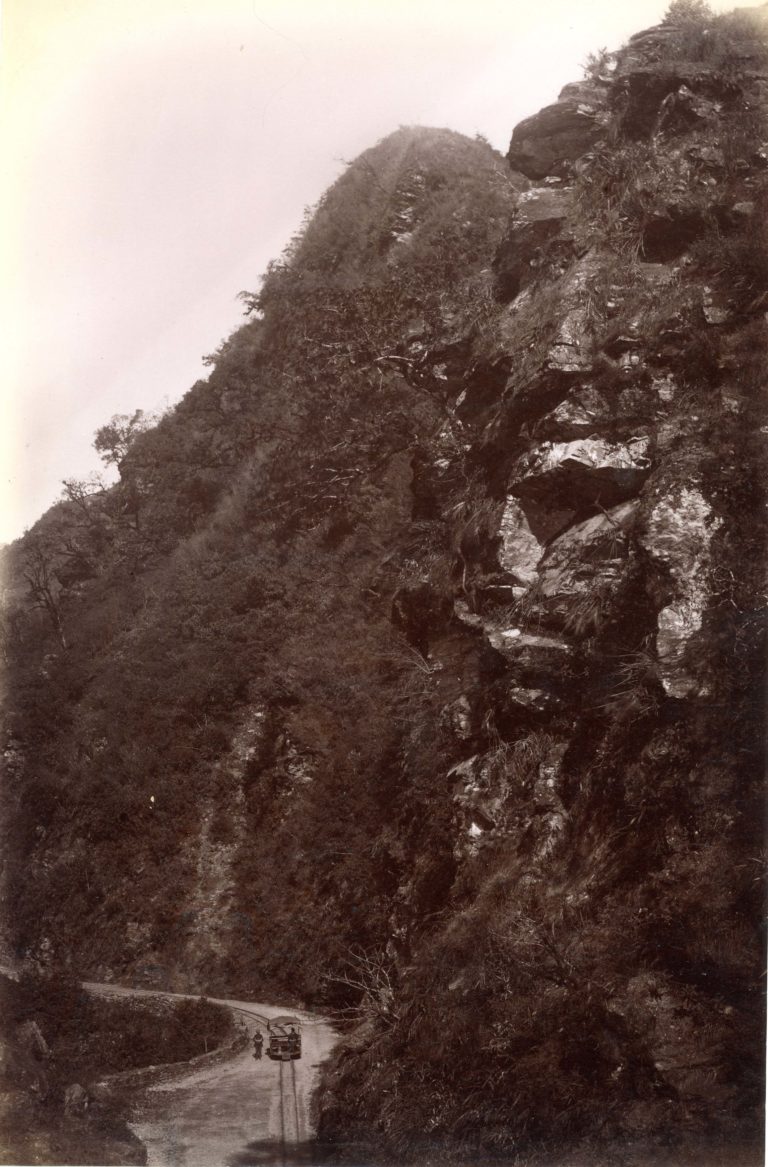
[Photo.14/(023)] View on the Darjeeling Hill Railway
Photograph uncredited, but possibly by Johnston & Hoffmann.
[Photo.22/(001)] Aftermath of a typhoon
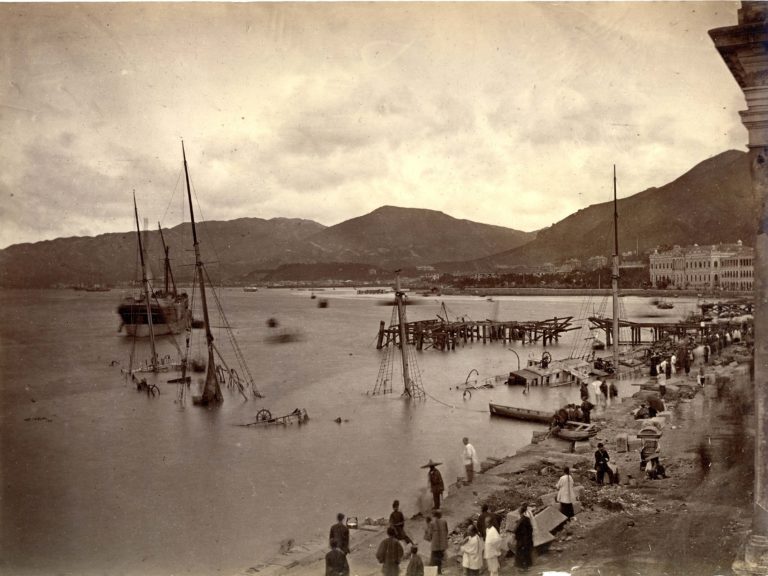
View looking along the Hong Kong waterfront after the typhoon of 1874, with wrecked vessels in the foreground near the…
[Photo.22/(002)] Waterfront after typhoon, 1874.
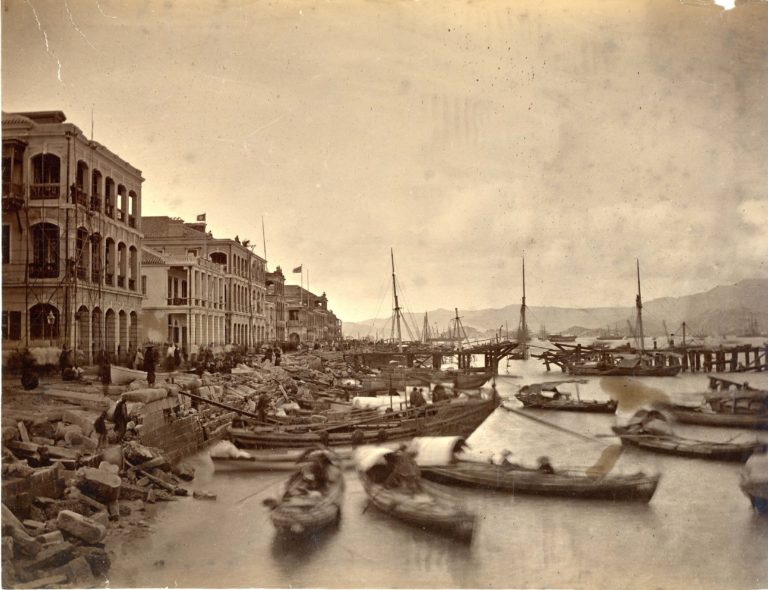
View looking along the Hong Kong waterfront after the typhoon of 1874. This view looks back towards the viewpoint of…
[Photo.22/(003)] Steamer, ashore after Typhoon
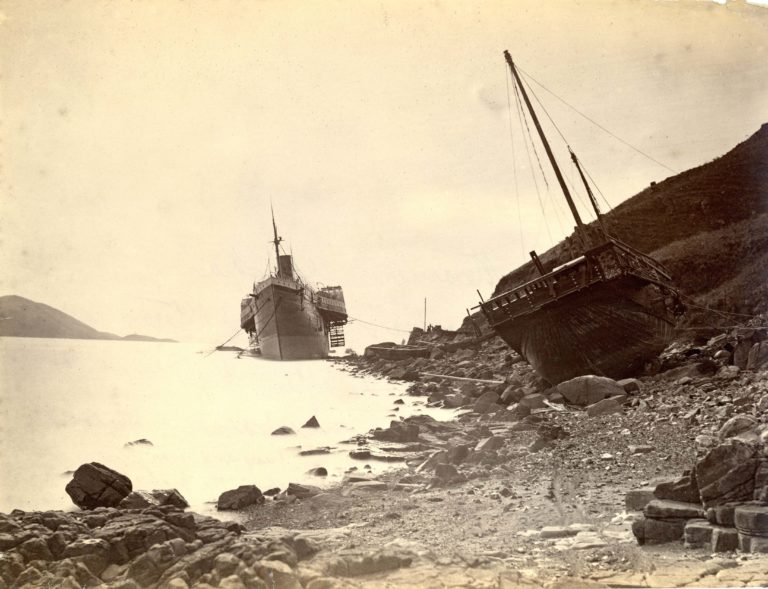
Bow view of the beached paddle steamer ‘Alaska’ after the Hong Kong Typhoon of 1874. Pencilled note on the reverse…
[Photo.22/(004)] Destroyed building after typhoon
View looking down onto the wrecked bungalow, which stood on a headland above the sea. -1874. Hong Kong Typhoon. By…
[Photo.22/(005)] Aberdeen Dock after typhoon
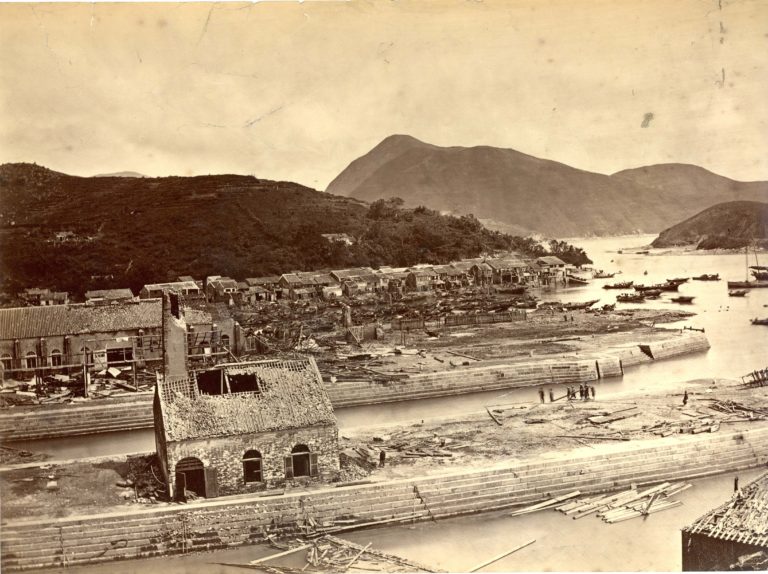
View looking down onto the dockyard, showing damage wrought by the typhoon. This print forms the right hand section of…
[Photo.22/(007)] Flagstaff at Victoria Peak after typhoon
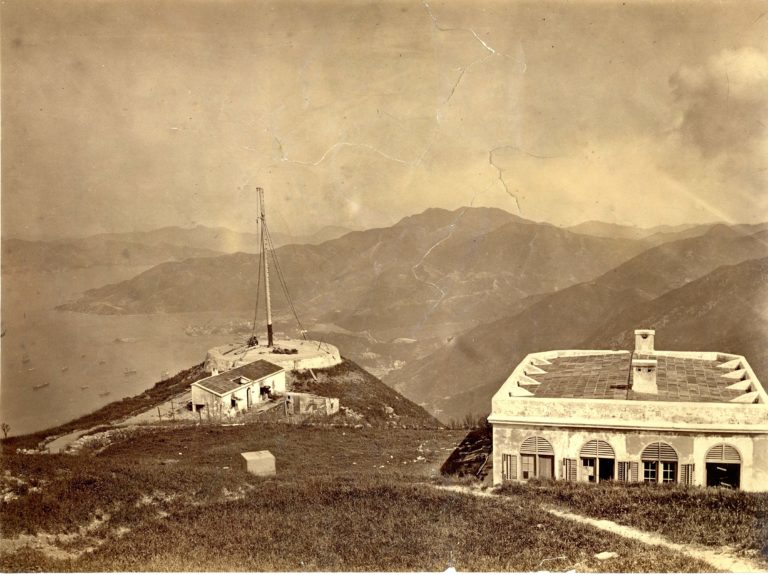
View looking down onto the damaged flagstaff and harbour below. Pencilled note on reverse of print reads: ‘Flagstaff at Victoria…
[Photo.22/(008)] Clubhouse, Hong Kong, opposite Post Office
View of clubhouse from street. Photograph uncredited, but possibly by Lai Afong.
[Photo.22/(009)] Panoramic view of Hong Kong in two sheets
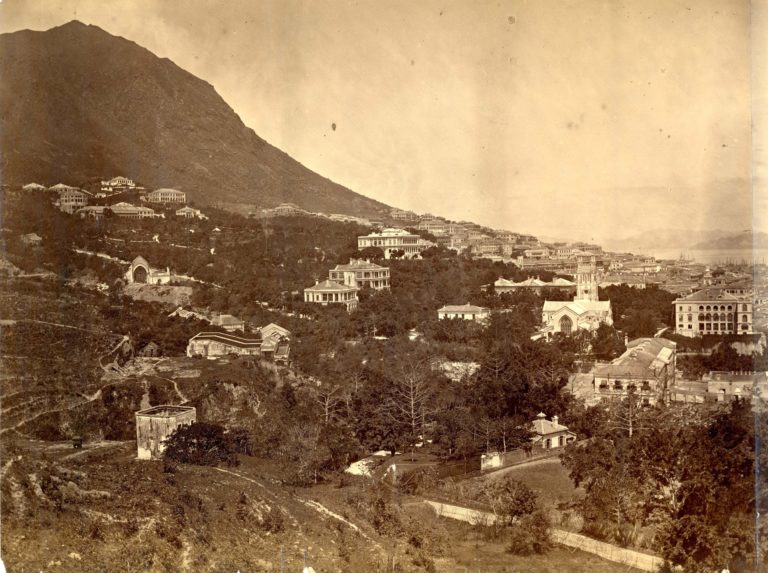
Panoramic view looking westwards along the Peak and over the harbour. A portion of the view at the bottom right-hand…
[Photo.22/(010)] Happy Valley Racecourse, Hong Kong
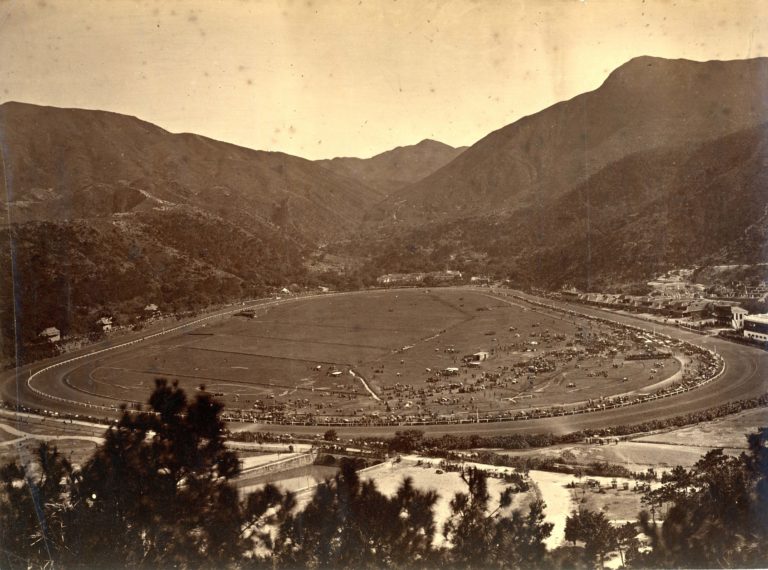
View looking down onto the racecourse, where a meeting is in progress.
[Photo.22/(011)] Cemetery, Hong Kong, Happy Valley. Naval Hospital on the hill
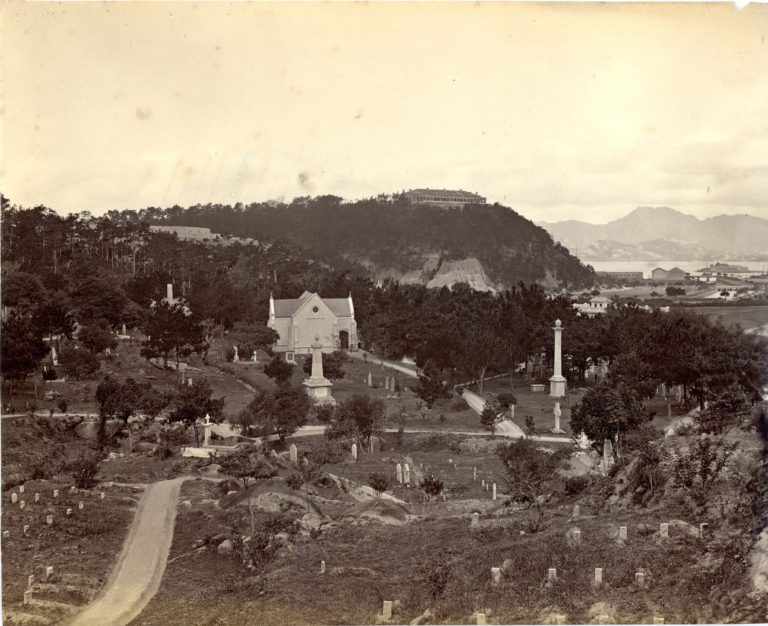
General view of Happy Valley Cemetery, with the chapel in the centre, and the Naval Hospital on the skyline in…
[Photo.22/(012)] Shipping in Hong Kong Harbour
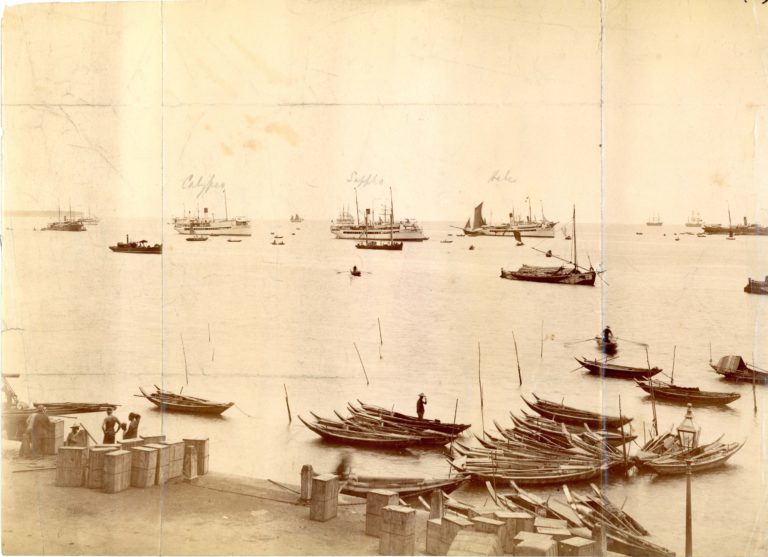
View from the wharf, looking towards shipping in the harbour. The names of three steamers – ‘Calypso’, ‘Sappho’ and ‘Hebe’…
[Photo.22/(013)] British naval vessel HMS Orion in dry dock, Hong Kong
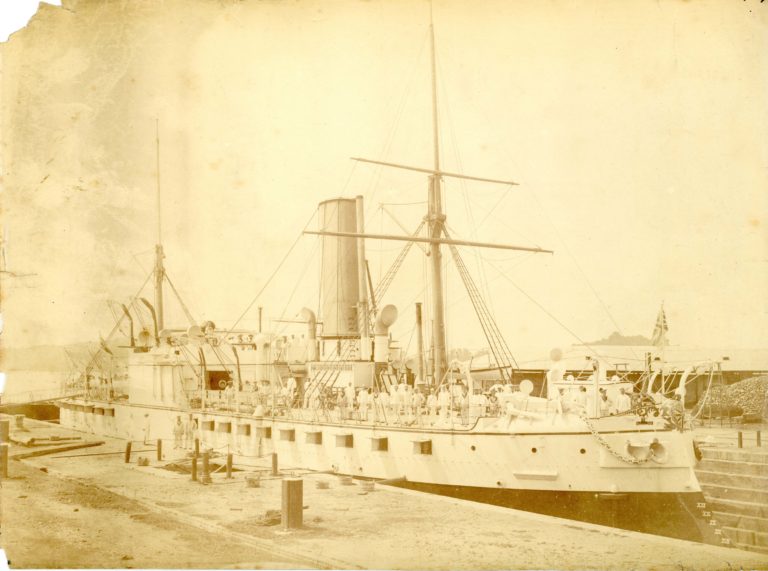
HMS Orion in dry dock, Hong Kong. Identified by Duncan Mirylees
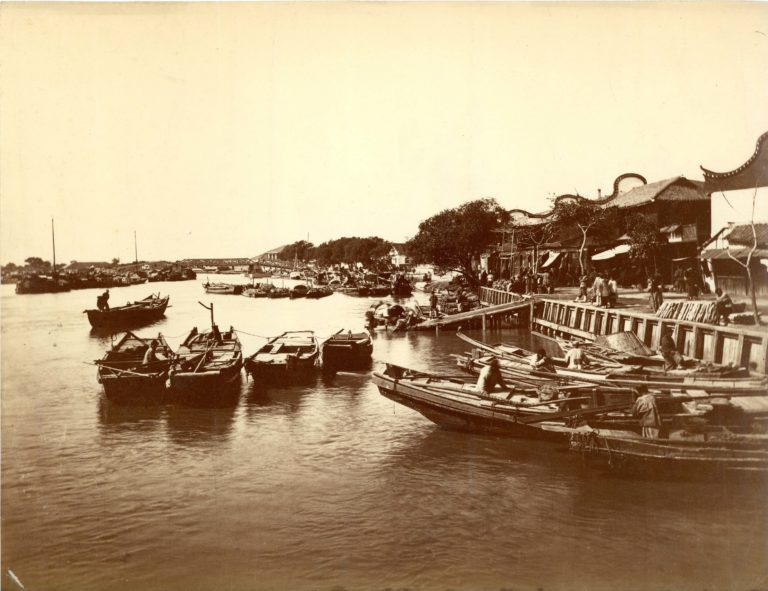
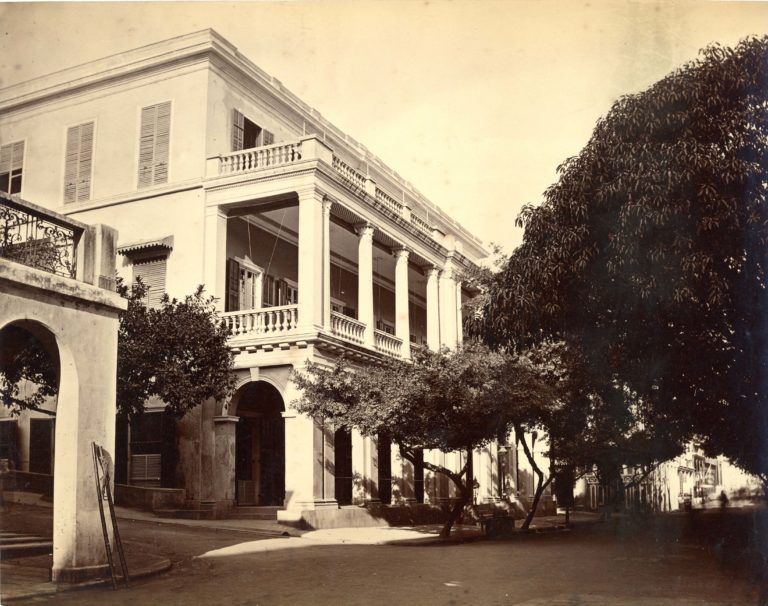
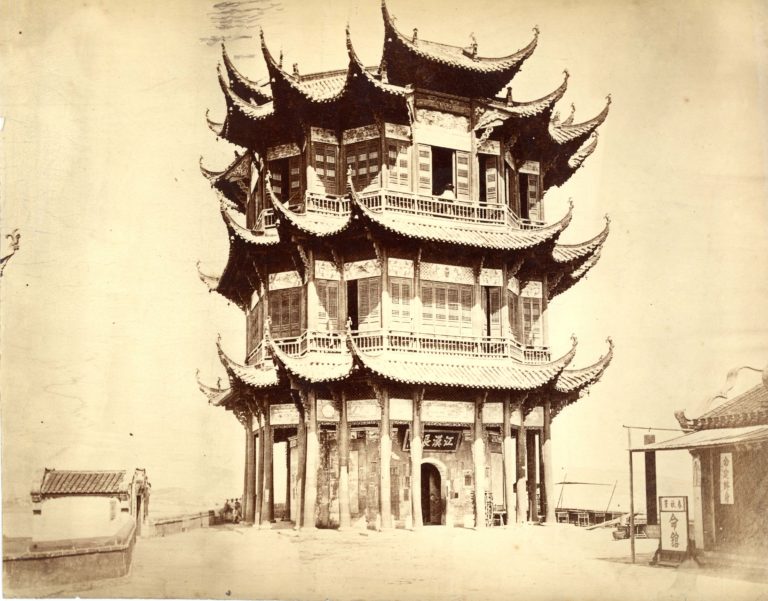
[Photo.22/(015)] Bund, Hankow
View looking along the street, lined with European mansions on the left.
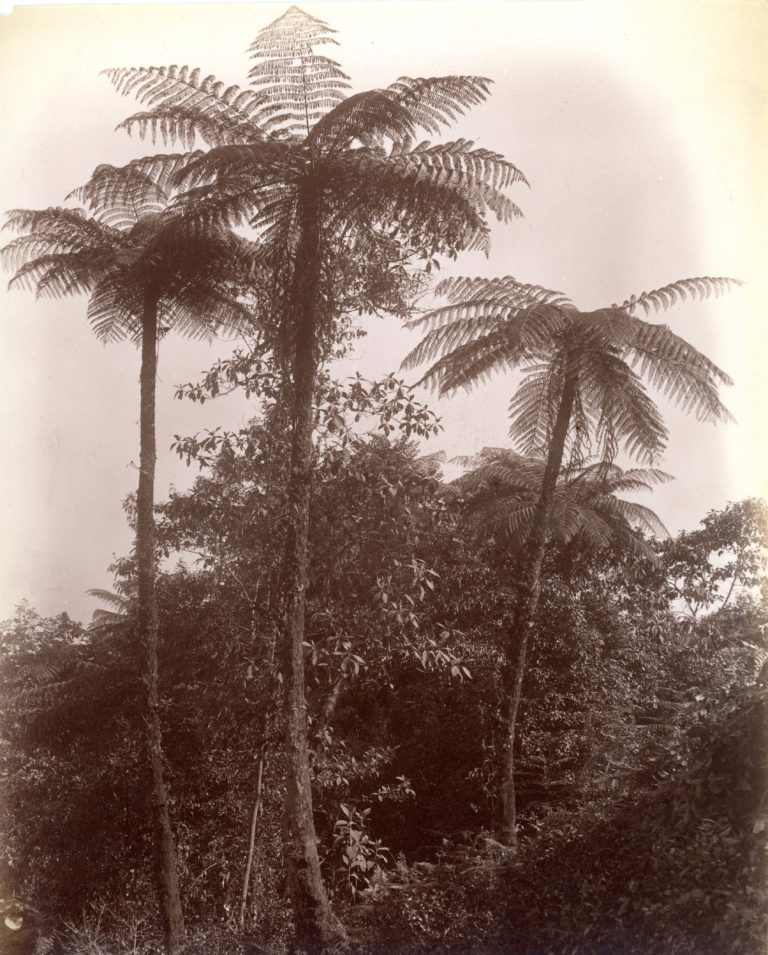
[Photo.22/(017)] Tea plantation, Yang li Moon (above Hankow)
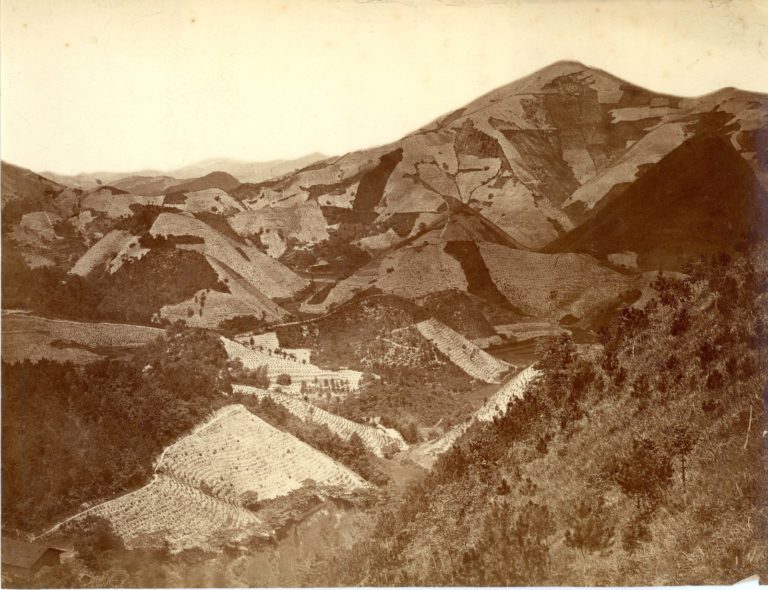
General view of land planted out with tea.
[Photo.22/(018)] Little Orphan Island, Yangtze River
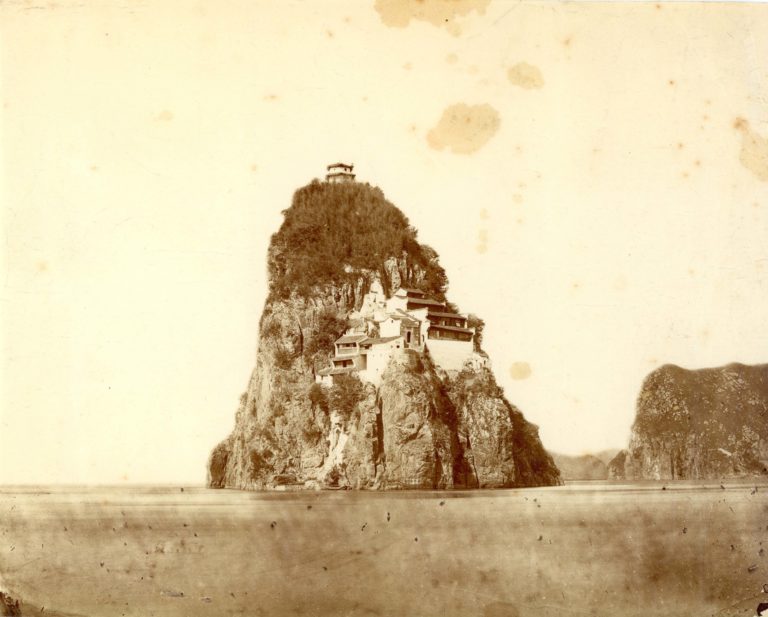
General view of the conical island, with a settlement of houses in the foreground.
[Photo.22/(019)] Chinese barbers at work in a courtyard
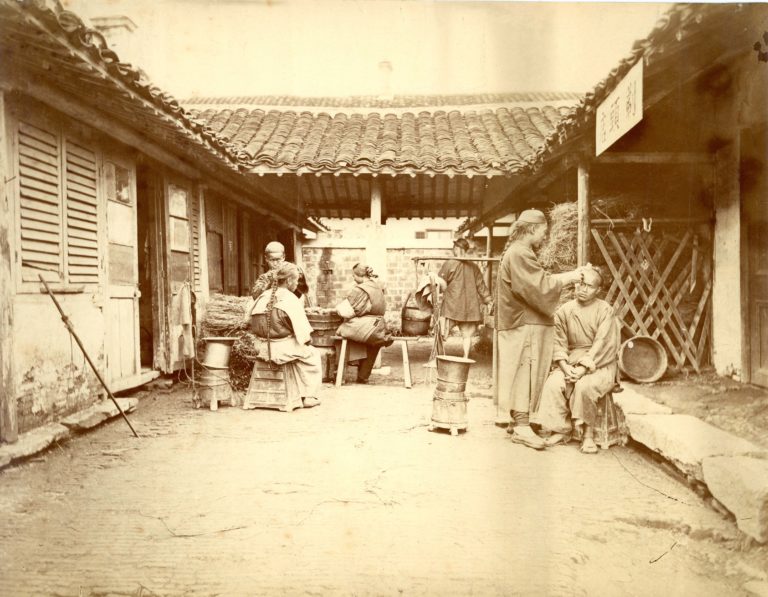
Photograph possibly taken by Milton M. Miller.
[Photo.22/(020)] Opium smokers
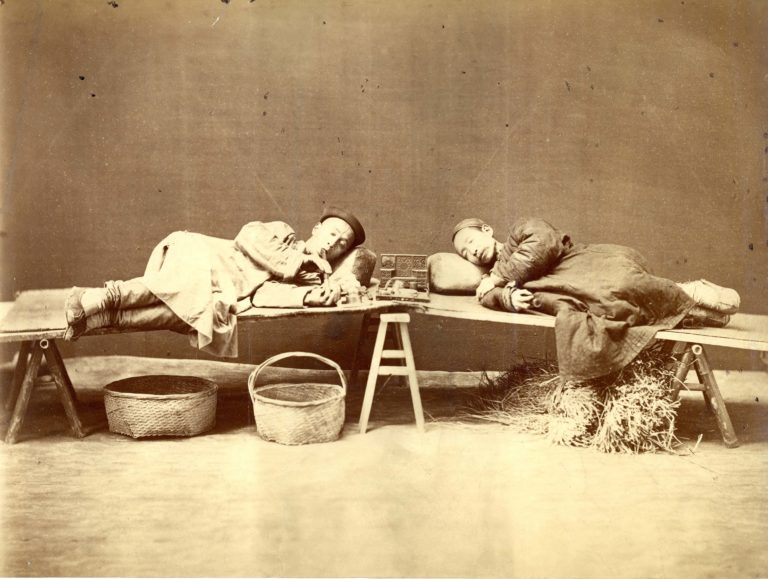
Studio portrait of two Chinese opium smokers, reclining on trestle beds with their pipes. Photograph possibly taken by Milton M….
[Photo.22/(021)] Labelling and packing brick tea
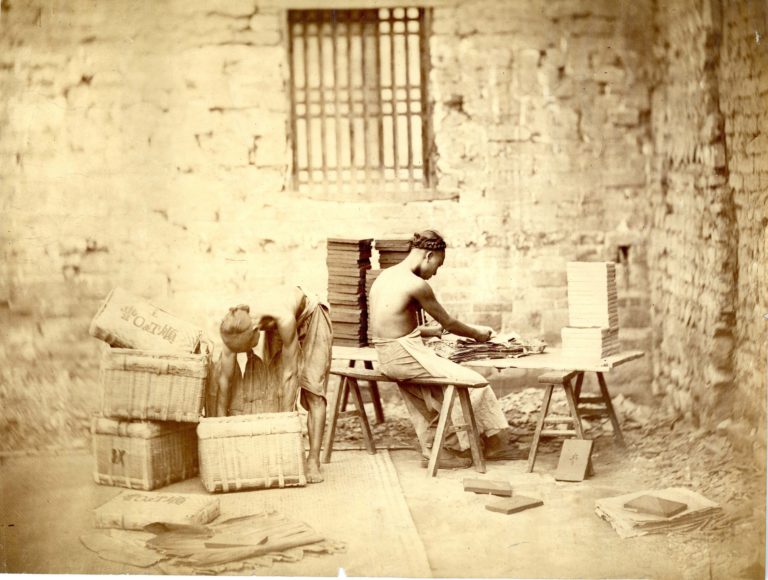
Two workers wrapping an packing tea. Photograph possibly taken by Milton M. Miller.
[Photo.22/(022)] Chinese family group
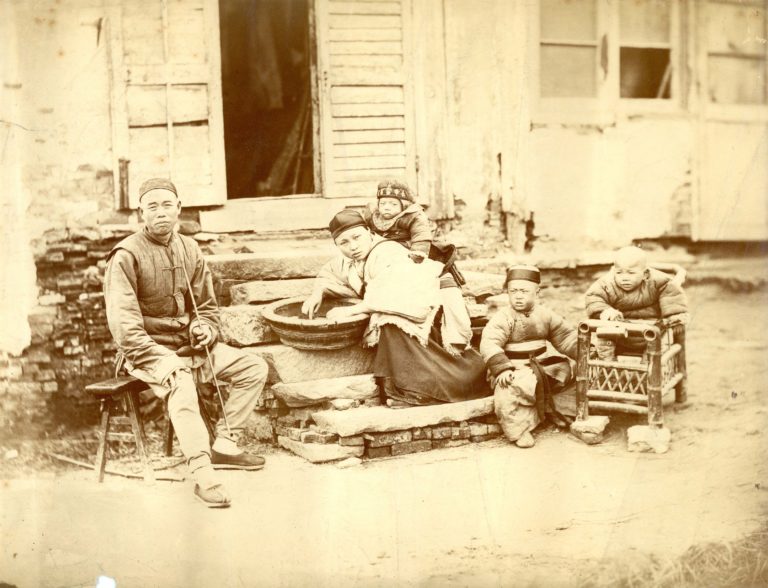
Family group posed in front of house. Photograph possibly taken by Milton M. Miller.
[Photo.22/(023)] Peking Observatory
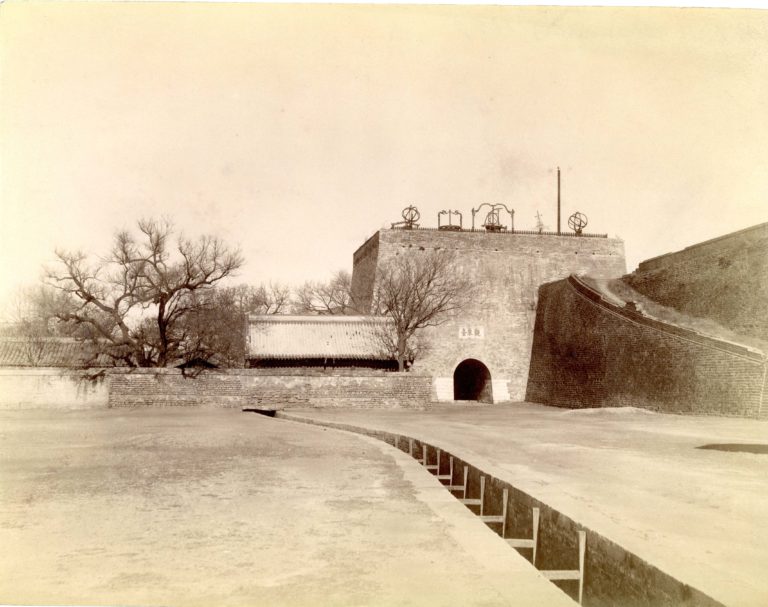
View looking towards the observatory, with astronomical instruments ranged along the top of the wall.
[Photo.22/(024)] Jesuit Observatory on wall of Peking
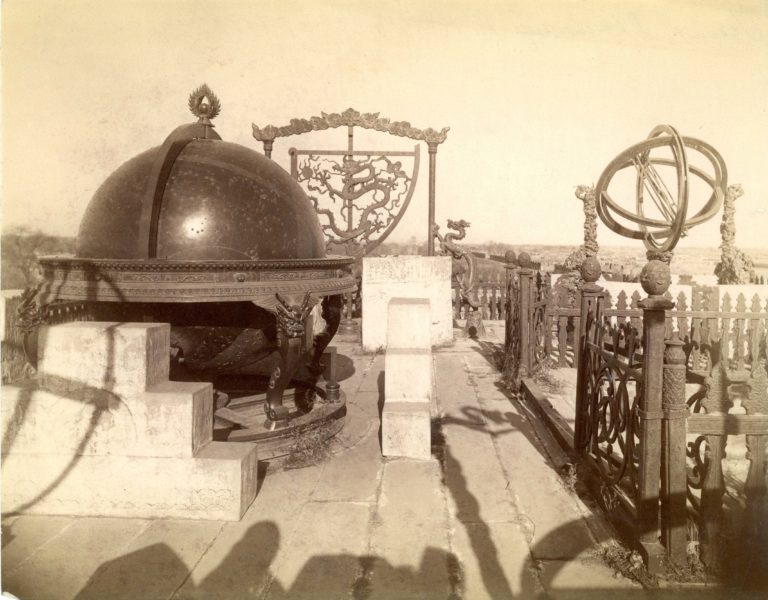
Close view of astronomical instruments in the observatory.
[Photo.22/(025)] View of the Whampoo River
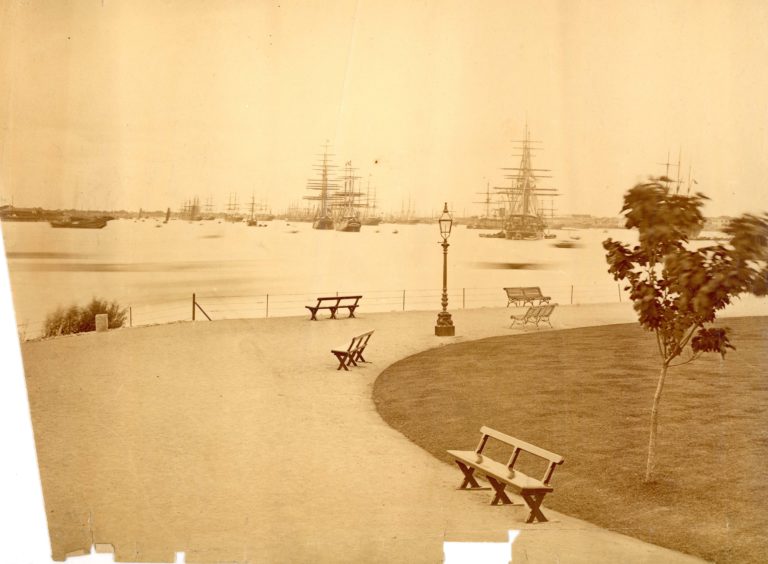
View of the Whampoo River, looking downstream, taken from the public garden in Shanghai. ‘American’ settlement appears on the left….