Photographic Collections
The Royal Asiatic Society has almost 100 different collections of photographs, containing several thousand images, dating back to the middle of the nineteenth century. The Society’s photographic collections are a valuable source of information about the cultural and physical heritage of many different parts of Asia. But they’re also useful for understanding the history of photography itself. These pages contain a small selection of the Society’s photographic holdings.
[Photo.12/(001)] Teppa Tank, Madura
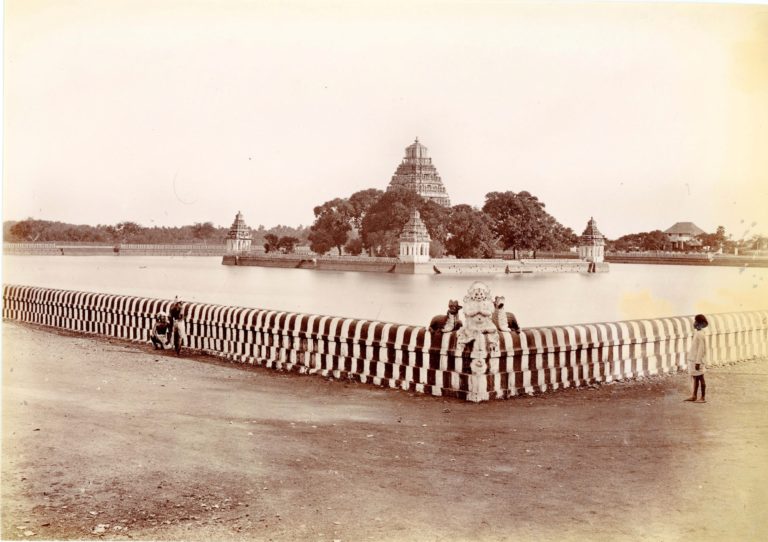
View across the Teppakulam Tank towards the shrine in the centre. By: Nicholas & Co., ca. 1880.
[Photo.12/(002)] Madura, the Southern Gopuram [of the Minakshi Sundareshvara Temple] from the east
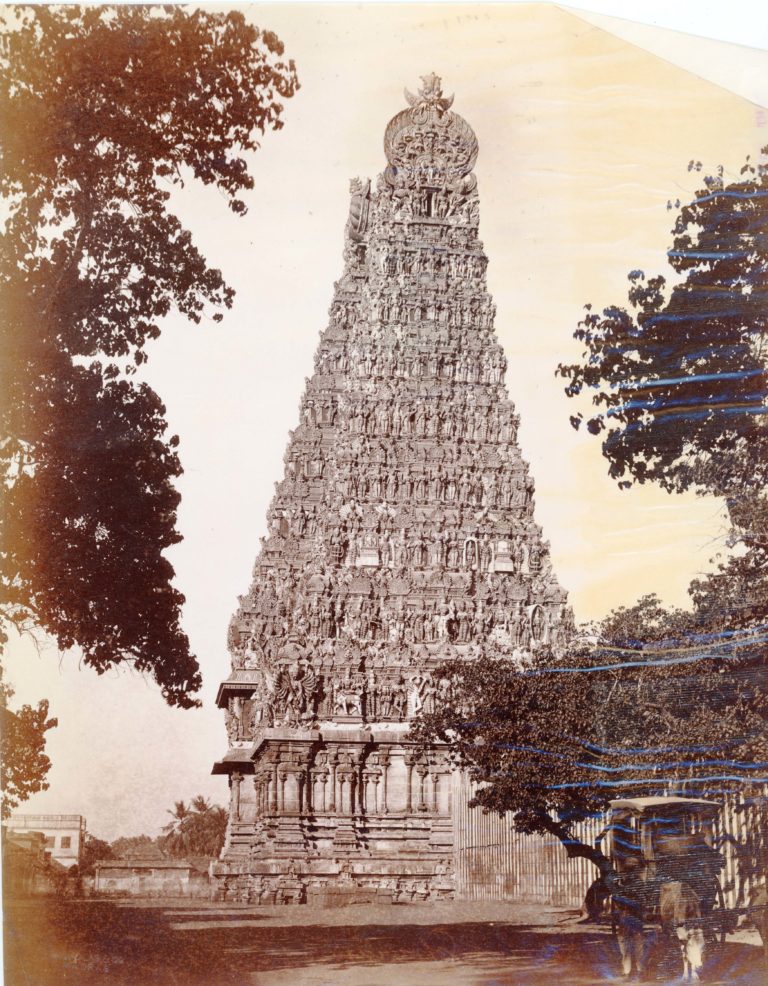
General view of the richly carved gopura of the Minakshi Sundareshvara Temple. By: Nicholas & Co., ca. 1880
[Photo.12/(003)] Madura, the temple jewels [Minakshi Sundareshvara Temple?]
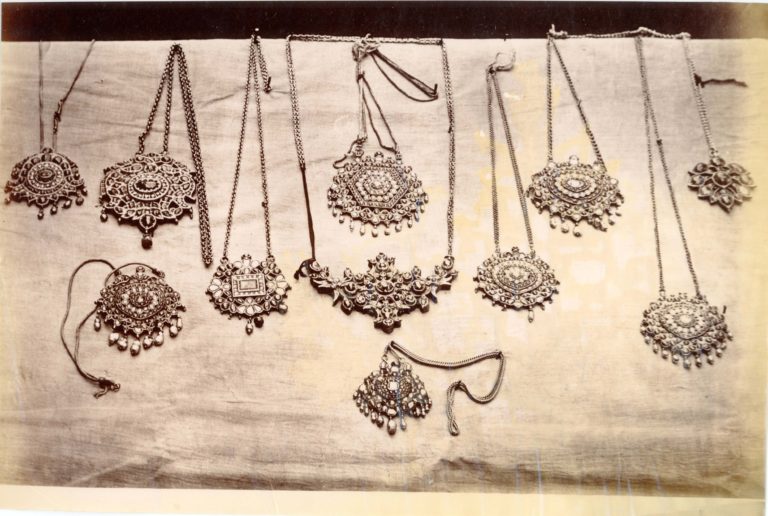
A view of the temple jewels, presumably of the Minakshi Sundareshvara Temple, arranged against a cloth backdrop. By: Nicholas &…
[Photo.12/(004)] Trichinopoly, the Rock and the Tank from the old Gateway
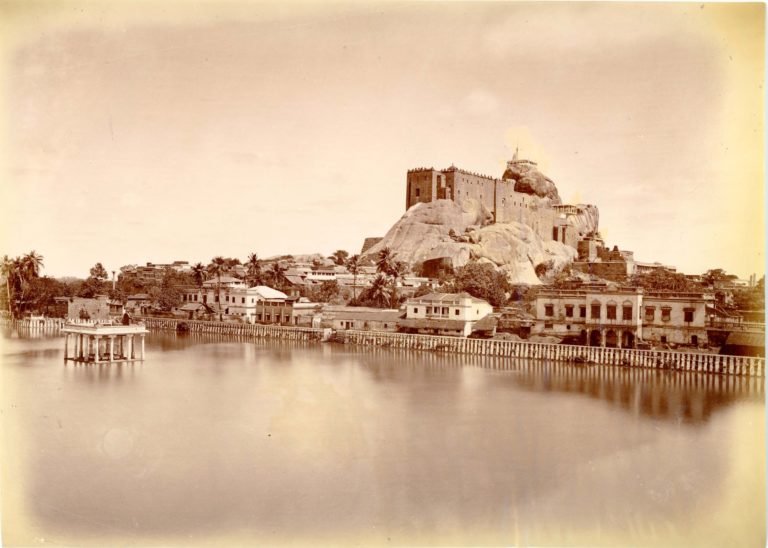
View looking across the tank towards the Rock, with its fort and temple on the summit. By: Nicholas & Co.,…
[Photo.12/(005)] Coonoor, Black Bridge on the ghat
View upstream towards the small wooden bridge. By: Nicholas & Co., ca. 1880
[Photo.12/(006)] Coonoor, Glen View Hotel, distant view
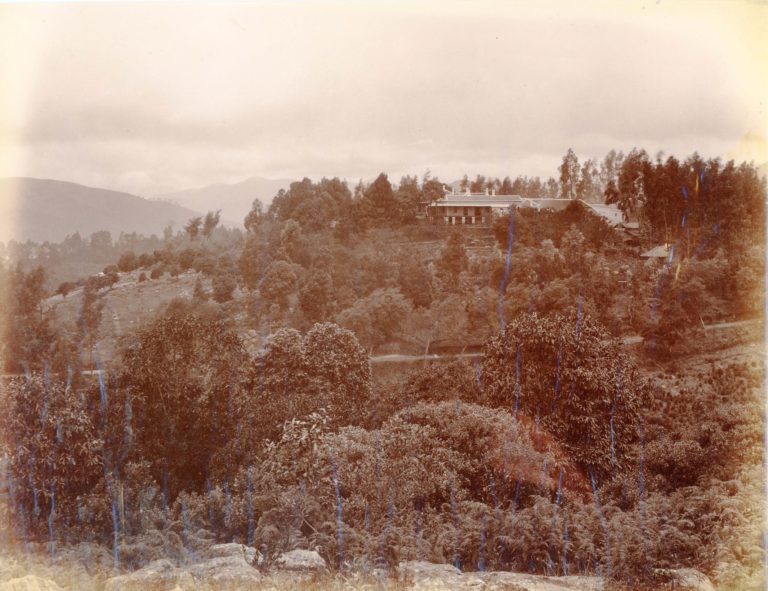
View looking across the wooded valley towards the hotel. By: Nicholas & Co., ca. 1880
[Photo.12/(007)] Coonoor, Sims Park, the Lake
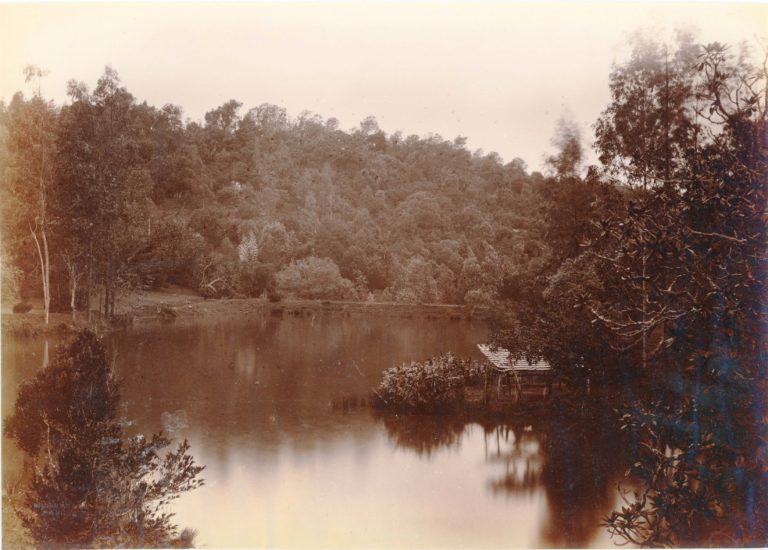
General view of the lake, with a boathouse in the foreground. By: Nicholas & Co., ca. 1880.
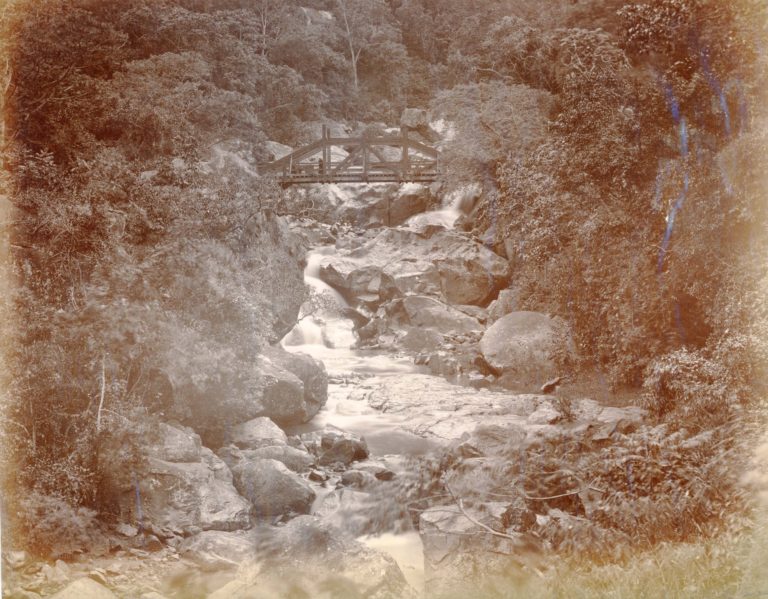
[Photo.12/(008)] Coonoor, Runnymede Waterfall
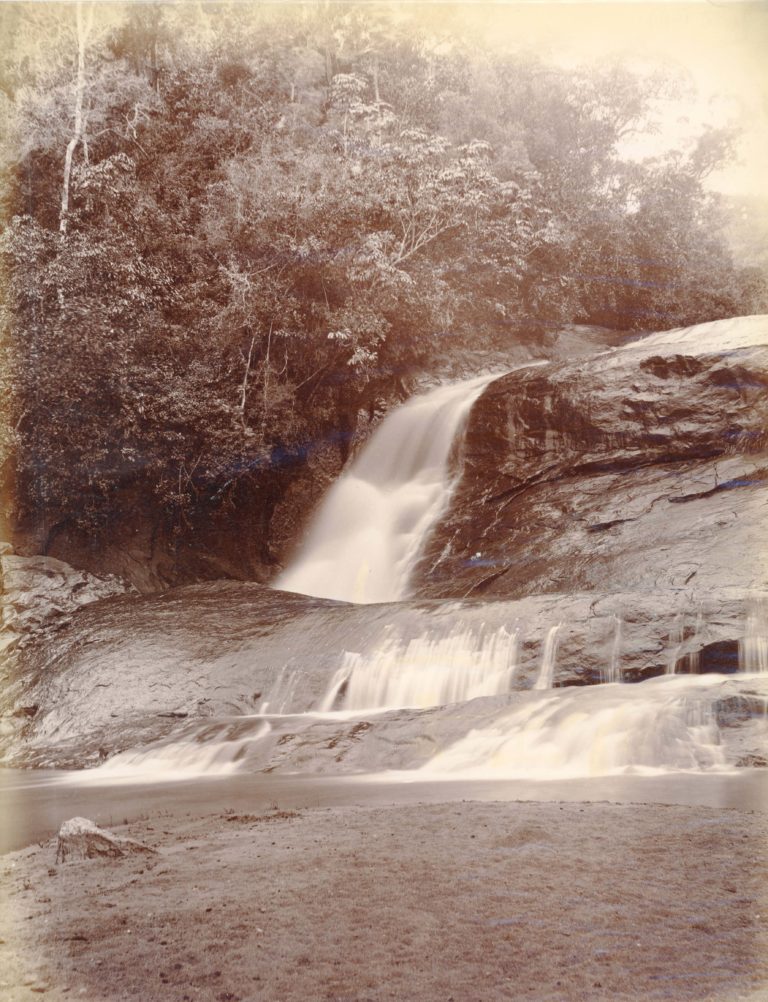
View from below the falls. By: Nicholas & Co., ca. 1880
[Photo.12/(009)] Coonoor, Hoolical Droog in the mist
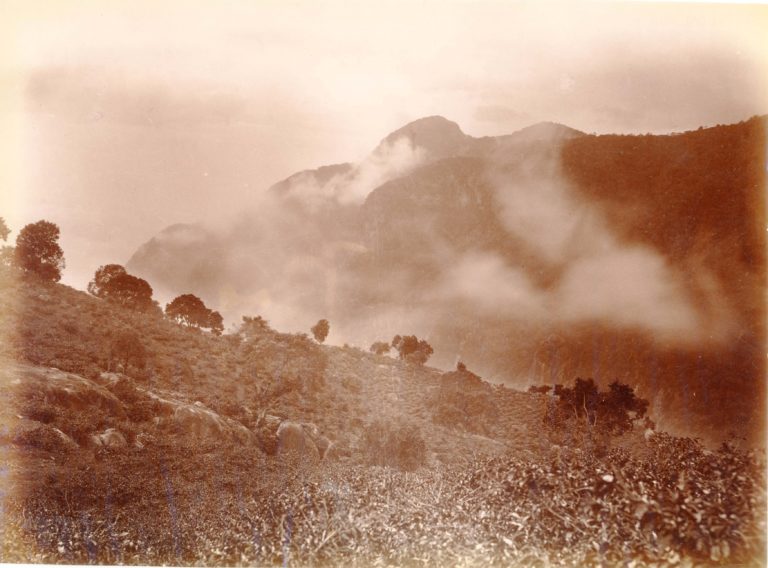
View across the valley towards neighbouring hills. By: Nicholas & Co., ca. 1880
[Photo.12/(010)] Towards Coonoor, from Lamb’s Rock
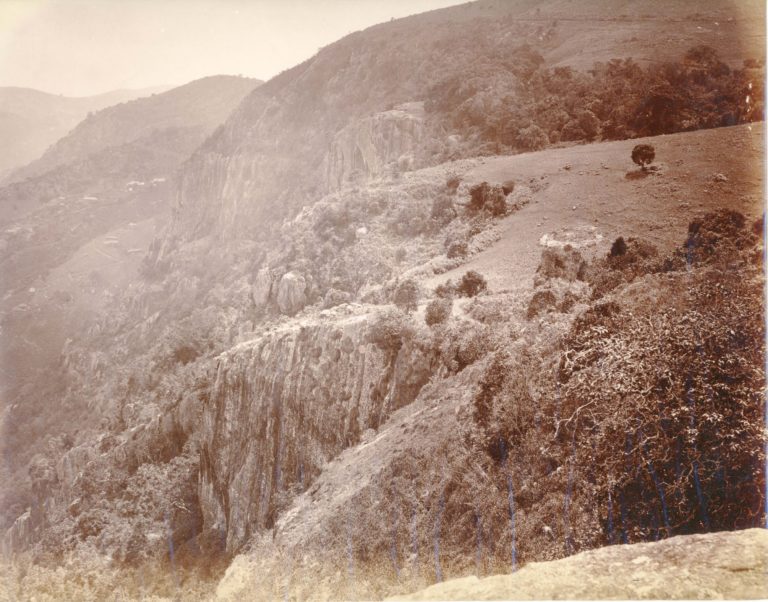
View towards Coonoor, from Lamb’s Rock. By: Nicholas & Co., ca. 1880
[Photo.12/(011)] Ootacamund, Charing Cross
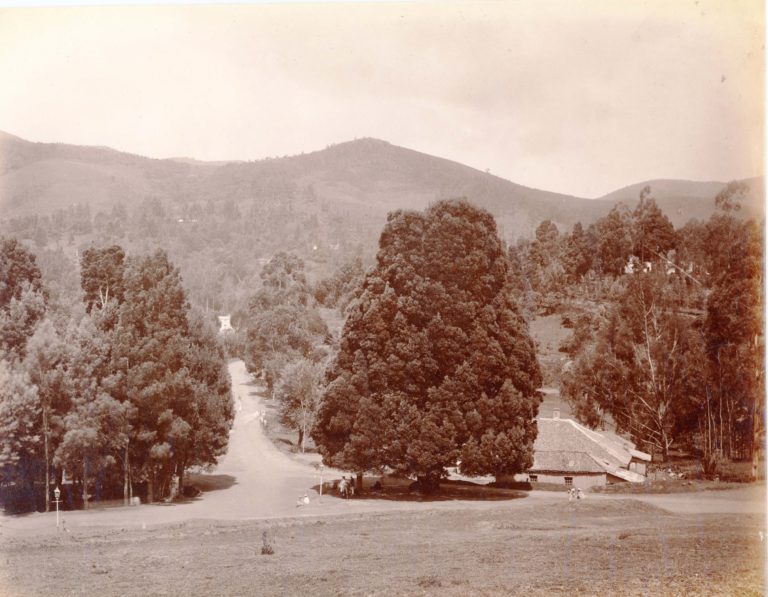
View from the hillside, looking down onto the junction of the roads below. By: Nicholas & Co., ca. 1880
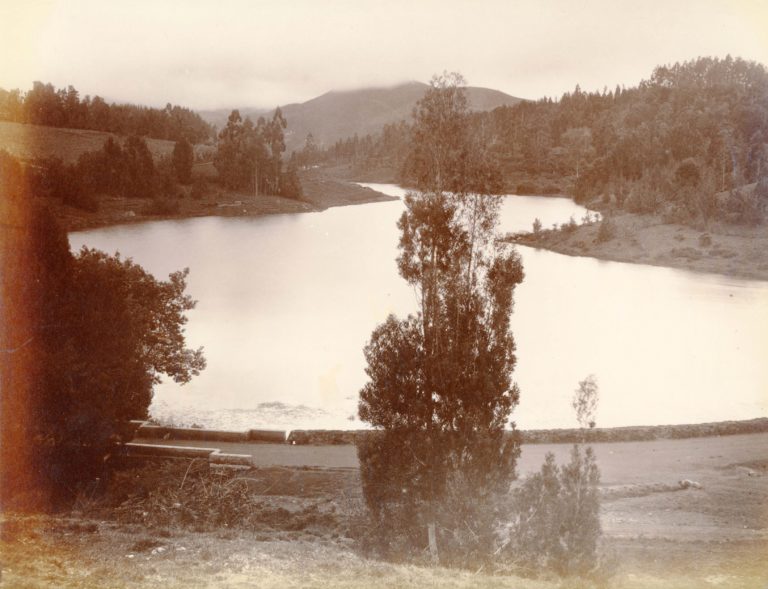
[Photo.12/(012)] Ootacamund, the Lake from Willow Bund

Ootacamund, the Lake from Willow Bund. By: Nicholas & Co., ca. 1880
[Photo.12/(013)] Ootacamund, the Lake and Elk Hill from Erin Cottage
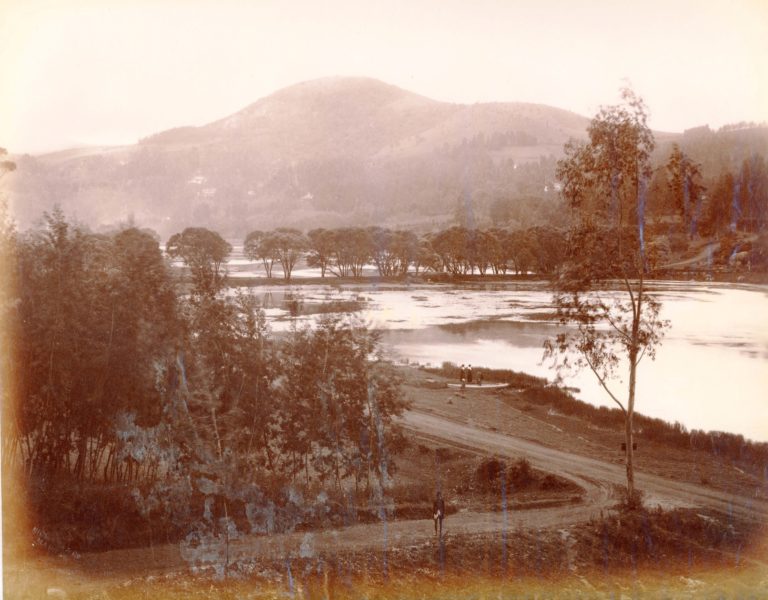
View across the lake towards Elk Hill beyond. By: Nicholas & Co., ca. 1880
[Photo.12/(014)] Ootacamund, the Lake from the west
Ootacamund, the Lake from the west. By: Nicholas & Co., ca. 1880
[Photo.12/(015)] The Seven Pagodas [Mamallapuram], General view of the rathas (monolithic temples), Dharmaraja’s in foreground
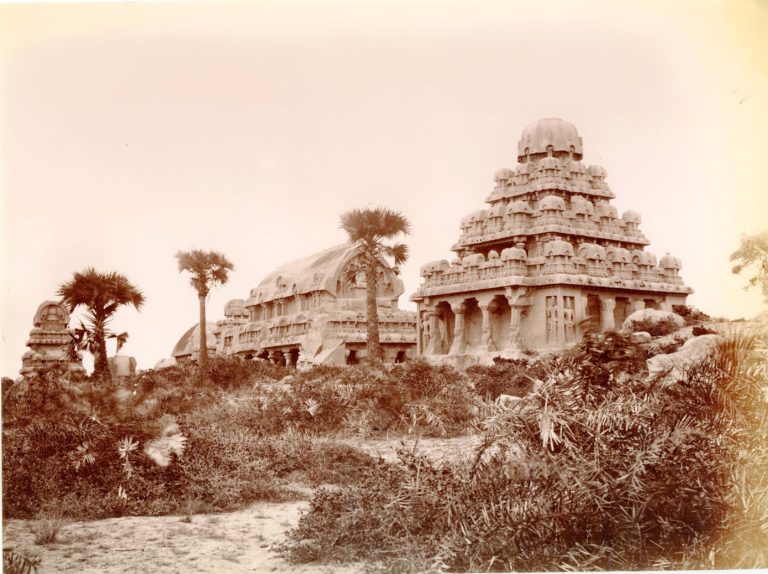
View from the south-west, with the pyramidal Dharmaraja Ratha is in the foreground, and the Bhima Ratha beyond. The Nakula…
[Photo.12/(016)] Seven Pagodas [Mamallapuram], Draupadi and Arjuna Rathas
General view from the west of the two monolithic temples, with the lion sculpture in the foreground. The Draupadi ratha…
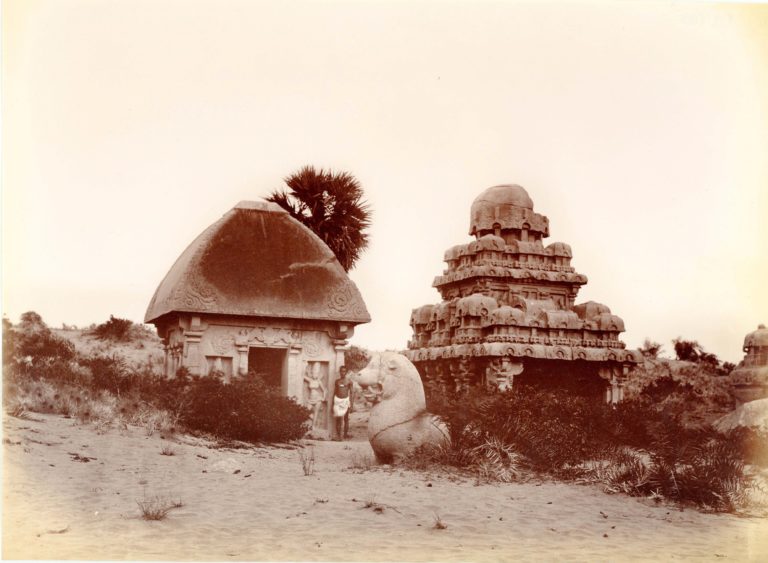
[Photo.12/(017)] The Seven Pagodas [Mamallapuram], the Split Temple [Bhima Ratha]
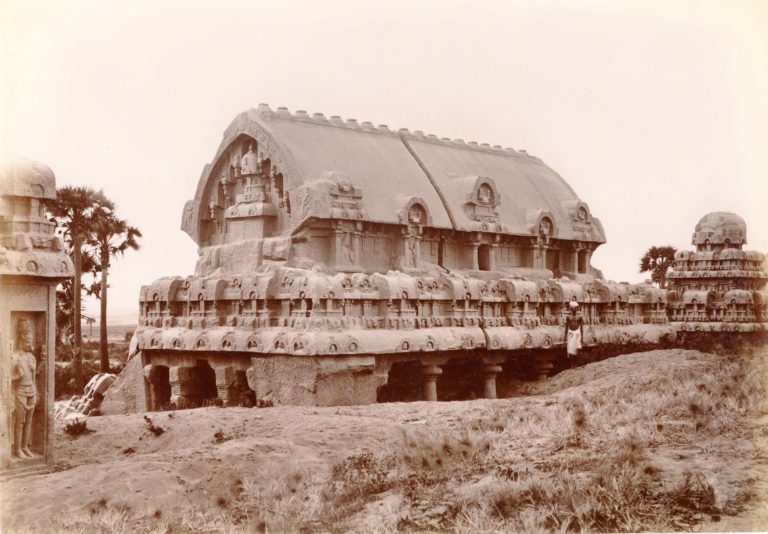
General view of the Bhima Ratha monolithic temple. By: Nicholas & Co., ca. 1880
[Photo.12/(018)] The Seven Pagodas [Mamallapuram], the Ganesa Temple, a very elegant structure
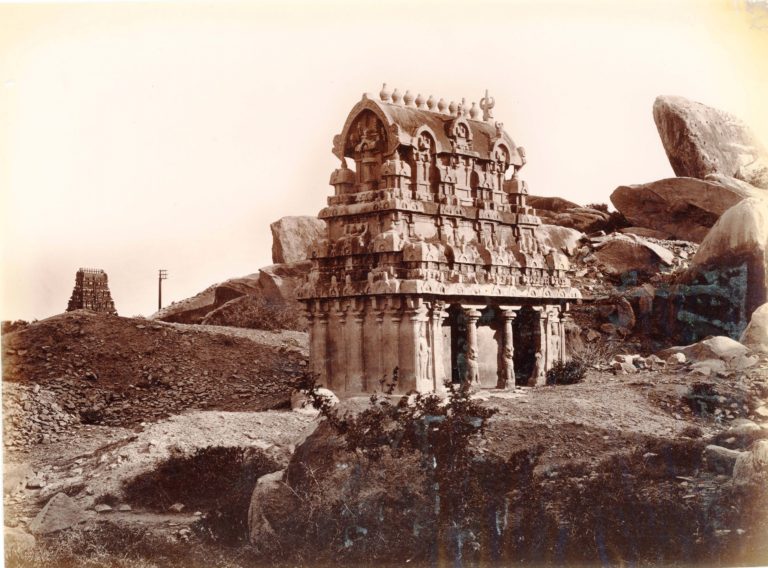
General view of the Ganesha Ratha. By: Nicholas & Co., ca. 1880.
[Photo.12/(019)] The Seven Pagodas [Mamallapuram], Yemopooram Temple [Mahishamardini Cave Temple]
The Seven Pagodas [Mamallapuram], Yemopooram Temple [Mahishamardini Cave Temple]. By: Nicholas & Co., ca. 1880.
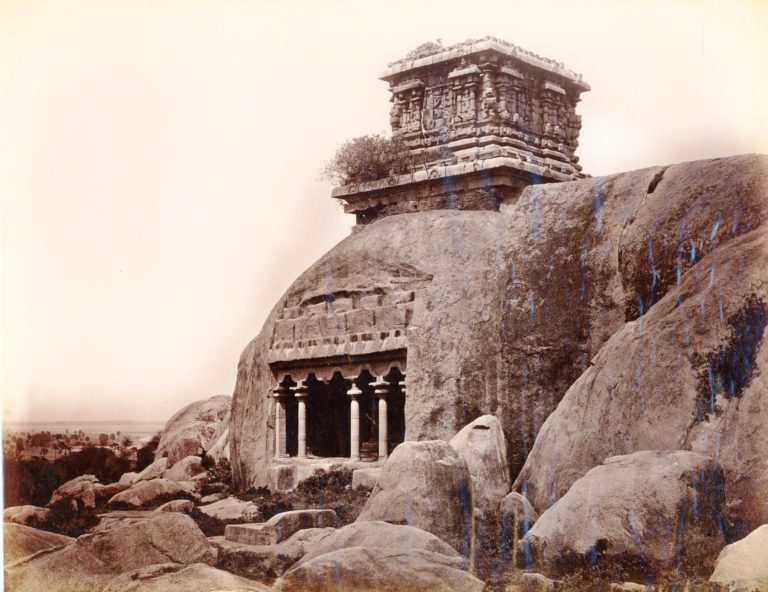
[Photo.12/(020)] The Seven Pagodas [Mamallapuram], Woolacalundha Temple

General view of the rock-cut temple. By: Nicholas & Co., ca. 1880
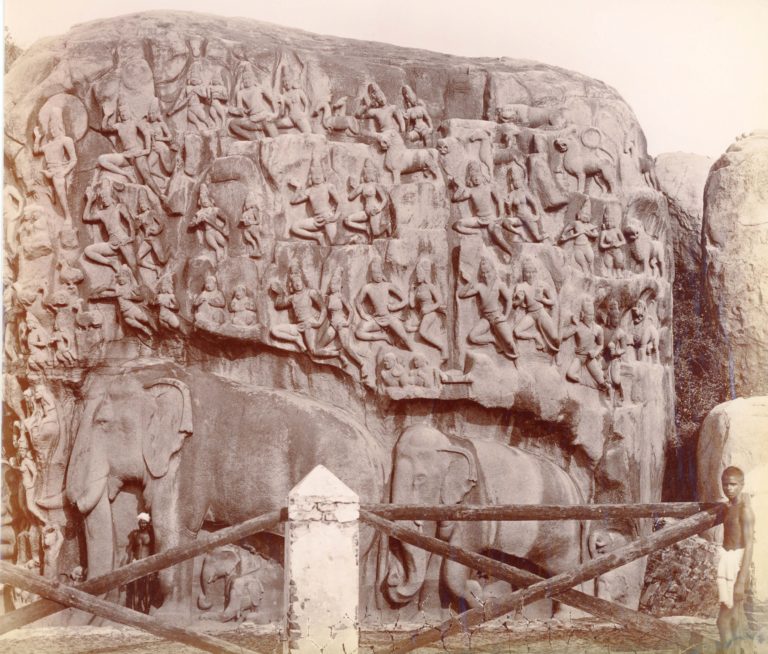
[Photo.12/(021)] The Seven Pagodas [Mamallapuram], the Butter Stone [Krishna’s Butterball]
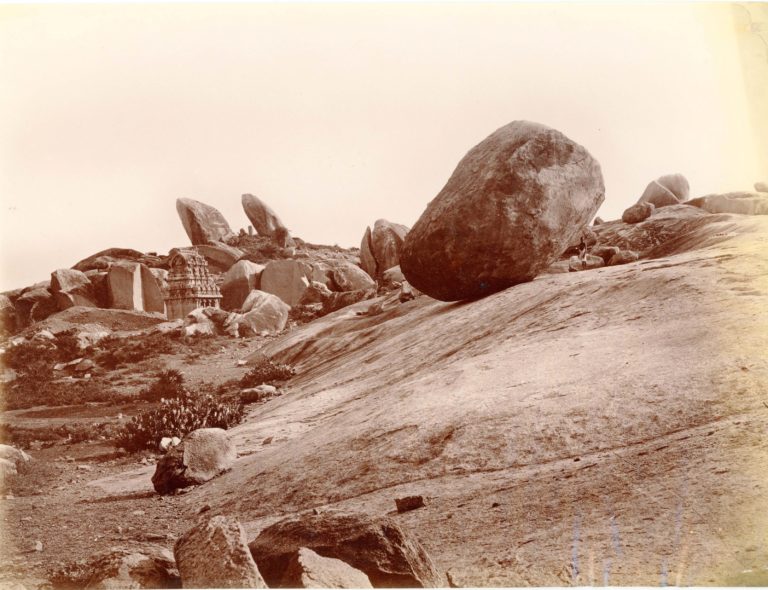
View of the massive boulder known as Krishna’s Butterball, with the Ganesha Temple visible in the background. By: Nicholas &…
[Photo.12/(022)] The Seven Pagodas [Mamallapuram], nearer view of the left portion of the carvings [Arjuna’s Penance]
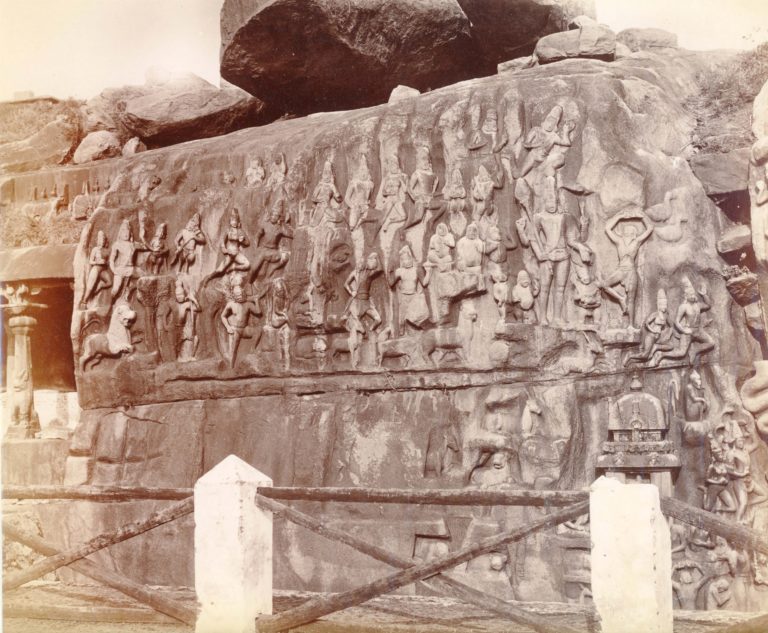
View of the sculpted rock face. This print joins up with print 23 to form an overall view of the…
[Photo.12/(023)] The Seven Pagodas [Mamallapuram], nearer view of the left portion of the carvings [Arjuna’s Penance]
Showing the right-hand portion of the sculpted rock face, which joins up with print 22 to form an overall view….
[Photo.12/(024)] The Seven Pagodas [Mamallapuram], Vishnu Trivikrama [Varaha Cave Temple?]
Rock-cut panel sculpture of Vishnu taking the three steps. By: Nicholas & Co., ca. 1880
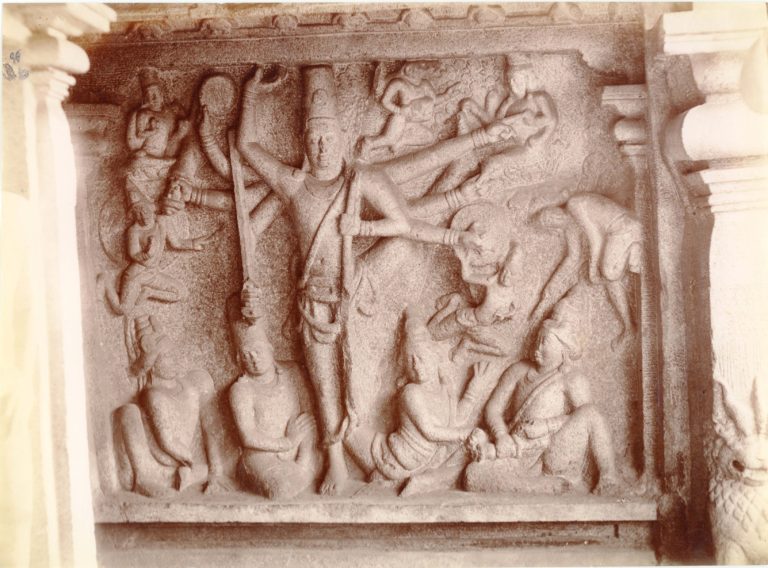
[Photo.12/(025)] The Seven Pagodas [Mamallapuram], the conflict between Durga and the evil spirit Mahishasura [Mahishamardini Cave Temple]
Rock-cut sculpture panel. By: Nicholas & Co., ca. 1880
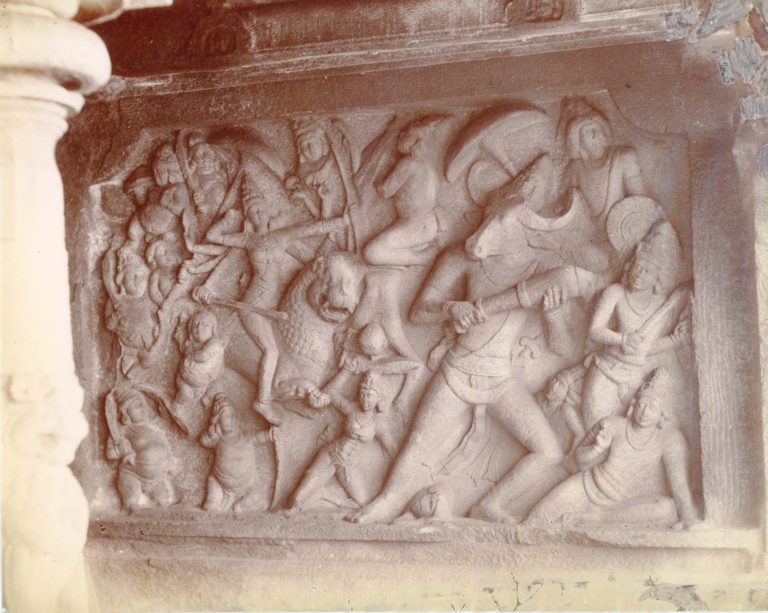
[Photo.12/(026)] The Seven Pagodas [Mamallapuram], the herds of the cowherd Nunda in Kristna’s Choultry
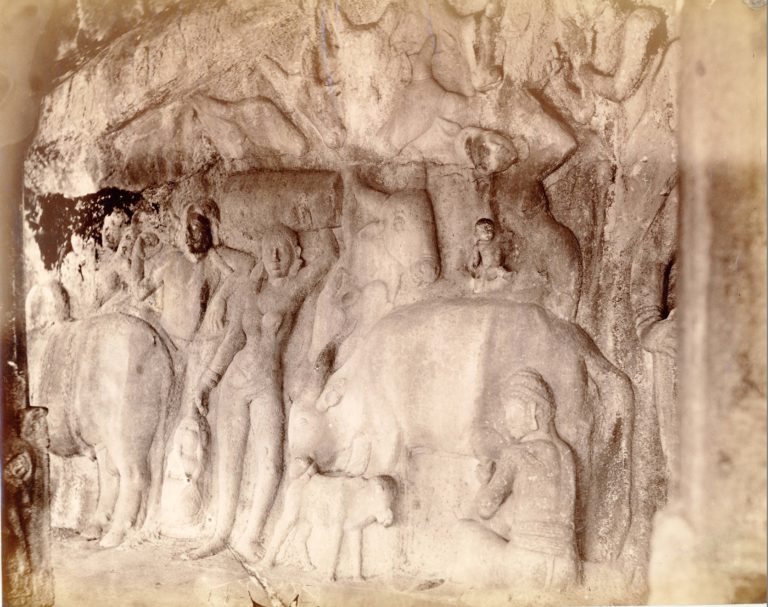
Rock-cut sculpture panel. By: Nicholas & Co., ca. 1880
[Photo.12/(027)] The Seven Pagodas [Mamallapuram], the Shore Temple
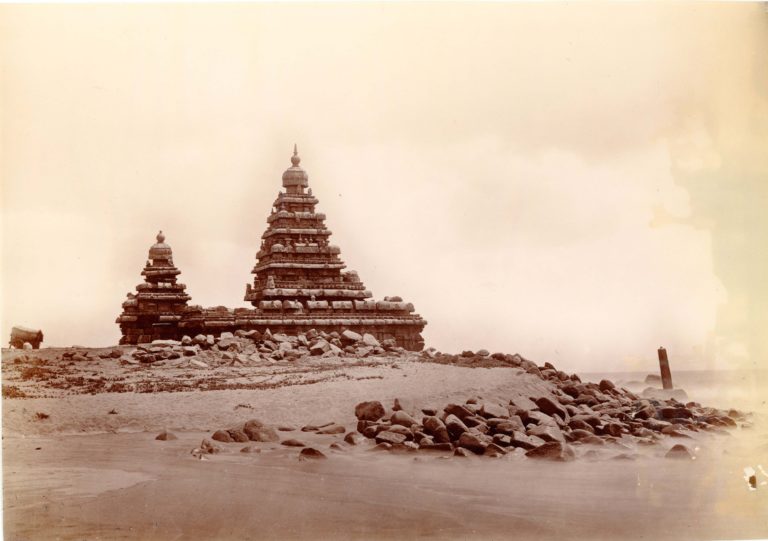
General view from the water’s edge. By: Nicholas & Co., ca. 1880
[Photo.13/(001)] Tomb of Mahomed Ghaus, Gwalior Fort
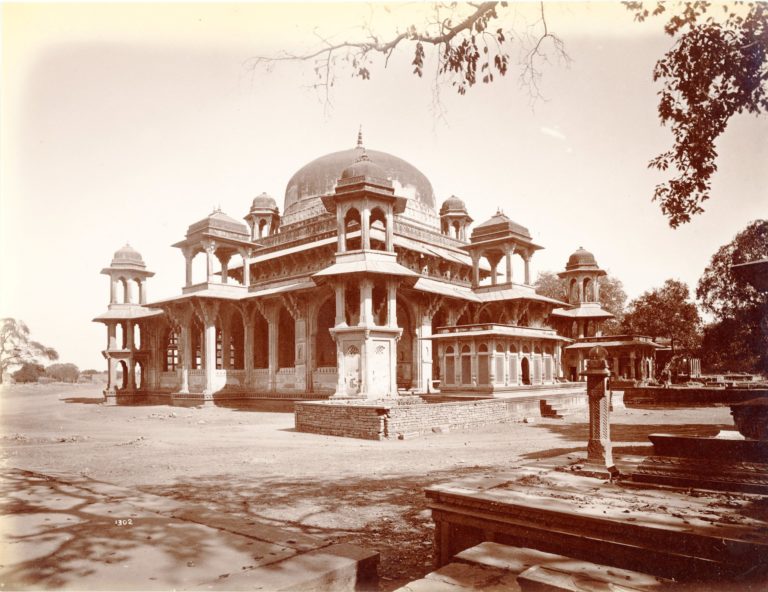
Tomb of Mahomed Ghaus, Gwalior Fort. 1880s, photograph by Lala Deen Dayal. Click on the image to expand.
[Photo.13/(002)] Interior of North Room, Man Mandir, Gwalior Fort
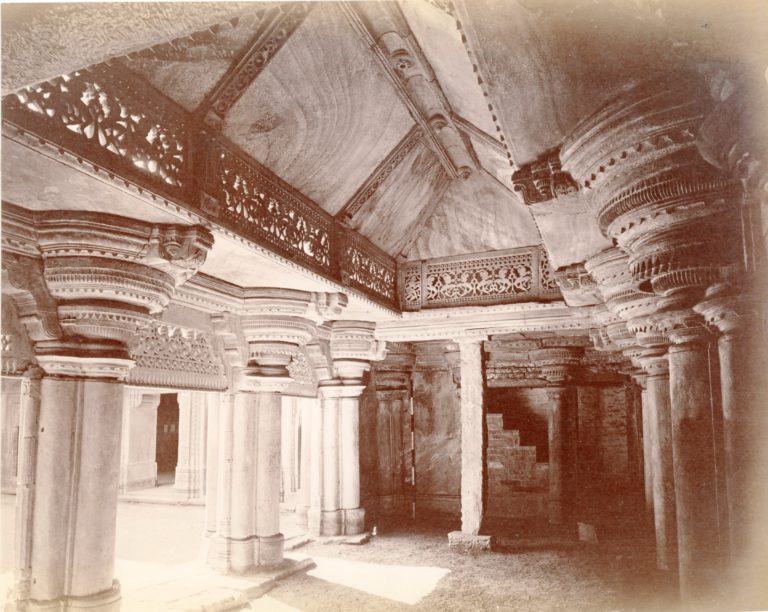
Interior of North Room, Man Mandir, Gwalior Fort. 1880s, photograph by Lala Deen Dayal. Click on the image to expand.
[Photo.13/(003)] Sas Bahu Temple, Gwalior Fort
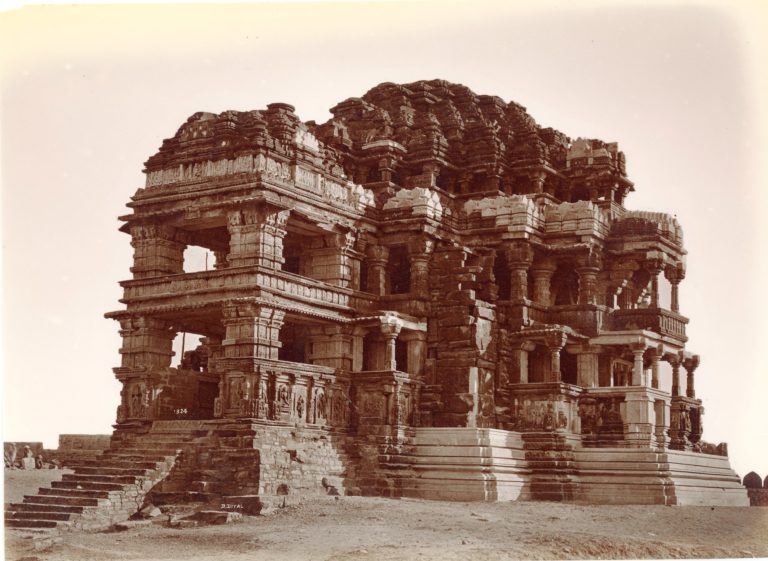
Sas Bahu Temple, Gwalior Fort. 1880s, photograph by Lala Deen Dayal. Click on the image to expand.
[Photo.13/(004)] Teli-ka-Mandir, Gwalior Fort
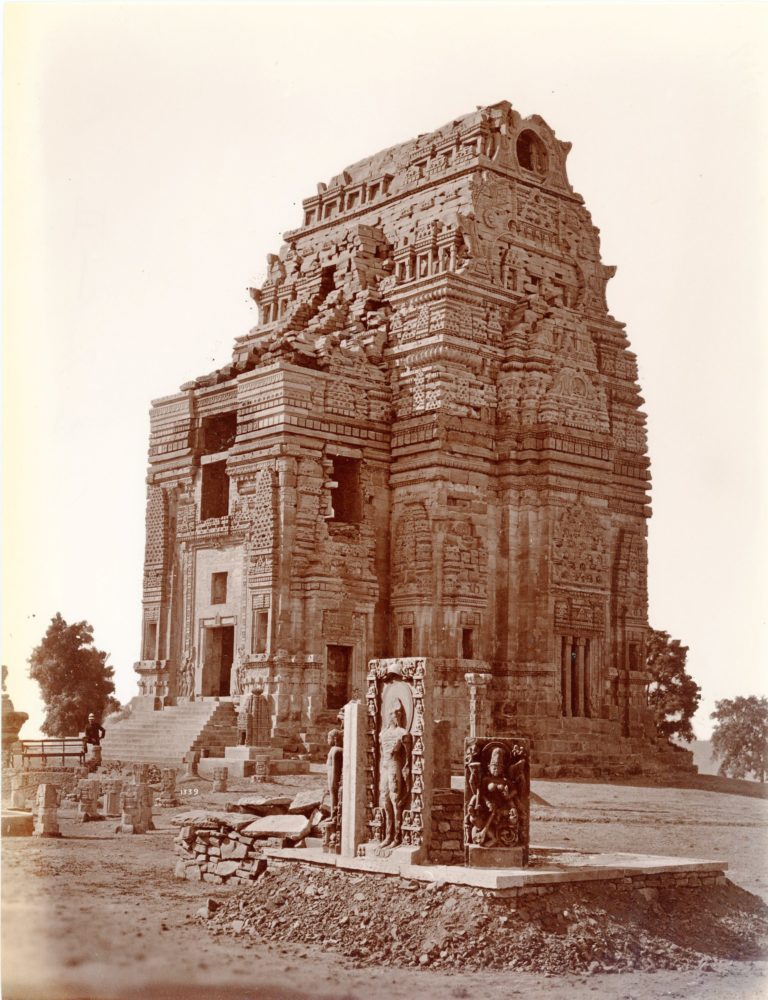
General view of the temple in the process of restoration, with sculptures displayed on plinths in the foreground. Reproduced as…
[Photo.13/(005)] Centre archway of Arhai-din-ka-Jhonpra, Ajmer
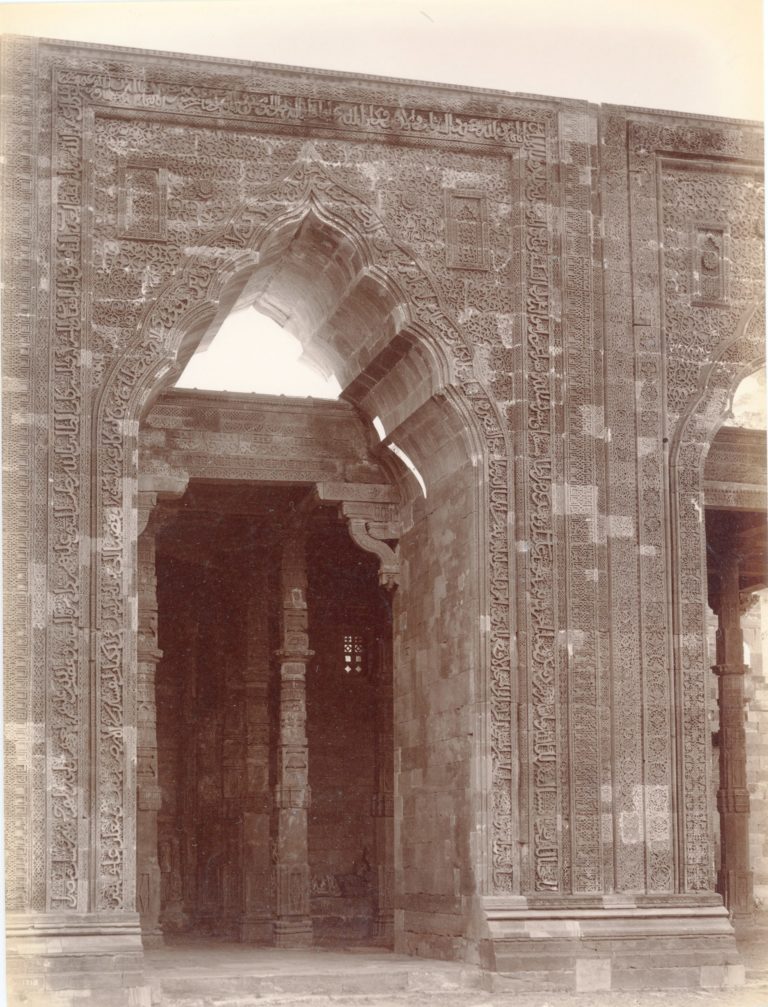
Centre archway of Arhai-din-ka-Jhonpra, Ajmer. 1880s, photograph by Lala Deen Dayal. Click on the image to expand.
[Photo.13/(006)] View of Durgah, Ajmer
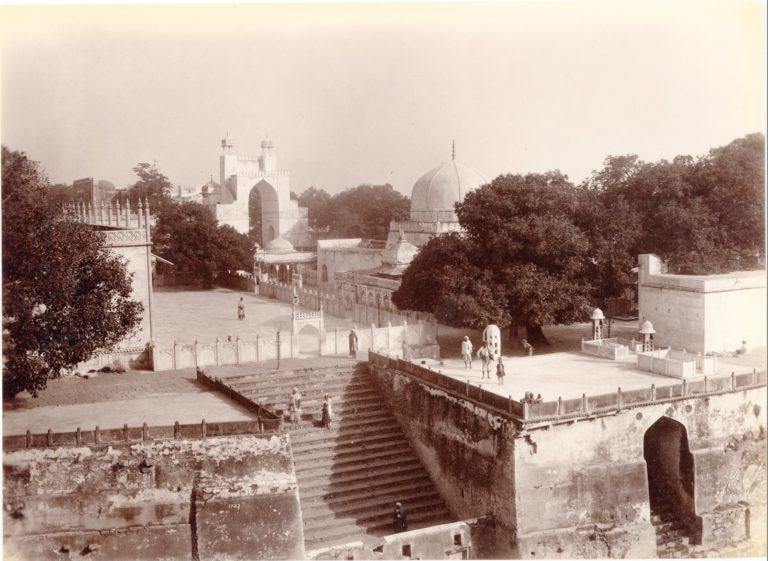
View of Durgah, Ajmer [Khwaja Muin-ud-din Chishti’s Dargah]. 1880s, photograph by Lala Deen Dayal. Click on the image to expand.
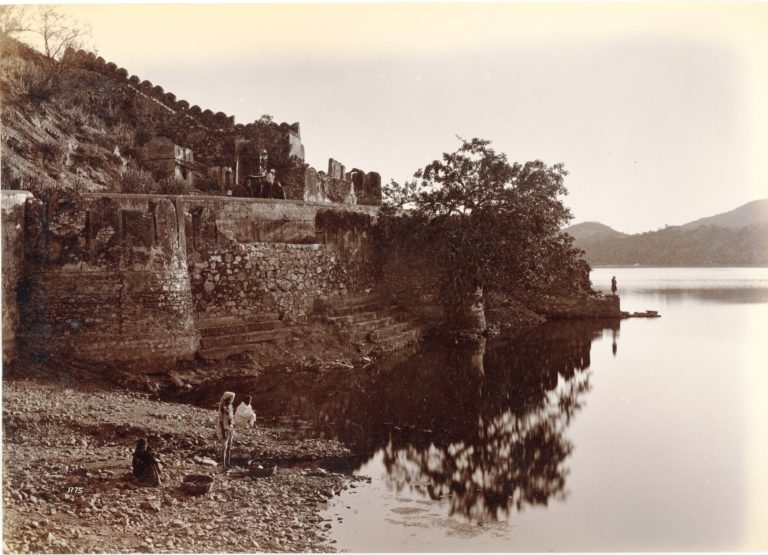
[Photo.13/(007)] Anna Sagor Lake, Ajmer
Anna Sagor Lake, Ajmer. 1880s, photograph by Lala Deen Dayal. Click on the image to expand.
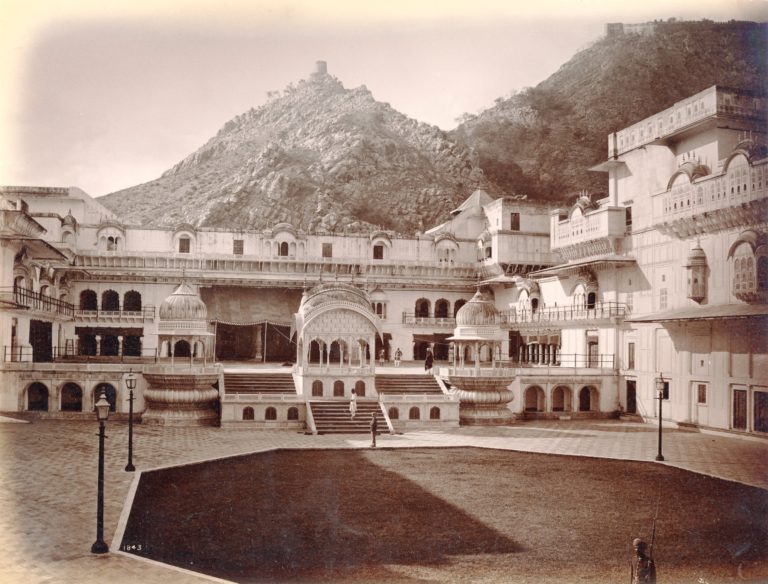
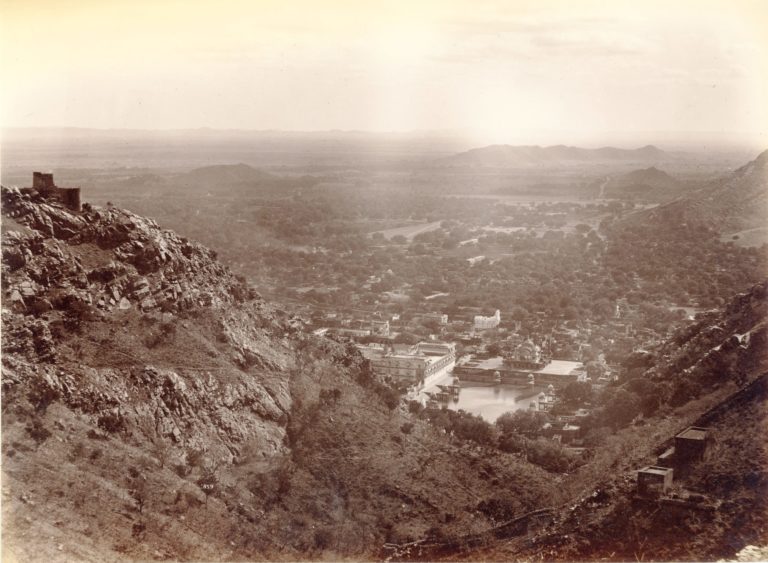
[Photo.13/(008)] City view from the Palace, Amber
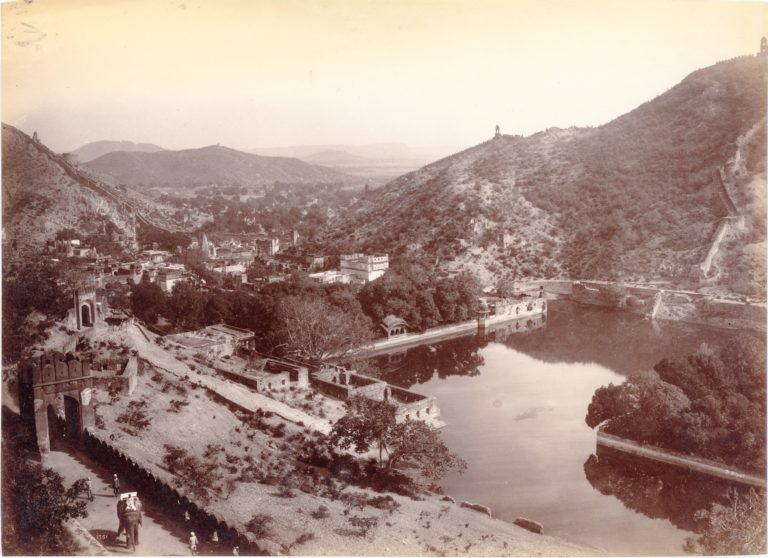
City view from the Palace, Amber. 1880s, photograph by Lala Deen Dayal. Click on the image to expand.
[Photo.13/(009)] Street view, Jaipur
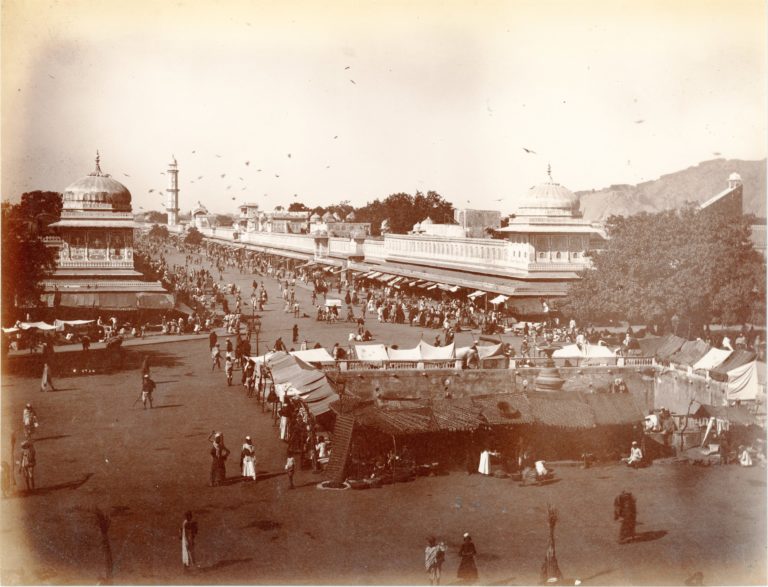
Street view, Jaipur. 1880s, photograph by Lala Deen Dayal. Click on the image to expand.
[Photo.13/(010)] The Palace, Amber
The Palace, Amber. 1880s, photograph by Lala Deen Dayal. Click on the image to expand.
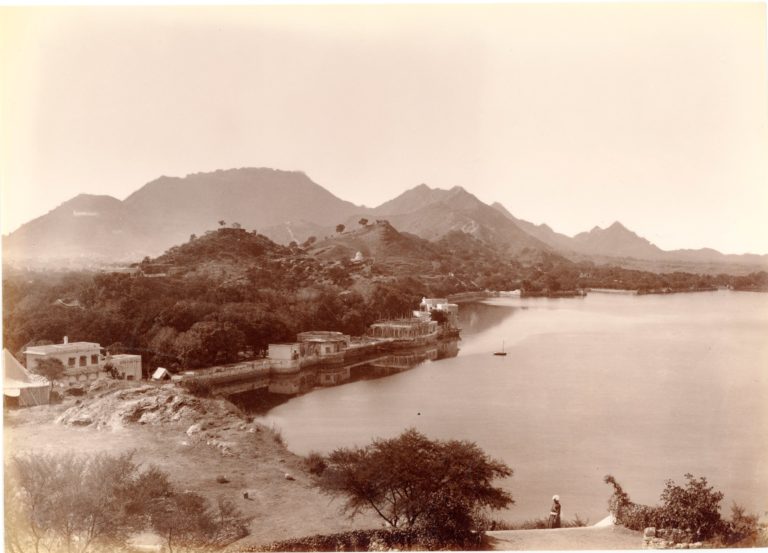
[Photo.13/(011)] North corner of the Amber Lake
North corner of the Amber Lake. 1880s, photograph by Lala Deen Dayal. Click on the image to expand.
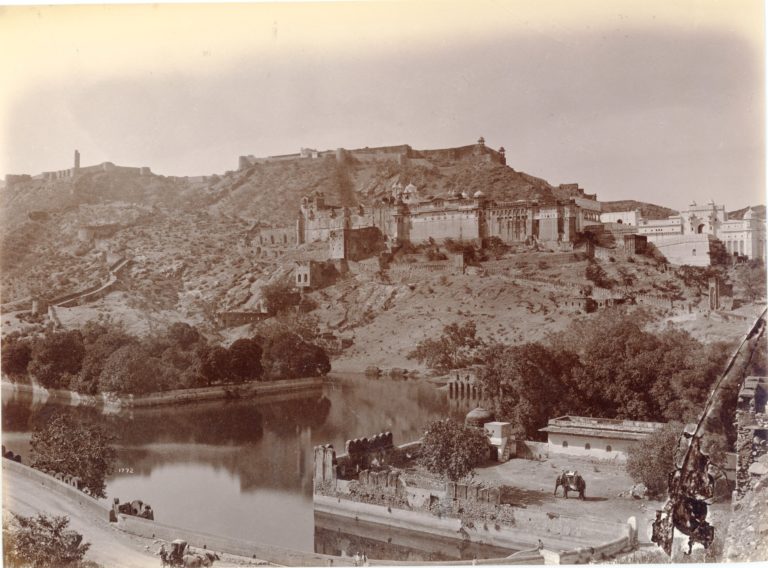
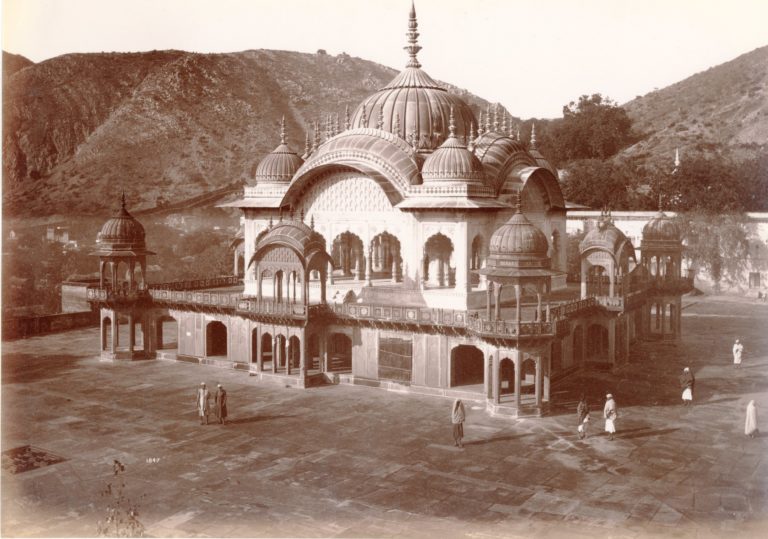
[Photo.13/(012)] Jaipur Palace

Jaipur Palace. 1880s, photograph by Lala Deen Dayal. Click on the image to expand.
[Photo.13/(013)] Inside the City Palace, Alwar
Inside the City Palace, Alwar. 1880s, photograph by Lala Deen Dayal. Click on the image to expand.
[Photo.13/(014)] Marble Cenotaph of the Maharaja, Alwar
Marble Cenotaph of the Maharaja, Alwar. 1880s, photograph by Lala Deen Dayal. Click on the image to expand.
[Photo.13/(015)] City view, Alwar
City view, Alwar. 1880s, photograph by Lala Deen Dayal. Click on the image to expand.
[Photo.13/(017)] The Water Palace [Gopal Bhavan], Dig
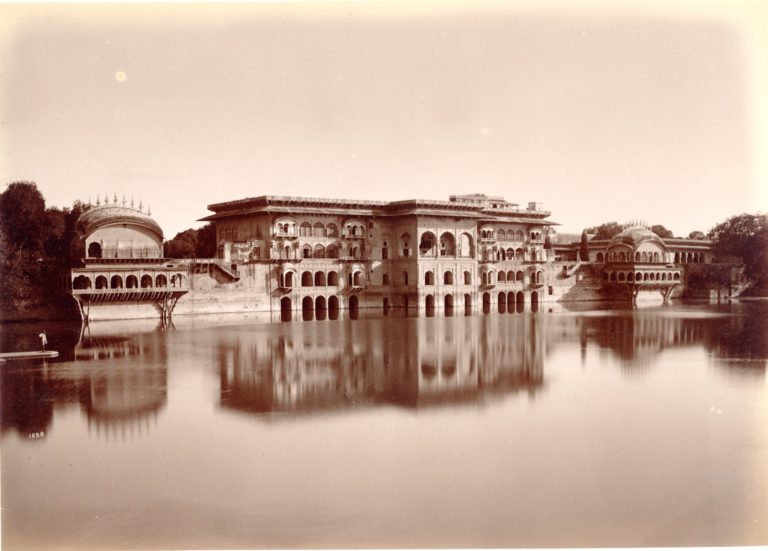
View looking across the Gopal Sagar tank towards the west facade of the Gopal Bhavan, flanked by the Savan Bhavan…
[Photo.13/(018)] Lahore Gate of the Fort, Delhi
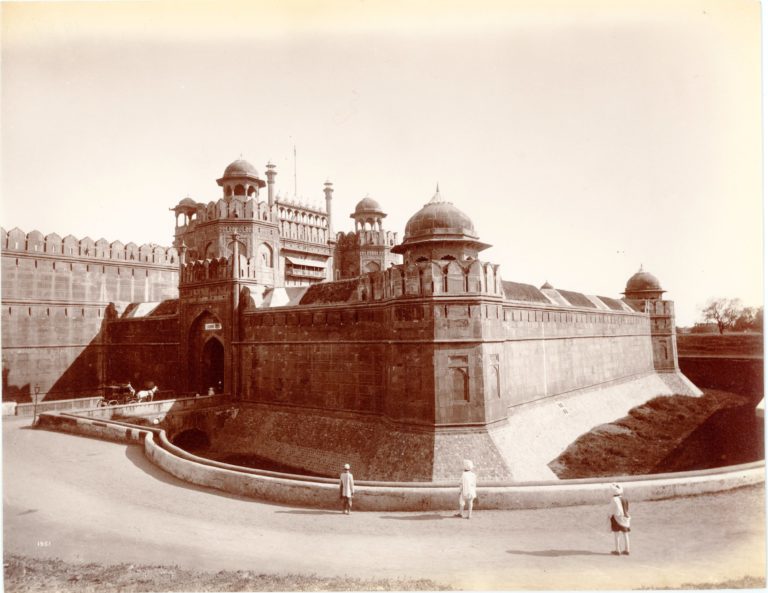
Lahore Gate of the Fort, Delhi. 1880s, photograph by Lala Deen Dayal.Click on the image to expand.
[Photo.13/(019)] Interior view of the Sumon Barj, Delhi
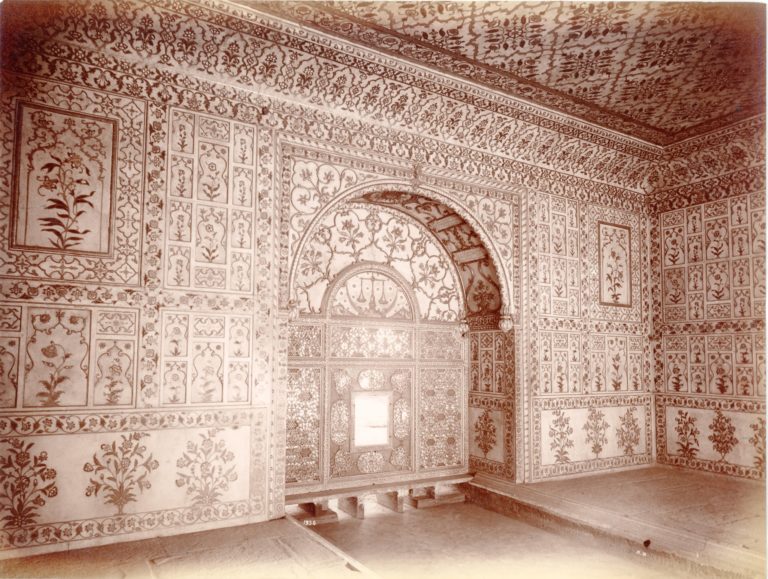
Interior view of the Diwan-i-Khas, showing pietra dura work and pierced screen. 1880s, photograph by Lala Deen Dayal. Click on…
[Photo.13/(020)] The Kashmiri Gate, Delhi
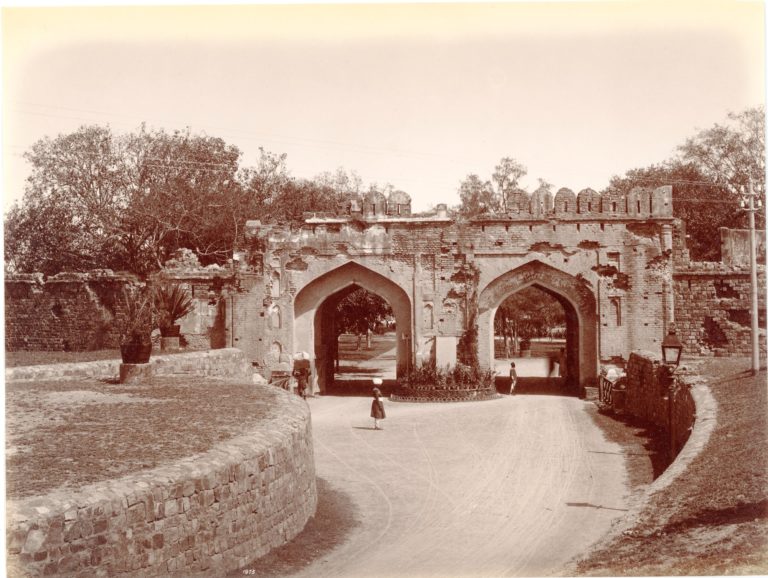
The Kashmiri Gate, Delhi. 1880s, photograph by Lala Deen Dayal. Click on the image to expand.
[Photo.13/(021)] The Qutb Minar, Delhi
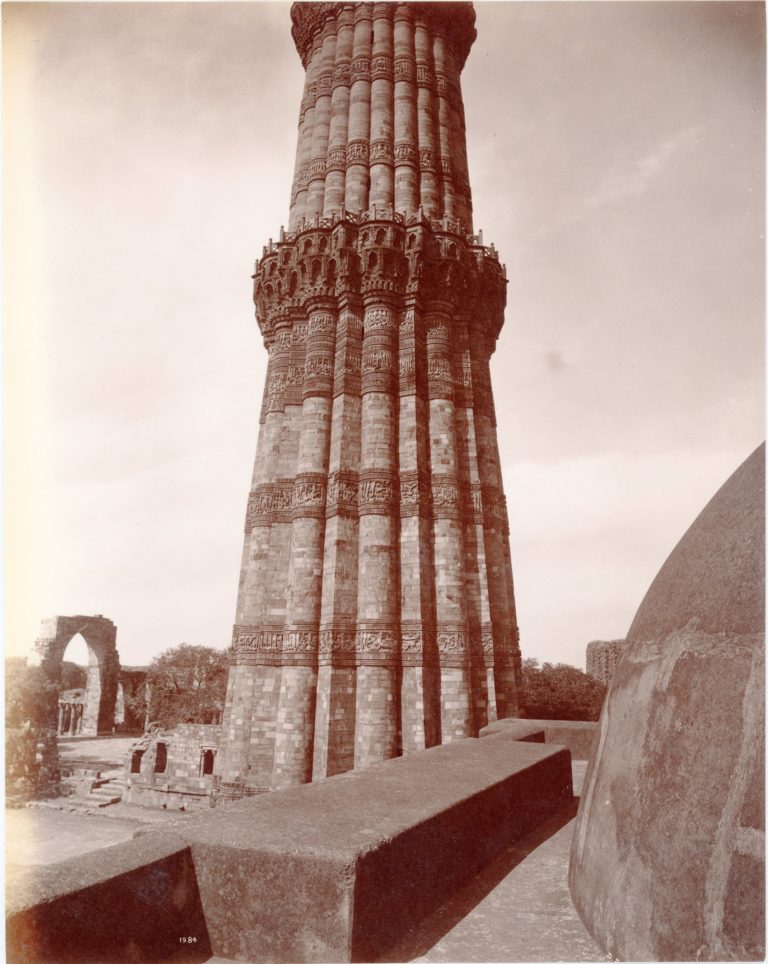
View from the base up to the second gallery of the Qutb Minar, photographed from the roof of the Alai…
[Photo.14/(001)] View looking towards the River Hugli from the Ochterlony Monument, Calcutta
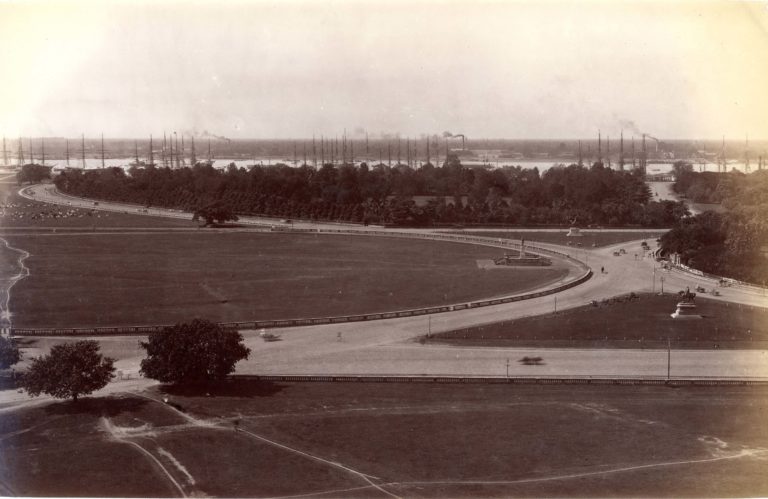
View looking westwards across the Maidan from the top of the Ochterlony Monument.
[Photo.14/(003)] Lankeshvara Shrine, Kailasanatha Rock-cut Temple, Ellora

Listed in the Bourne and Shepherd catalogue as ‘The Ar-Lanka Cave Temple of Kylas’.
[Photo.14/(004)] Dherwada Cave Temple, Ellora
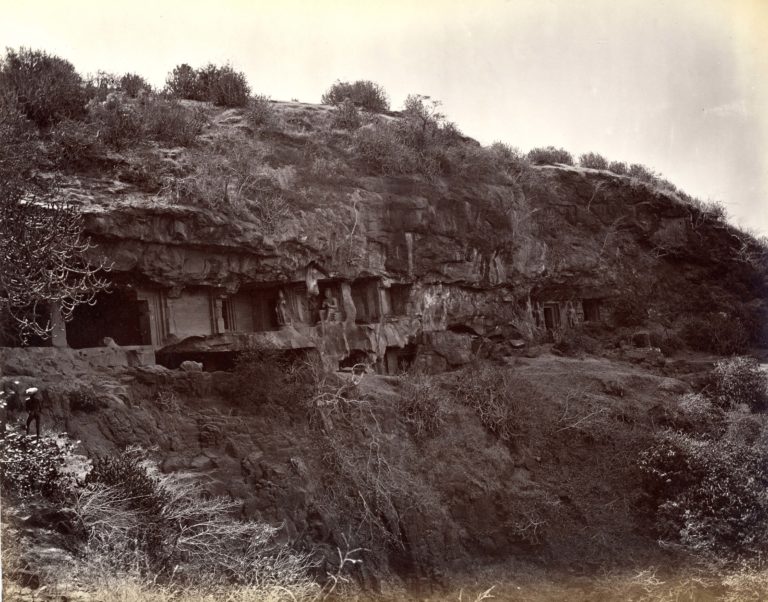
View of entrance to the Buddhist Dherwada Cave (Ellora Cave IX). Listed in the Bourne and Shepherd catalogue as ‘General…
[Photo.14/(005)] Side porch of rock-cut temple with sculptured figures
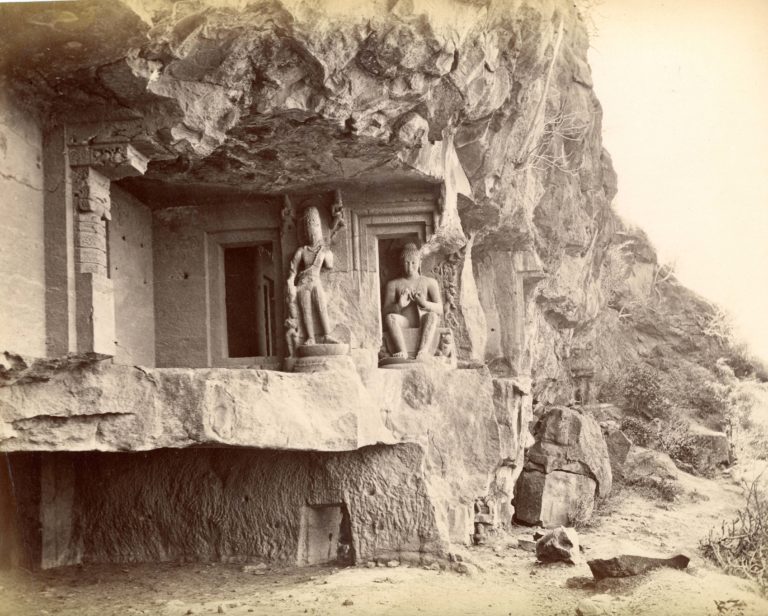
Side porch of rock-cut temple with sculptured figures, with seated Buddha on right and a dvarapala on left between two…
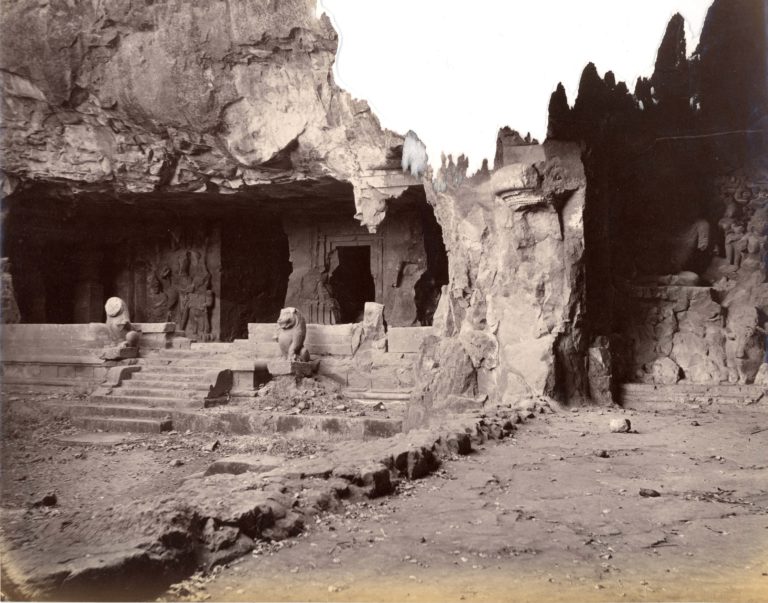
[Photo.14/(006)] Elephanta Cave Temple
View of the Shiva Temple. Listed in the Bourne and Shepherd catalogue as ‘General view of the Great cave of…
[Photo.14/(007)] Entrance to cave temple, Elephanta
Listed in the Bourne & Shepherd catalogue as ‘Left wing, or Lion Cave’.
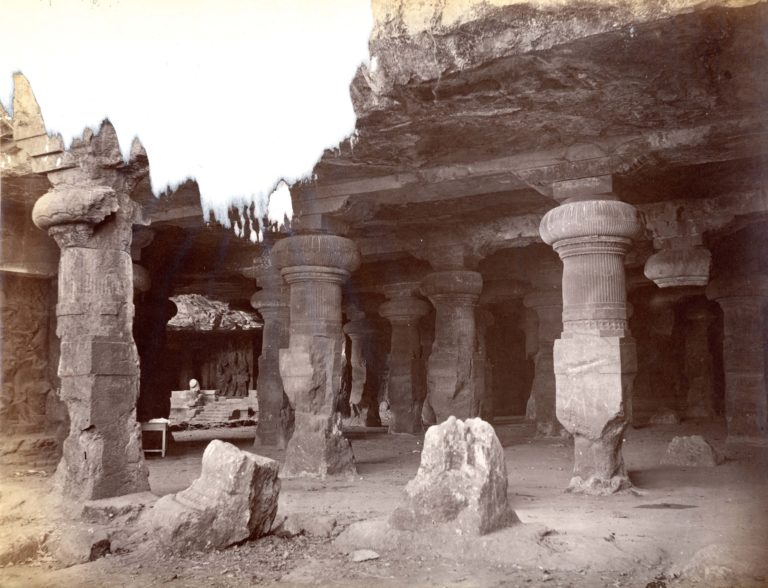
[Photo.14/(008)] Interior of Elephanta Cave Temple

Listed in the Bourne and Shepherd catalogue as ‘View from Lion Cave, looking towards entrance’.
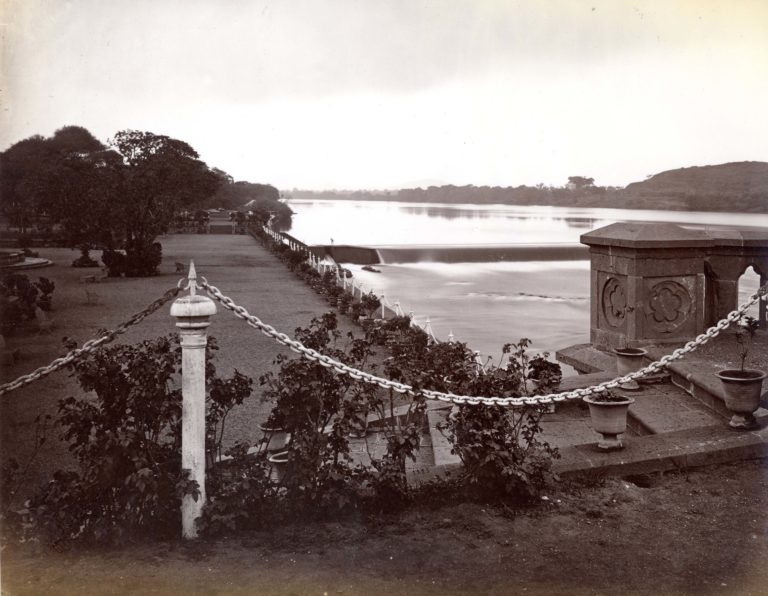
[Photo.14/(009)] The Bund Gardens, Poona
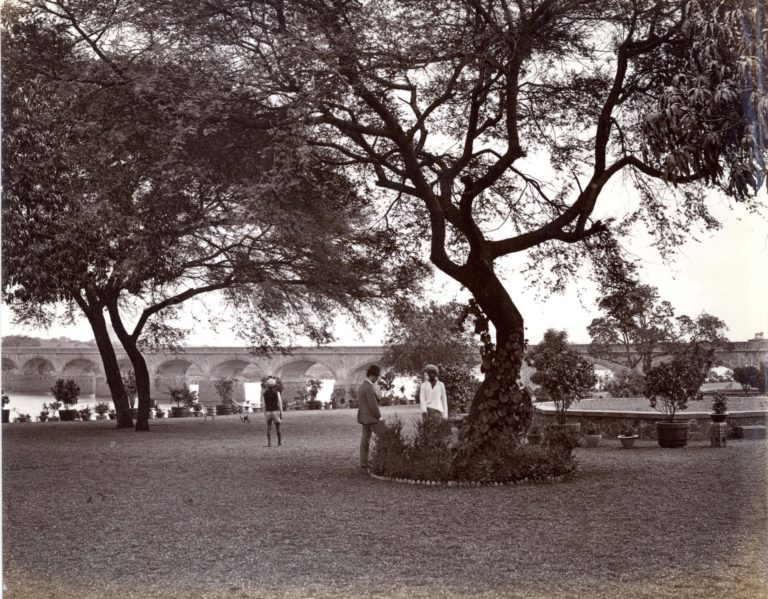
The Bund Gardens, Poona, looking towards the Fitzgerald Bridge
[Photo.14/(010)] View on the Bund at Poona
View from the Bund Gardens looking towards the stone bund across the river.
[Photo.14/(011)] Back Bay, Bombay
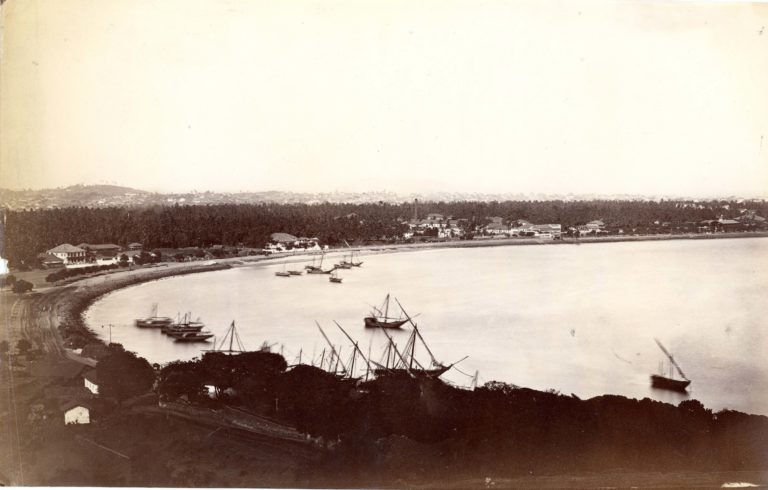
This view, looking across Back Bay from Malabar Hill towards the town, links up with print 12 to form a…
[Photo.14/(012)] Bombay from Malabar Hill
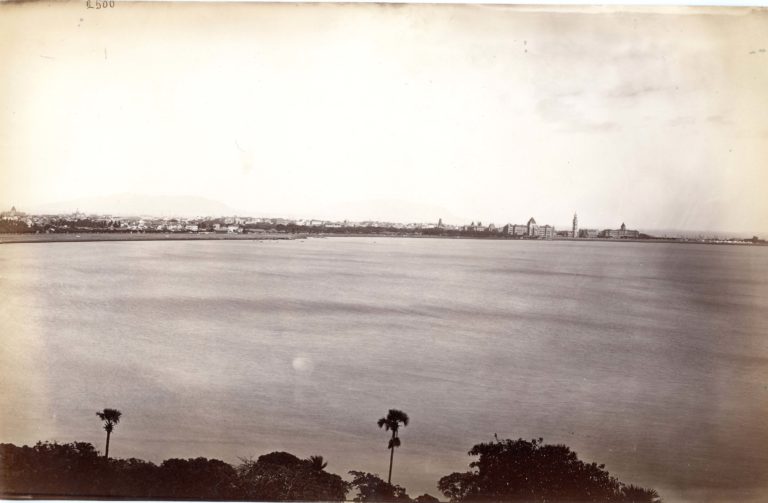
View looking south-east across Back Bay towards the town, with the University buildings and Secretariat visible in the distance. The…
[Photo.14/(013)] Malabar Hill from the Rajabai Tower, Bombay
View from the Rajabai Tower, looking across Back Bay towards Malabar Hill. This print joins up with print 14 to…
[Photo.14/(014)] Malabar Hill from the Rajabai Tower, Bombay
Continuation of print 13, forming a panoramic view of Malabar Hill.
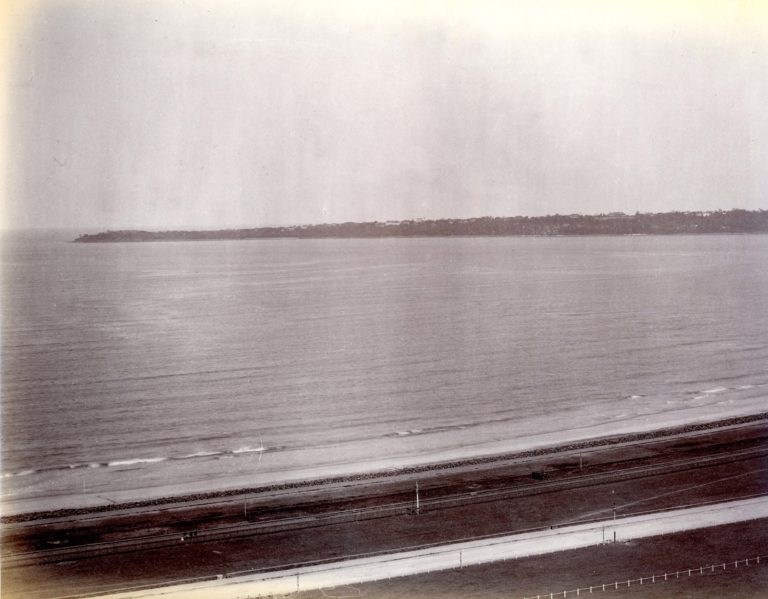
[Photo.14/(015)] Mahalakshmi Temple, Breach Candy, Bombay

General view of the temple and surrounding houses on the seashore at Breach Candy.
[Photo.14/(016)] Darjeeling
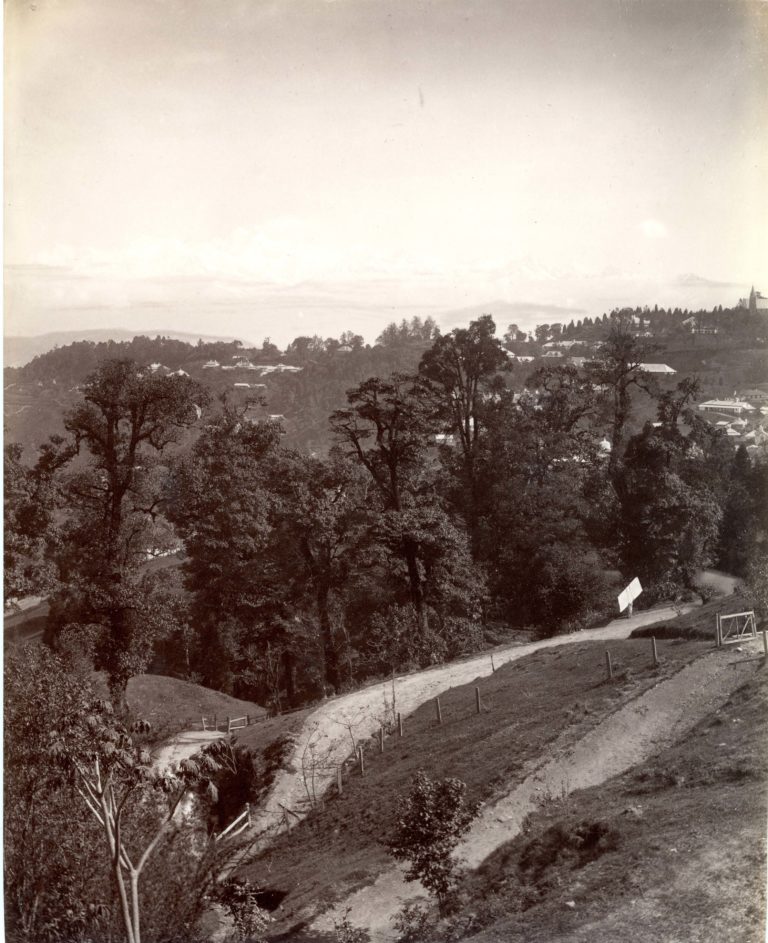
Joins up with print 17. Photograph uncredited, but possibly by Johnston & Hoffmann.
[Photo.14/(017)] Darjeeling

Joins up with print 16. Photograph uncredited, but possibly by Johnston & Hoffmann.
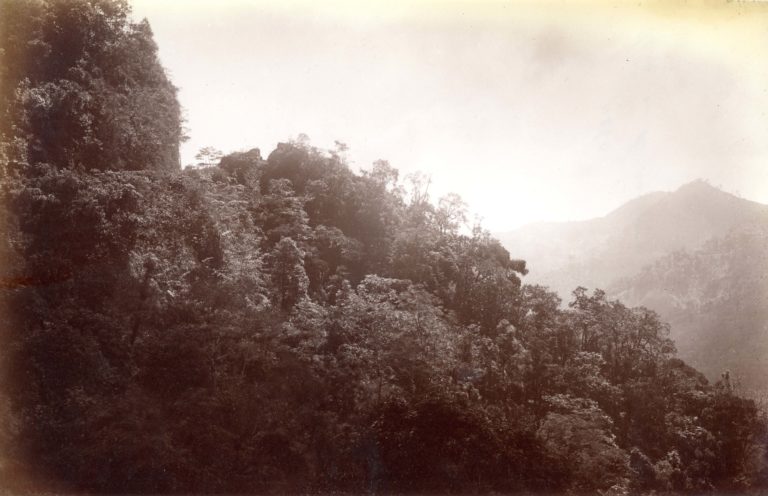
[Photo.14/(018)] Sunset on Kinchenjunga, from Darjeeling
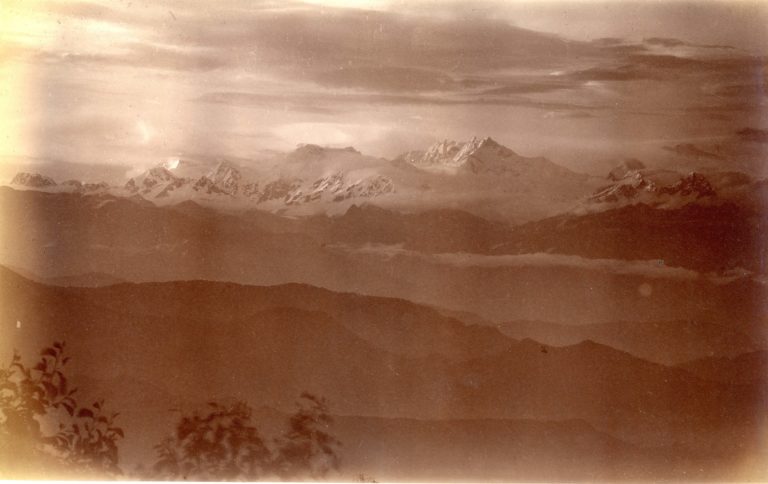
View looking towards the Himalayas from Darjeeling. Photograph uncredited, but possibly by Johnston & Hoffmann.
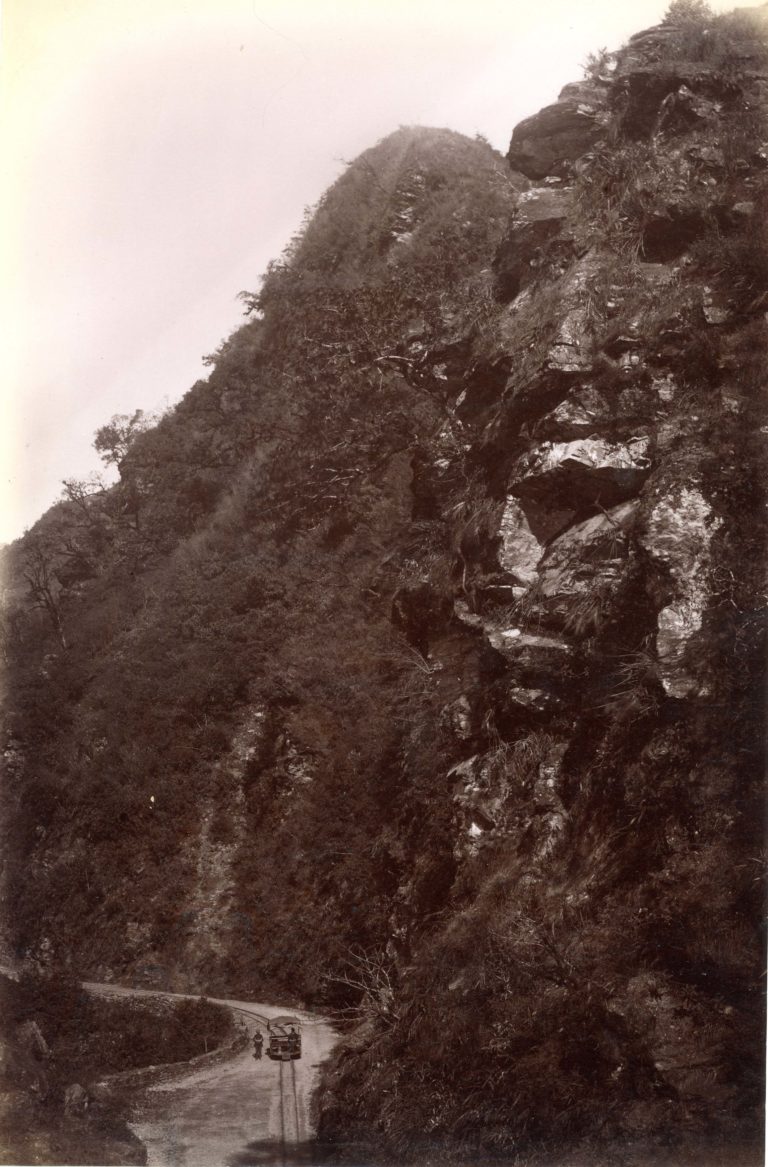
[Photo.14/(019)] Tista Valley
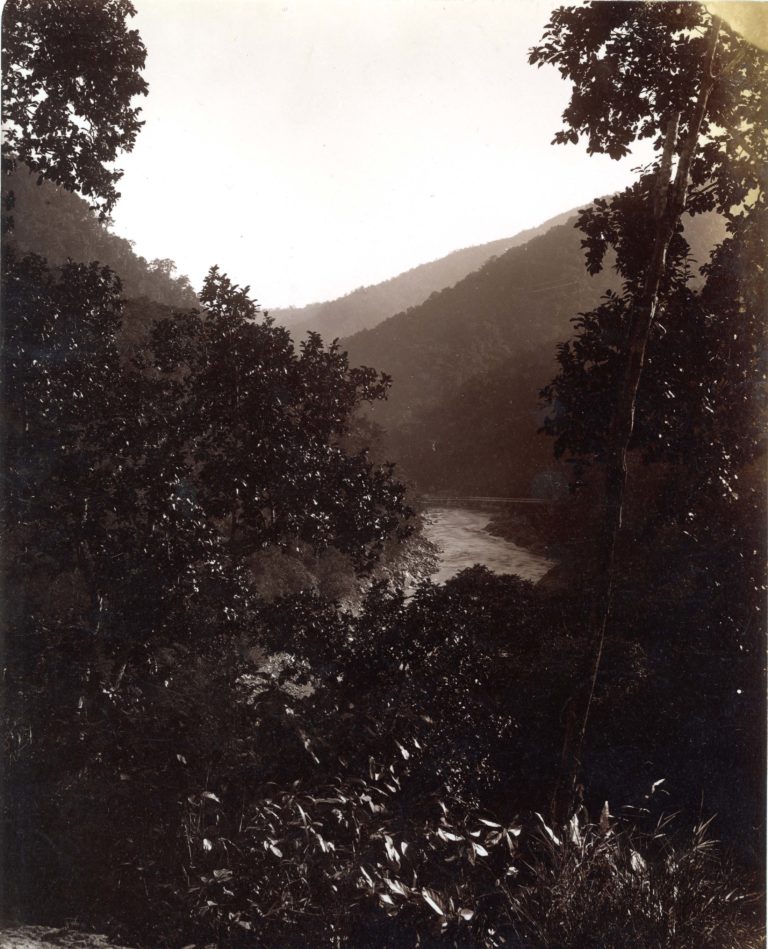
View of river and wooded hills. Photograph uncredited, but possibly by Johnston & Hoffmann.
[Photo.14/(022)] The railway view from Goomti Corner
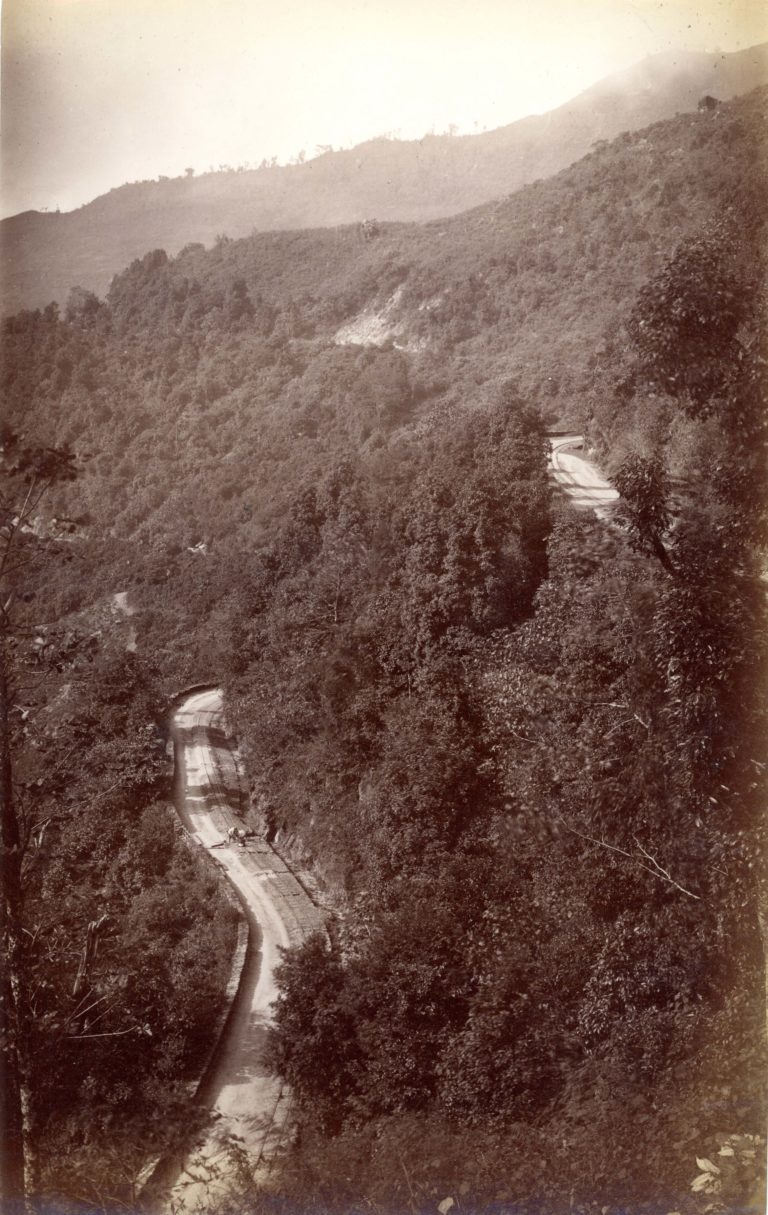
Photograph uncredited, but possibly by Johnston & Hoffmann.
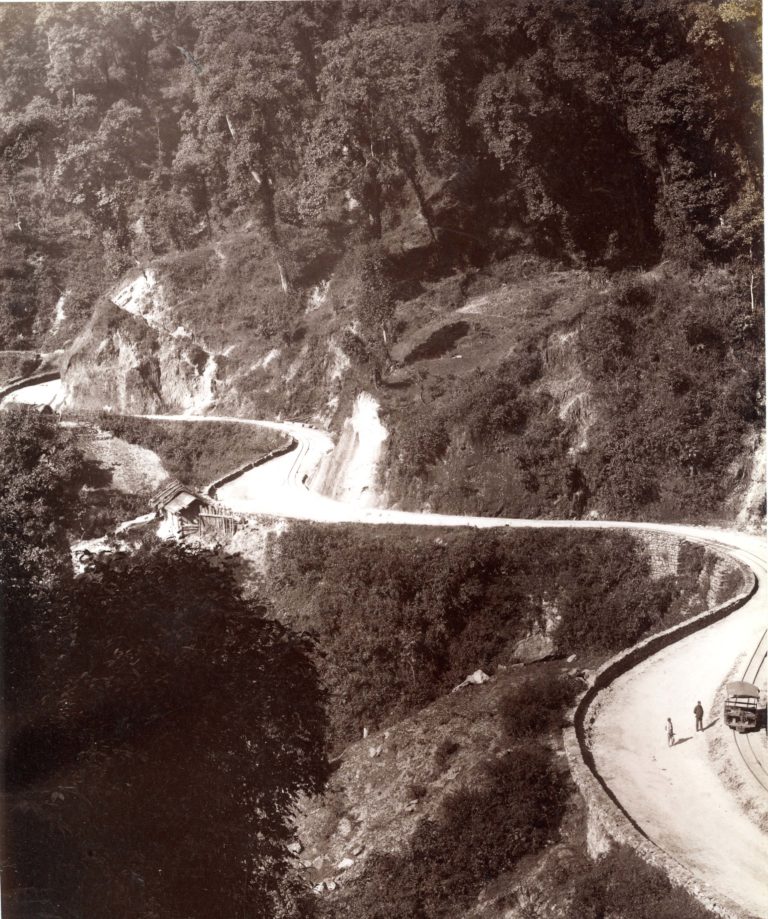
[Photo.14/(023)] View on the Darjeeling Hill Railway
Photograph uncredited, but possibly by Johnston & Hoffmann.
[Photo.22/(001)] Aftermath of a typhoon
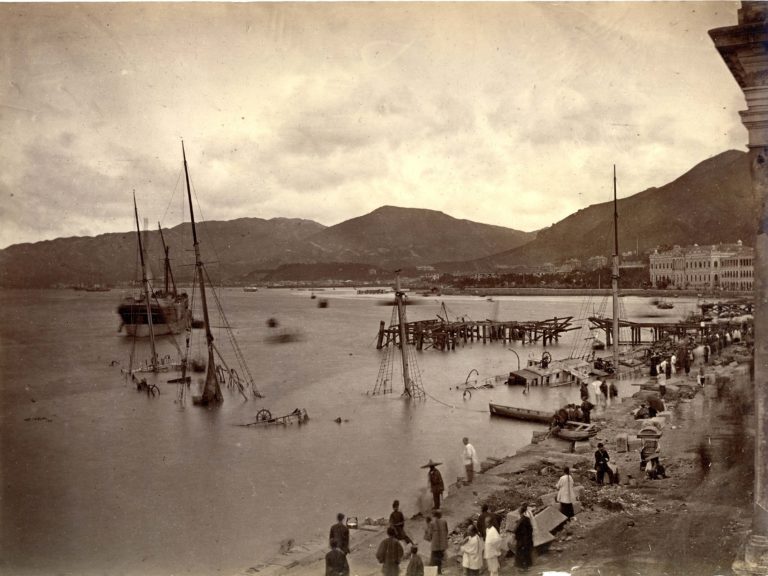
View looking along the Hong Kong waterfront after the typhoon of 1874, with wrecked vessels in the foreground near the…
[Photo.22/(002)] Waterfront after typhoon, 1874.
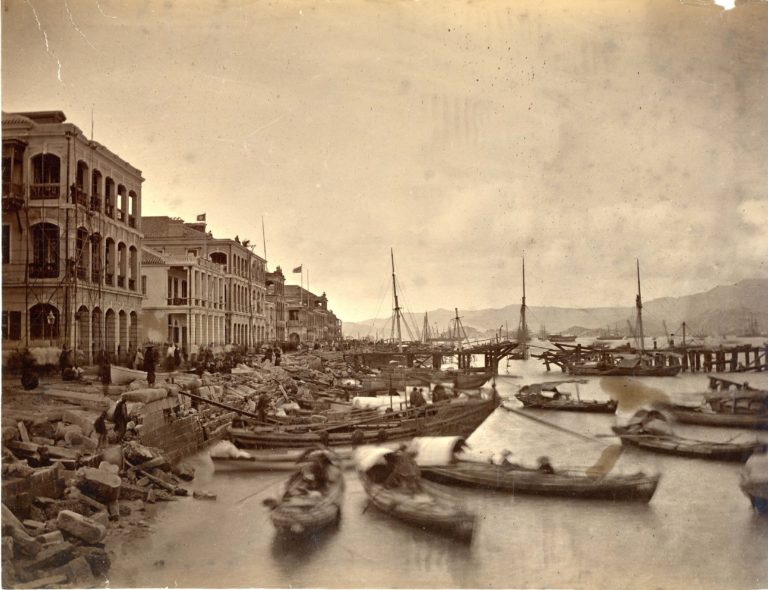
View looking along the Hong Kong waterfront after the typhoon of 1874. This view looks back towards the viewpoint of…
[Photo.22/(003)] Steamer, ashore after Typhoon
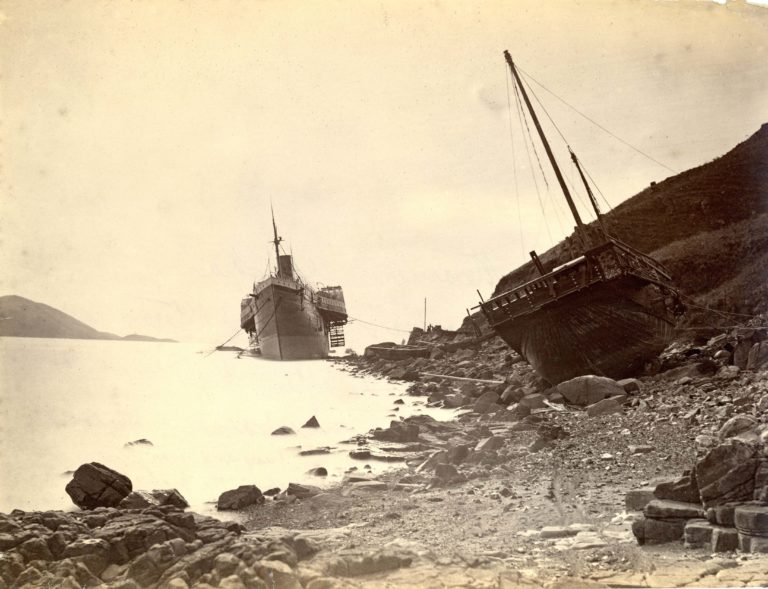
Bow view of the beached paddle steamer ‘Alaska’ after the Hong Kong Typhoon of 1874. Pencilled note on the reverse…
[Photo.22/(004)] Destroyed building after typhoon
View looking down onto the wrecked bungalow, which stood on a headland above the sea. -1874. Hong Kong Typhoon. By…
[Photo.22/(005)] Aberdeen Dock after typhoon
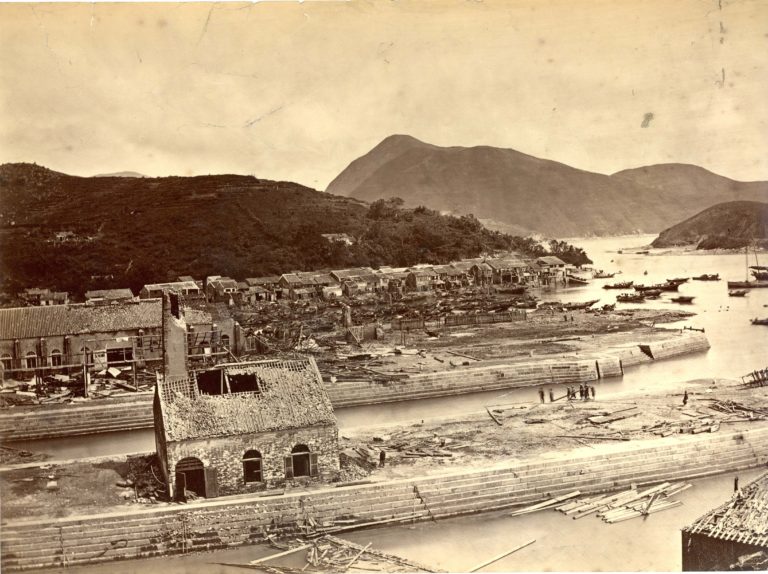
View looking down onto the dockyard, showing damage wrought by the typhoon. This print forms the right hand section of…
[Photo.22/(007)] Flagstaff at Victoria Peak after typhoon
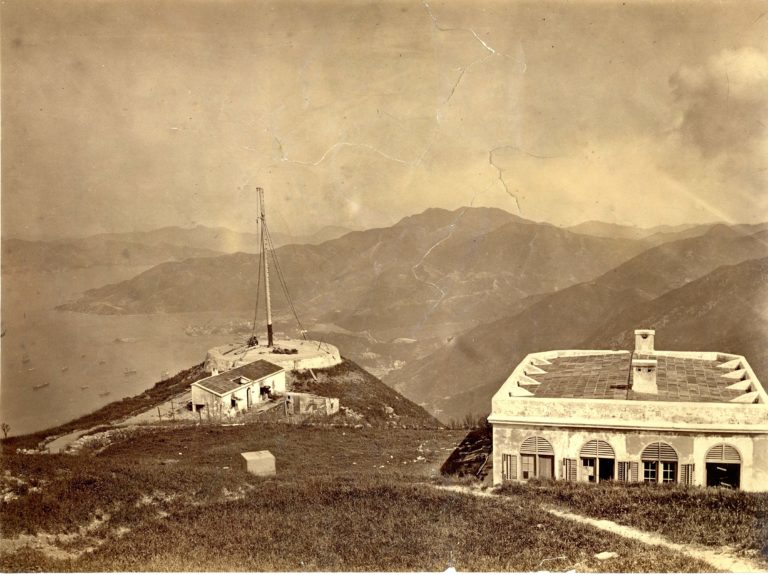
View looking down onto the damaged flagstaff and harbour below. Pencilled note on reverse of print reads: ‘Flagstaff at Victoria…
[Photo.22/(008)] Clubhouse, Hong Kong, opposite Post Office
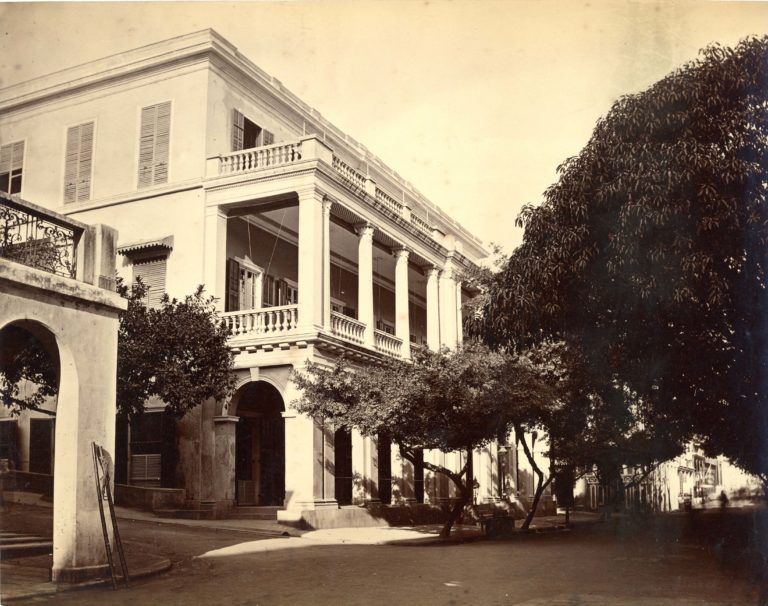
View of clubhouse from street. Photograph uncredited, but possibly by Lai Afong.
[Photo.22/(009)] Panoramic view of Hong Kong in two sheets
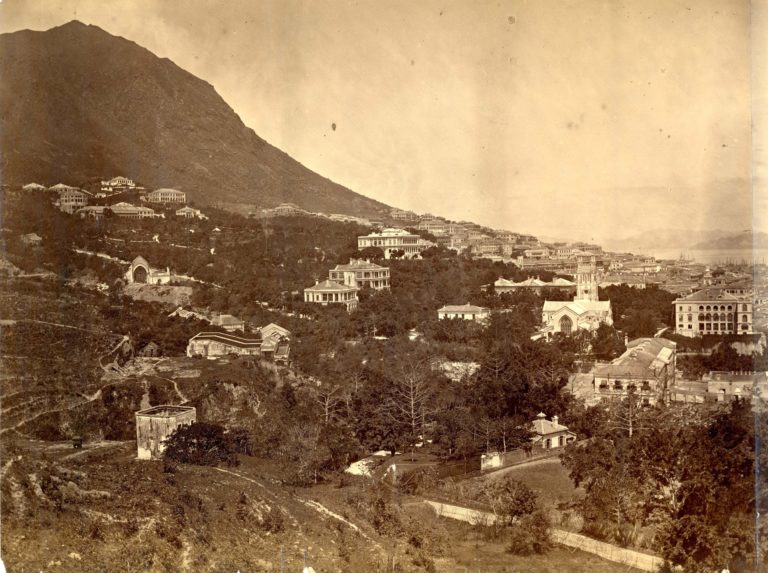
Panoramic view looking westwards along the Peak and over the harbour. A portion of the view at the bottom right-hand…
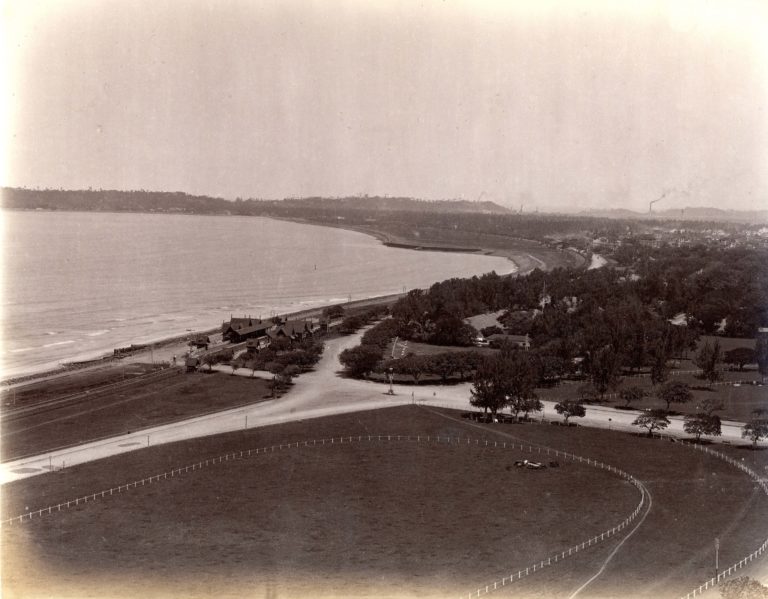
[Photo.22/(010)] Happy Valley Racecourse, Hong Kong
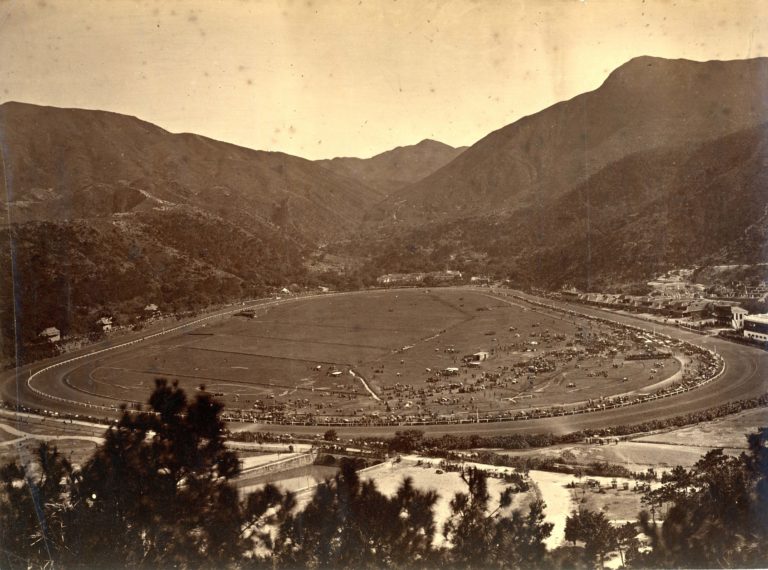
View looking down onto the racecourse, where a meeting is in progress.
[Photo.22/(011)] Cemetery, Hong Kong, Happy Valley. Naval Hospital on the hill
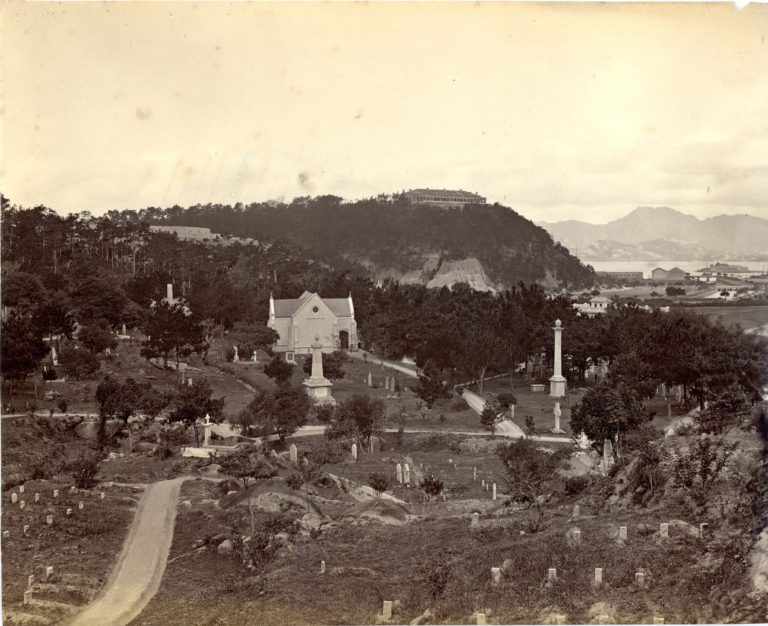
General view of Happy Valley Cemetery, with the chapel in the centre, and the Naval Hospital on the skyline in…
[Photo.22/(012)] Shipping in Hong Kong Harbour
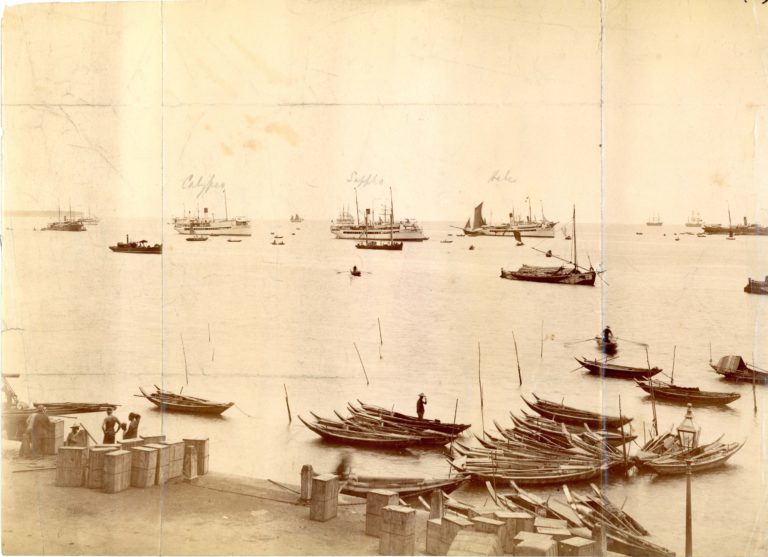
View from the wharf, looking towards shipping in the harbour. The names of three steamers – ‘Calypso’, ‘Sappho’ and ‘Hebe’…
[Photo.22/(013)] British naval vessel HMS Orion in dry dock, Hong Kong
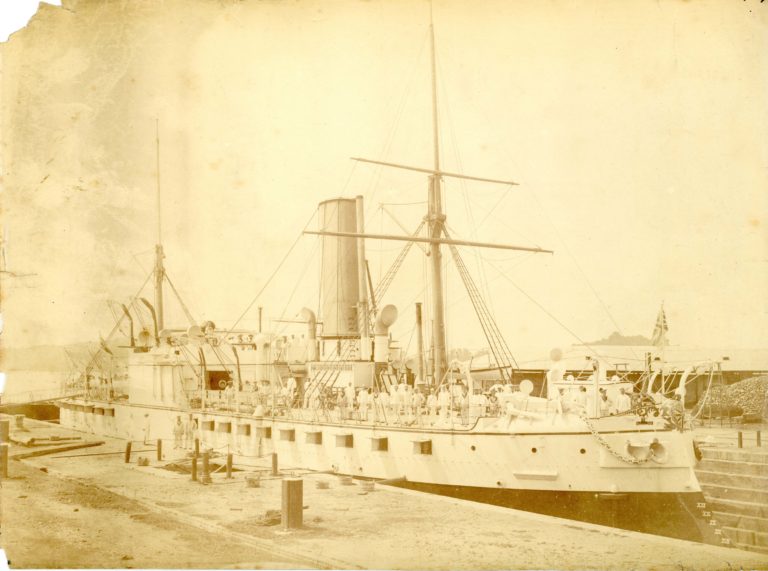
HMS Orion in dry dock, Hong Kong. Identified by Duncan Mirylees
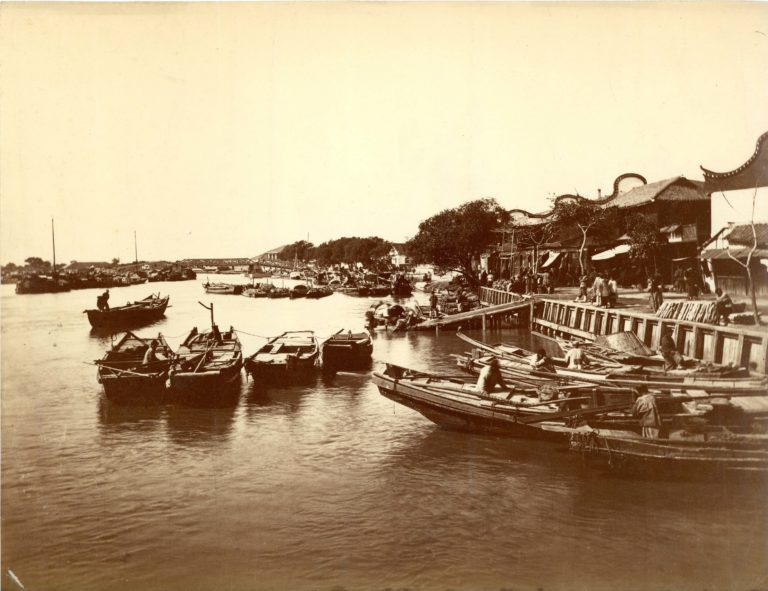
[Photo.22/(015)] Bund, Hankow
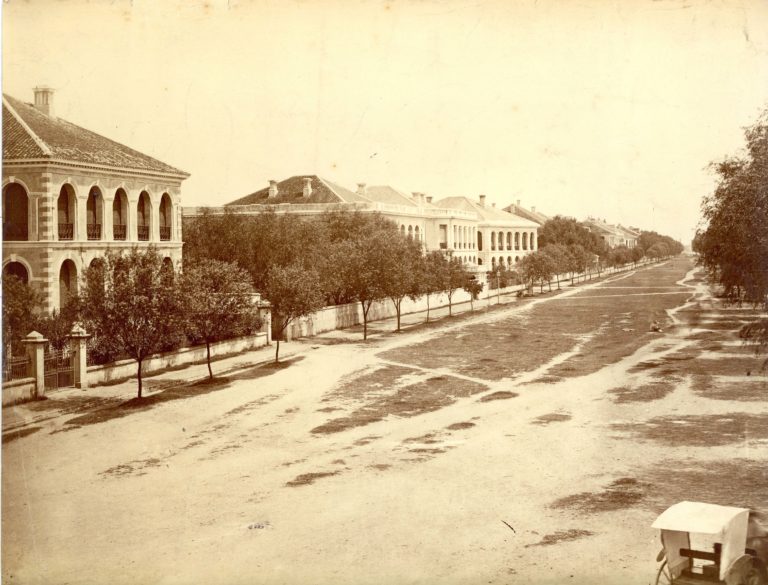
View looking along the street, lined with European mansions on the left.
[Photo.22/(017)] Tea plantation, Yang li Moon (above Hankow)
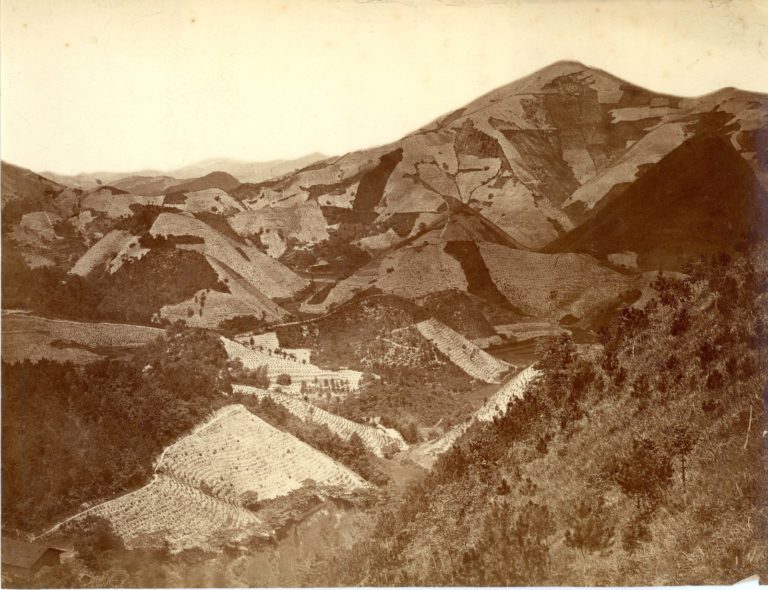
General view of land planted out with tea.
[Photo.22/(018)] Little Orphan Island, Yangtze River
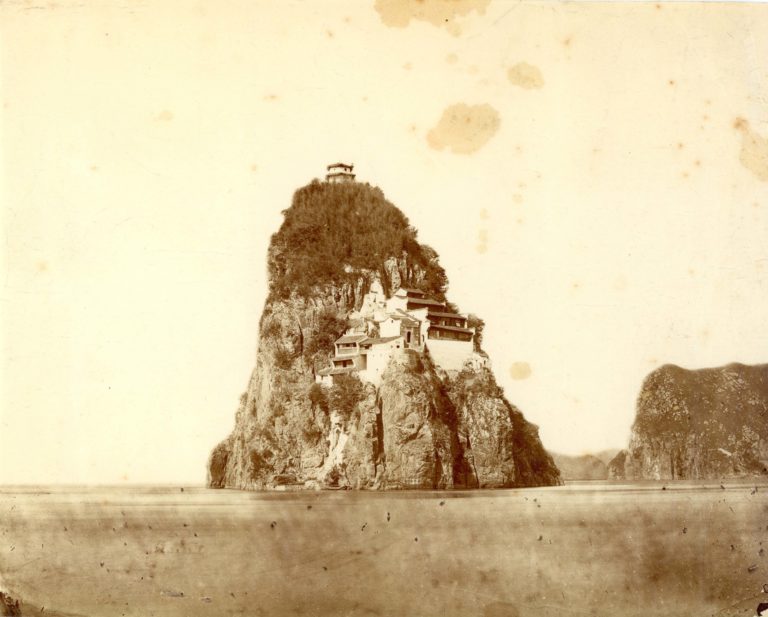
General view of the conical island, with a settlement of houses in the foreground.
[Photo.22/(019)] Chinese barbers at work in a courtyard
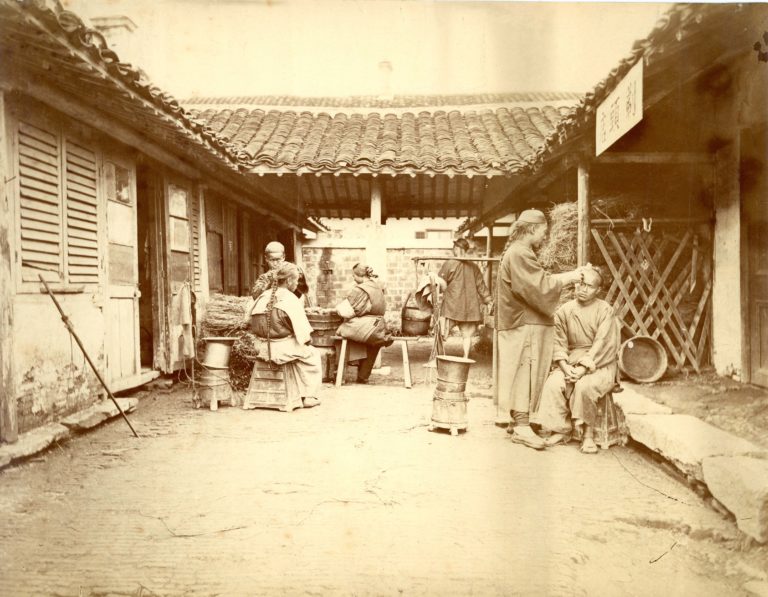
Photograph possibly taken by Milton M. Miller.
[Photo.22/(020)] Opium smokers
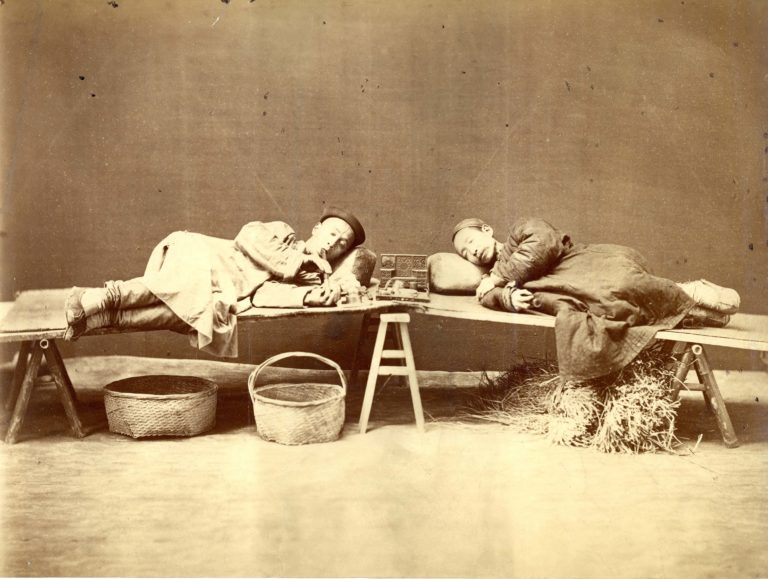
Studio portrait of two Chinese opium smokers, reclining on trestle beds with their pipes. Photograph possibly taken by Milton M….
[Photo.22/(021)] Labelling and packing brick tea
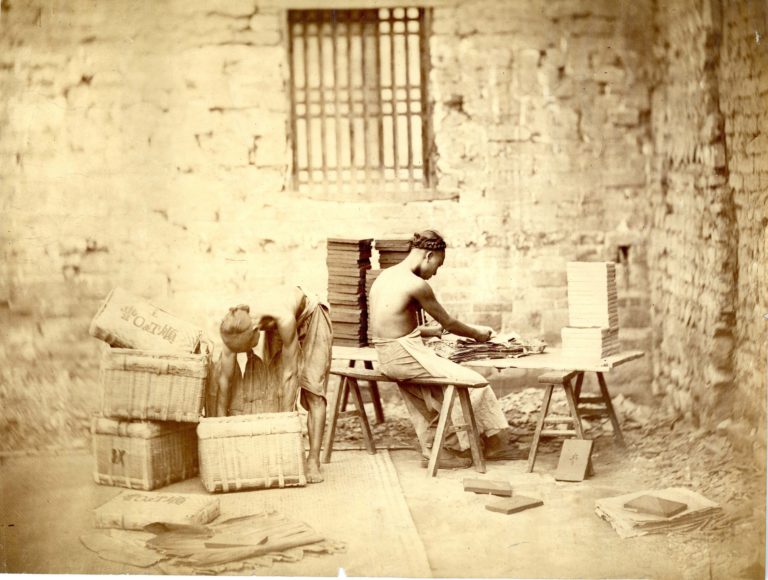
Two workers wrapping an packing tea. Photograph possibly taken by Milton M. Miller.
[Photo.22/(022)] Chinese family group
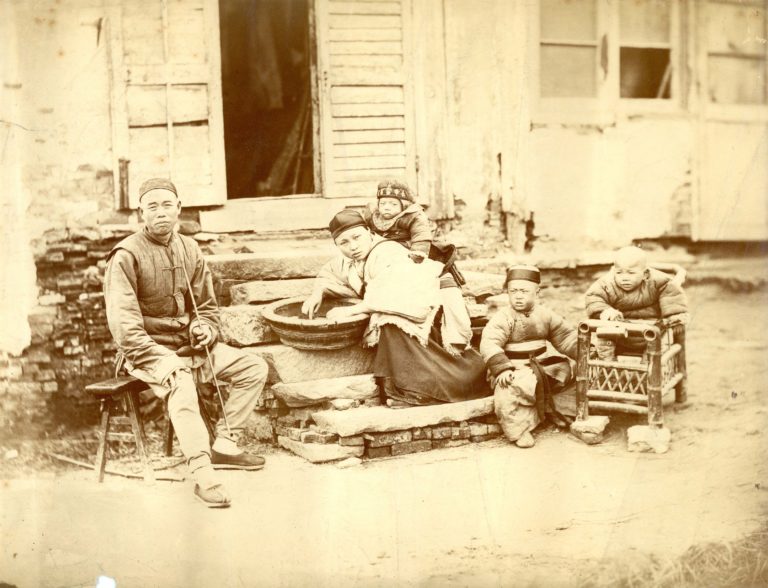
Family group posed in front of house. Photograph possibly taken by Milton M. Miller.
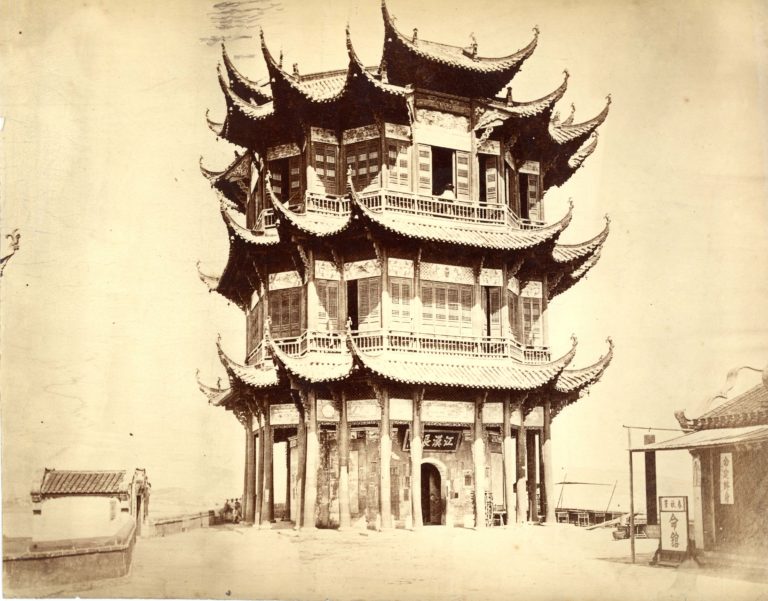
[Photo.22/(023)] Peking Observatory
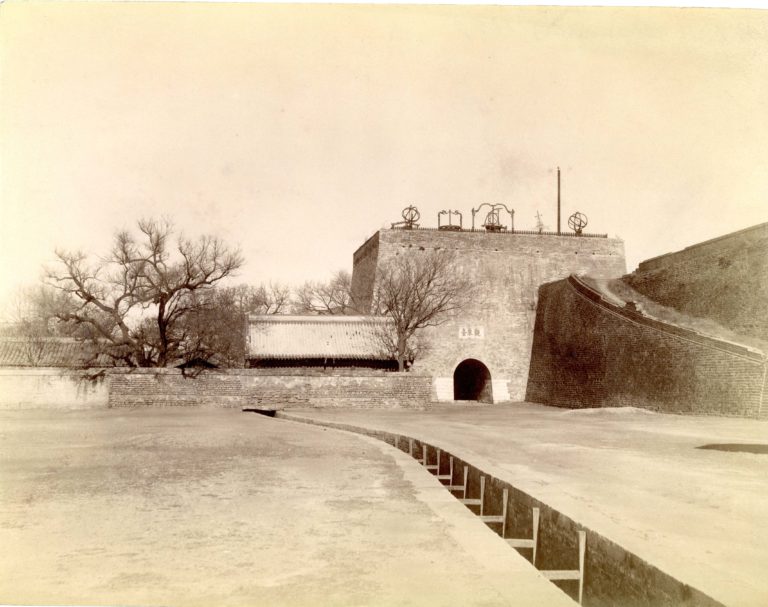
View looking towards the observatory, with astronomical instruments ranged along the top of the wall.
[Photo.22/(024)] Jesuit Observatory on wall of Peking
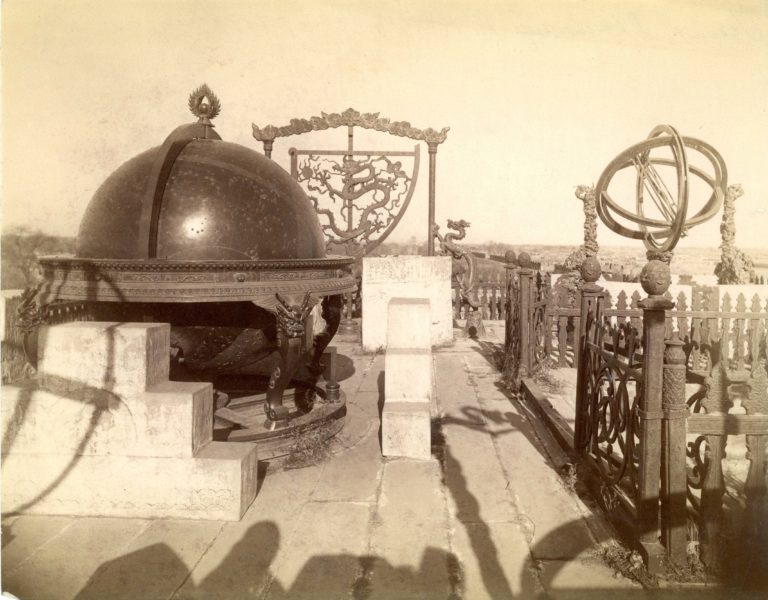
Close view of astronomical instruments in the observatory.
[Photo.22/(025)] View of the Whampoo River
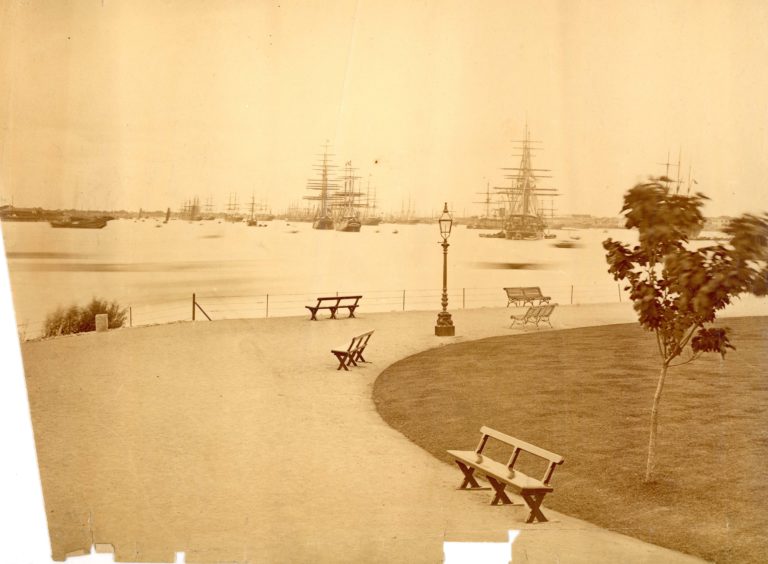
View of the Whampoo River, looking downstream, taken from the public garden in Shanghai. ‘American’ settlement appears on the left….